How to do on-demand processing
Access processing service panel
In the ESA Charter Mapper on-demand processors can be found by opening the Processing services panel located in the right of the interface.
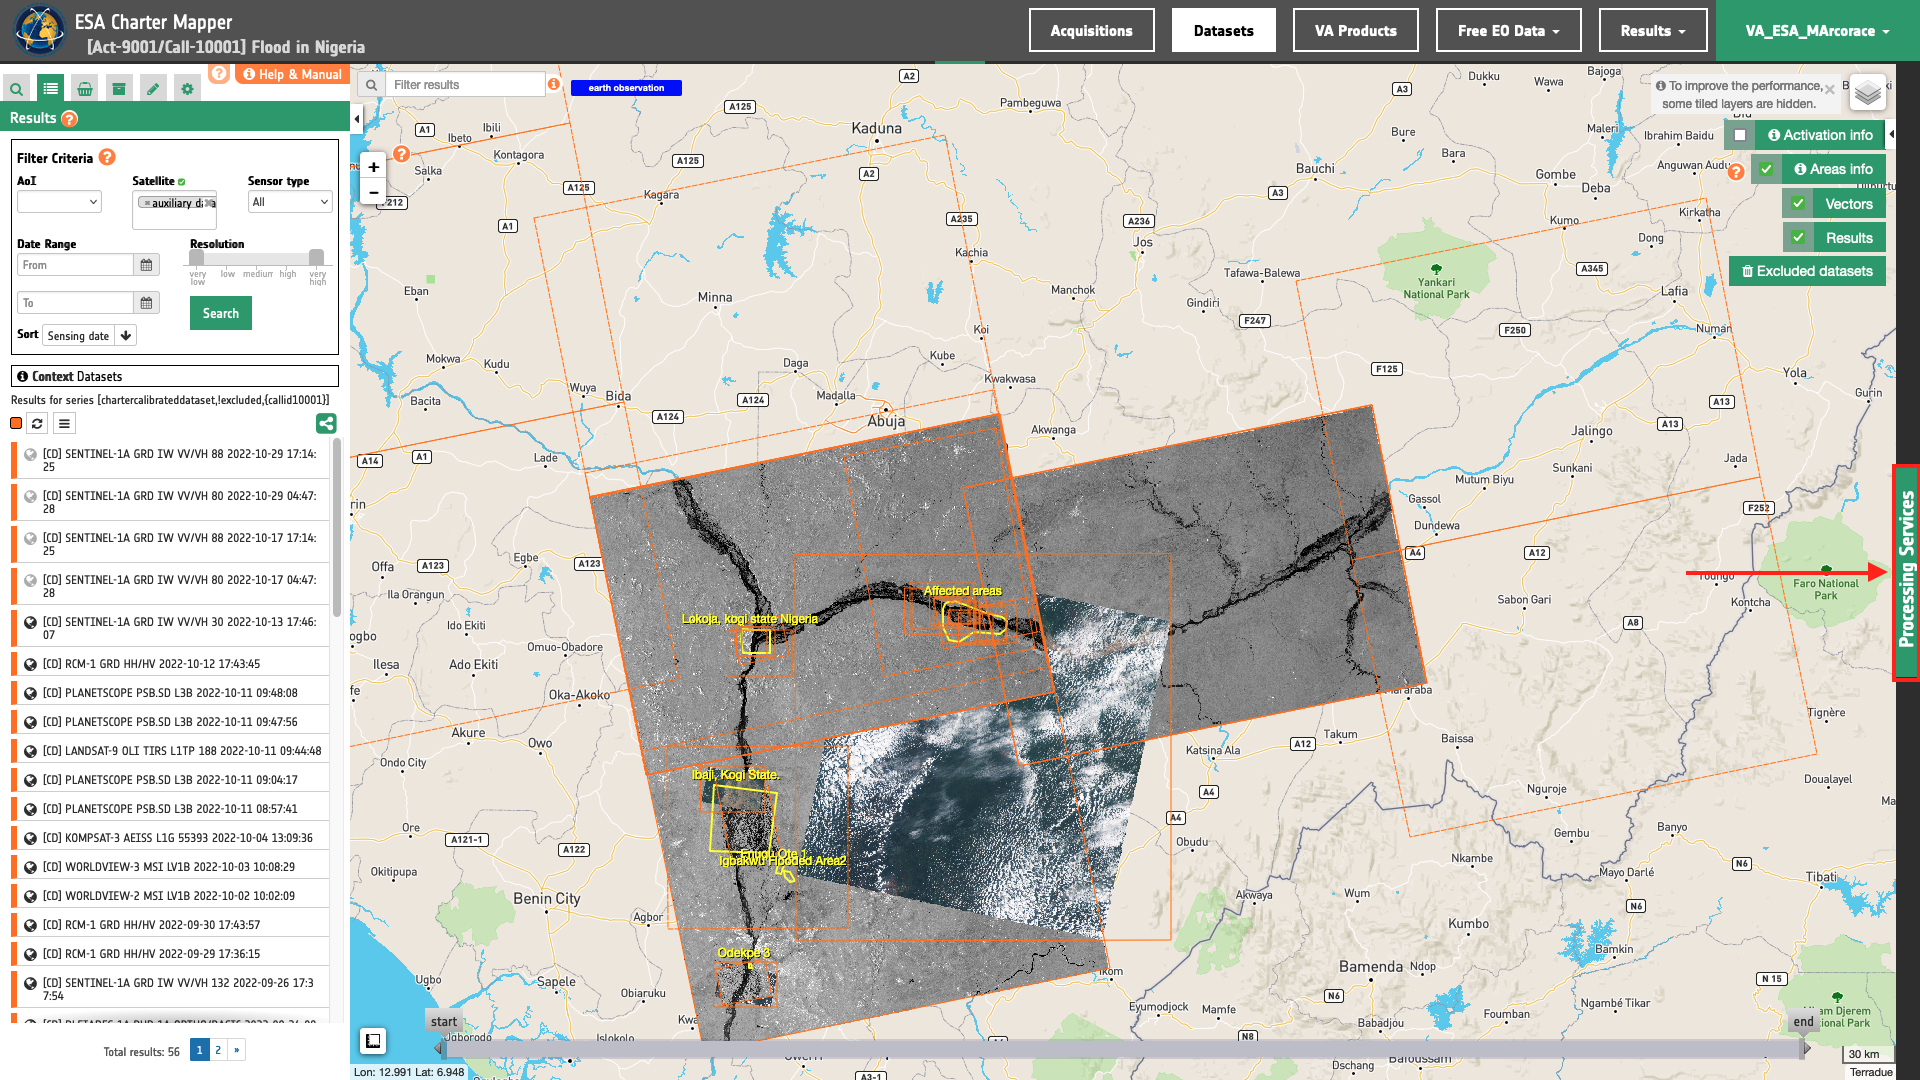
The Services tab contains the list of available Processing Services which can be quickly filtered by tags.
Note
Find more information about the service tag filter here.
The Jobs tab contains the list of the jobs submitted by the users.
Hint
More information about the Services and Jobs tabs of the processing services panel can be found here.
More details about each of the physical meaning or visual products of the ESA Charter Mapper can be found in the specifications of each service.
How to submit an on-demand job
Once you identified the on-demand processor to use, click on the service icon to access the Service details. This view includes a description of the selected service (title, version, caption), followed by a form of all the input parameters to be filled-in.
Fill the parameters and run the job
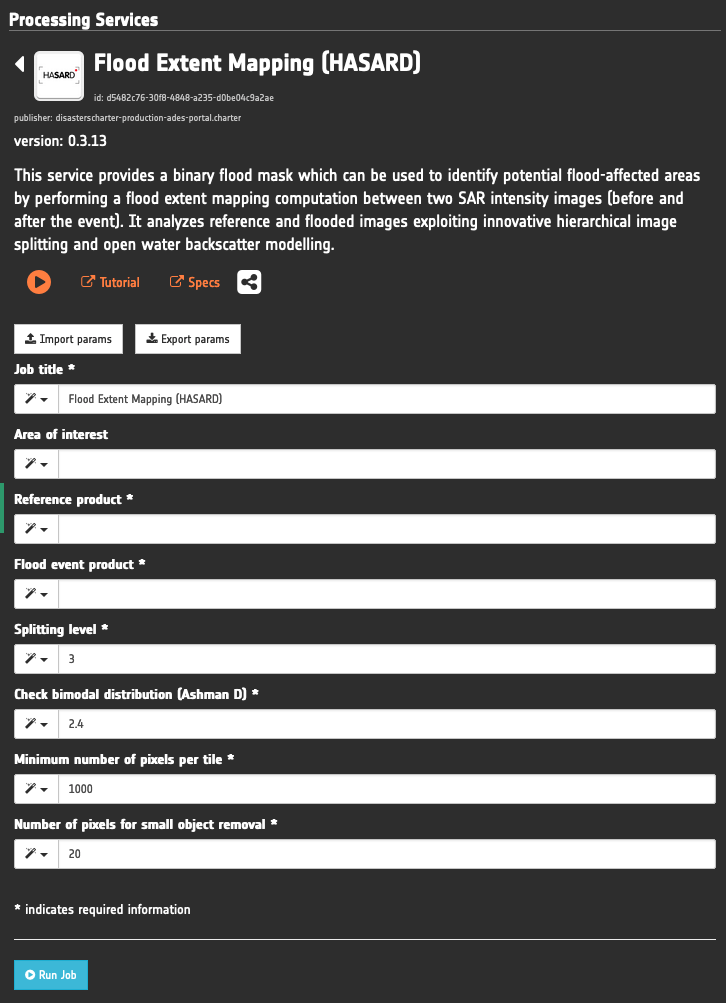
Users can fill the form manually, by feature dragging (if available for the input) or by the geobrowser clipboard. Is also possible to import and export parameters set in a json format.
Note
Find more information about the drag and drop of features here.
Once all mandatory fields have been correctly inserted, the user can submit the job by clicking on the button Run Job located in the bottom of the service details tab.
Note
A description of the tools or functions that can be employed in the Service details can be found here.
Checking for job duplicates
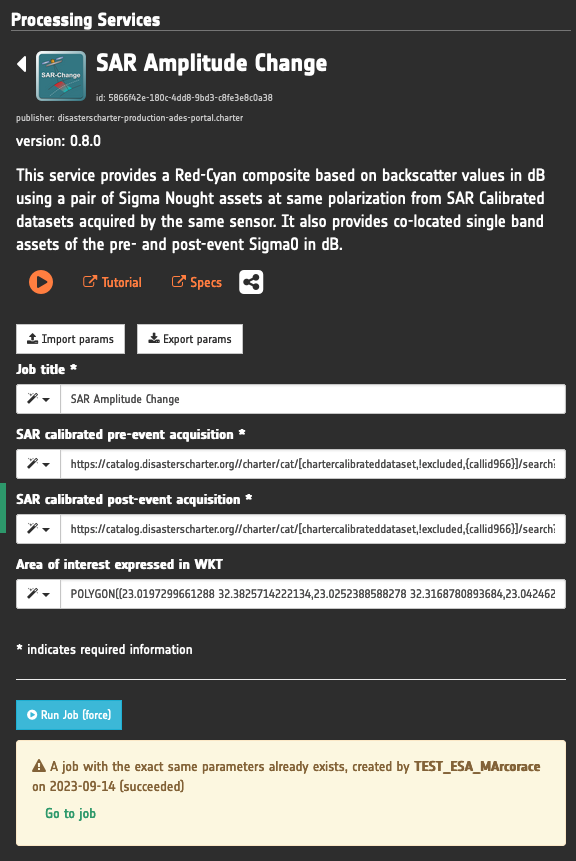
After the click on Run Job the platform firstly checks if a job with exactly the same params already exists. This is made by looking at the jobs of the user or the ones shared by the others. In this step the message in the Run Job button changes to Checking for job duplicates... If one or more duplicates are found a warning will appear under the button. This check is required to avoid duplicates of the same job. In case a job with the very same parameters must be re-submitted the user can click on the Button Run Job (force) and trigger the processing again.
Validation of input parameters
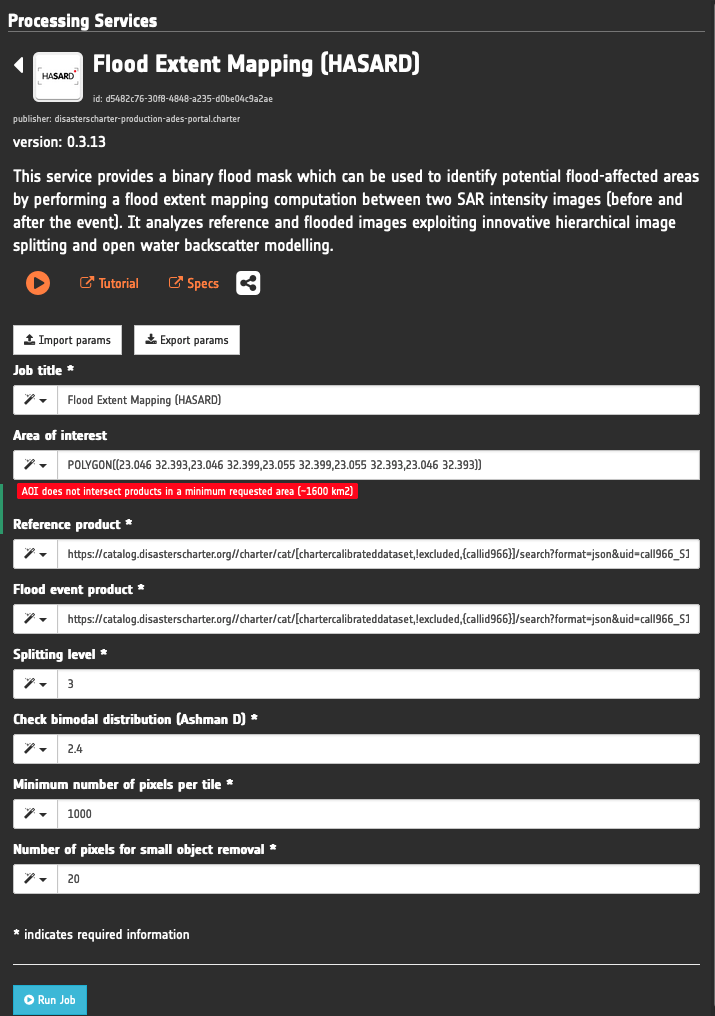
After the check for job duplicates, the system validates the parameters inserted by the user with an assertion. At this stage the message in the Run Job button turns to Validating the job... In case of error the assertion will provide a warning explaining why a parameter is not correctly defined.
Monitor the running job
After the job submission, it is possible to monitor job progress through the progress bar. Running jobs have Running as status the running percentage status can seen in the Job Details as well as in Jobs tab.
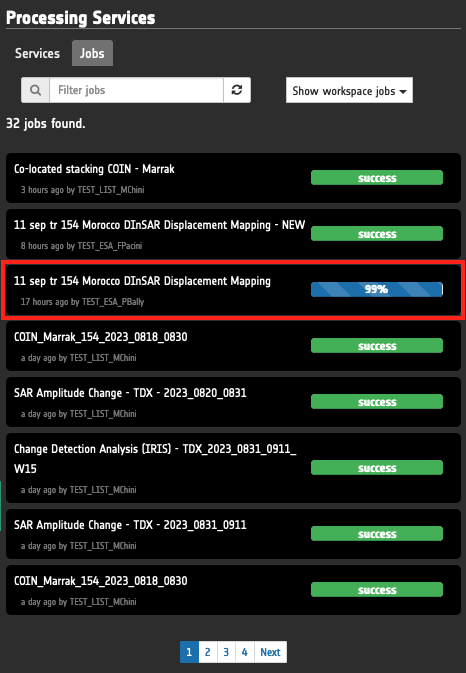
The progress bar will evolve as following:
-
0%processing not started yet, -
50%processing is running, -
99%the processing is accomplished but the result still needs to be published.
Edit job name
Users can edit the default name of a job by clicking on the pencil icon next. Adding a different name to the job could help to easily retrieve a particular job when searching for multiple results made with the same processor or similar params.
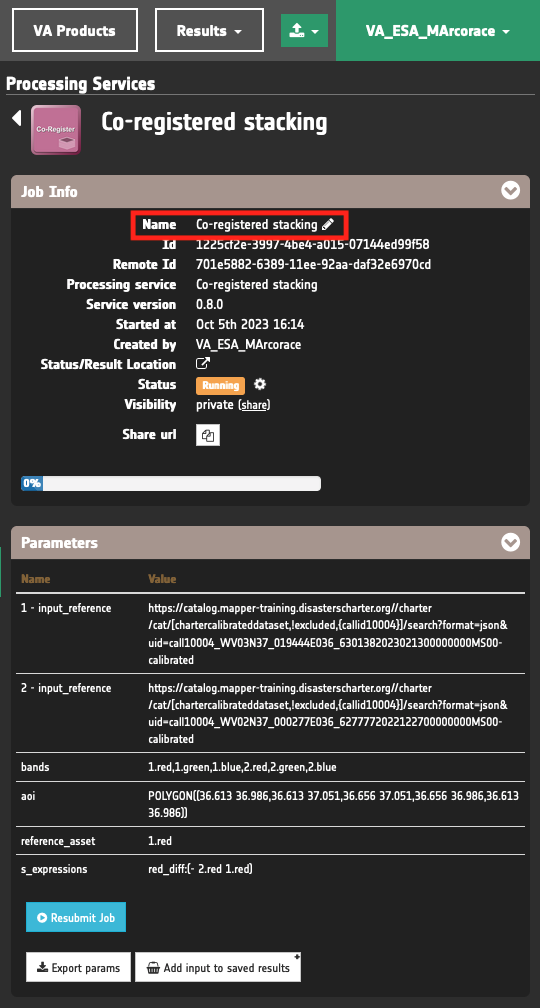
The editing of a job name is possible ONLY when the job is running.
Warning
Once a job is completed it is not anymore possible to edit the name of a job.
Job publication
The publication of the result from an on-demand processor is triggered immediately when the user checks the job status.
Warning
The publication of a result from a job is not automatically triggered when the user is not connected because it needs a valid user session token. Thus, the job status will remain at 99% until the user does not check the job status once back into the workspace.
Once the job is accomplished the status will change from Running to Success or Failed.
How to find the result
The final status of the job can be either Success or Failed. If successful the user can access the result in the workspace, show output single band or overview assets in the map, and download the needed single band or overview assets for visualization and further processing outside the platform.
After the successful run of an on-demand job, users can access the job result by clicking on the Show results or Show input and results buttons located in the bottom of the service details.

Show results
Users can visualize the result in the map by clicking on the Show results button located in the bottom of the service details.
When clicking on Show results one or more features will appear in the left panel under the Results tab representing the output of the job.

For each selected feature the geobrowser will show the default asset in the map. This default asset is usually an overview derived from one or more single band assets generated by the service.
Hint
Employ the Show Result button to quickly visualize the result in the map.
Link input Dataset to job result
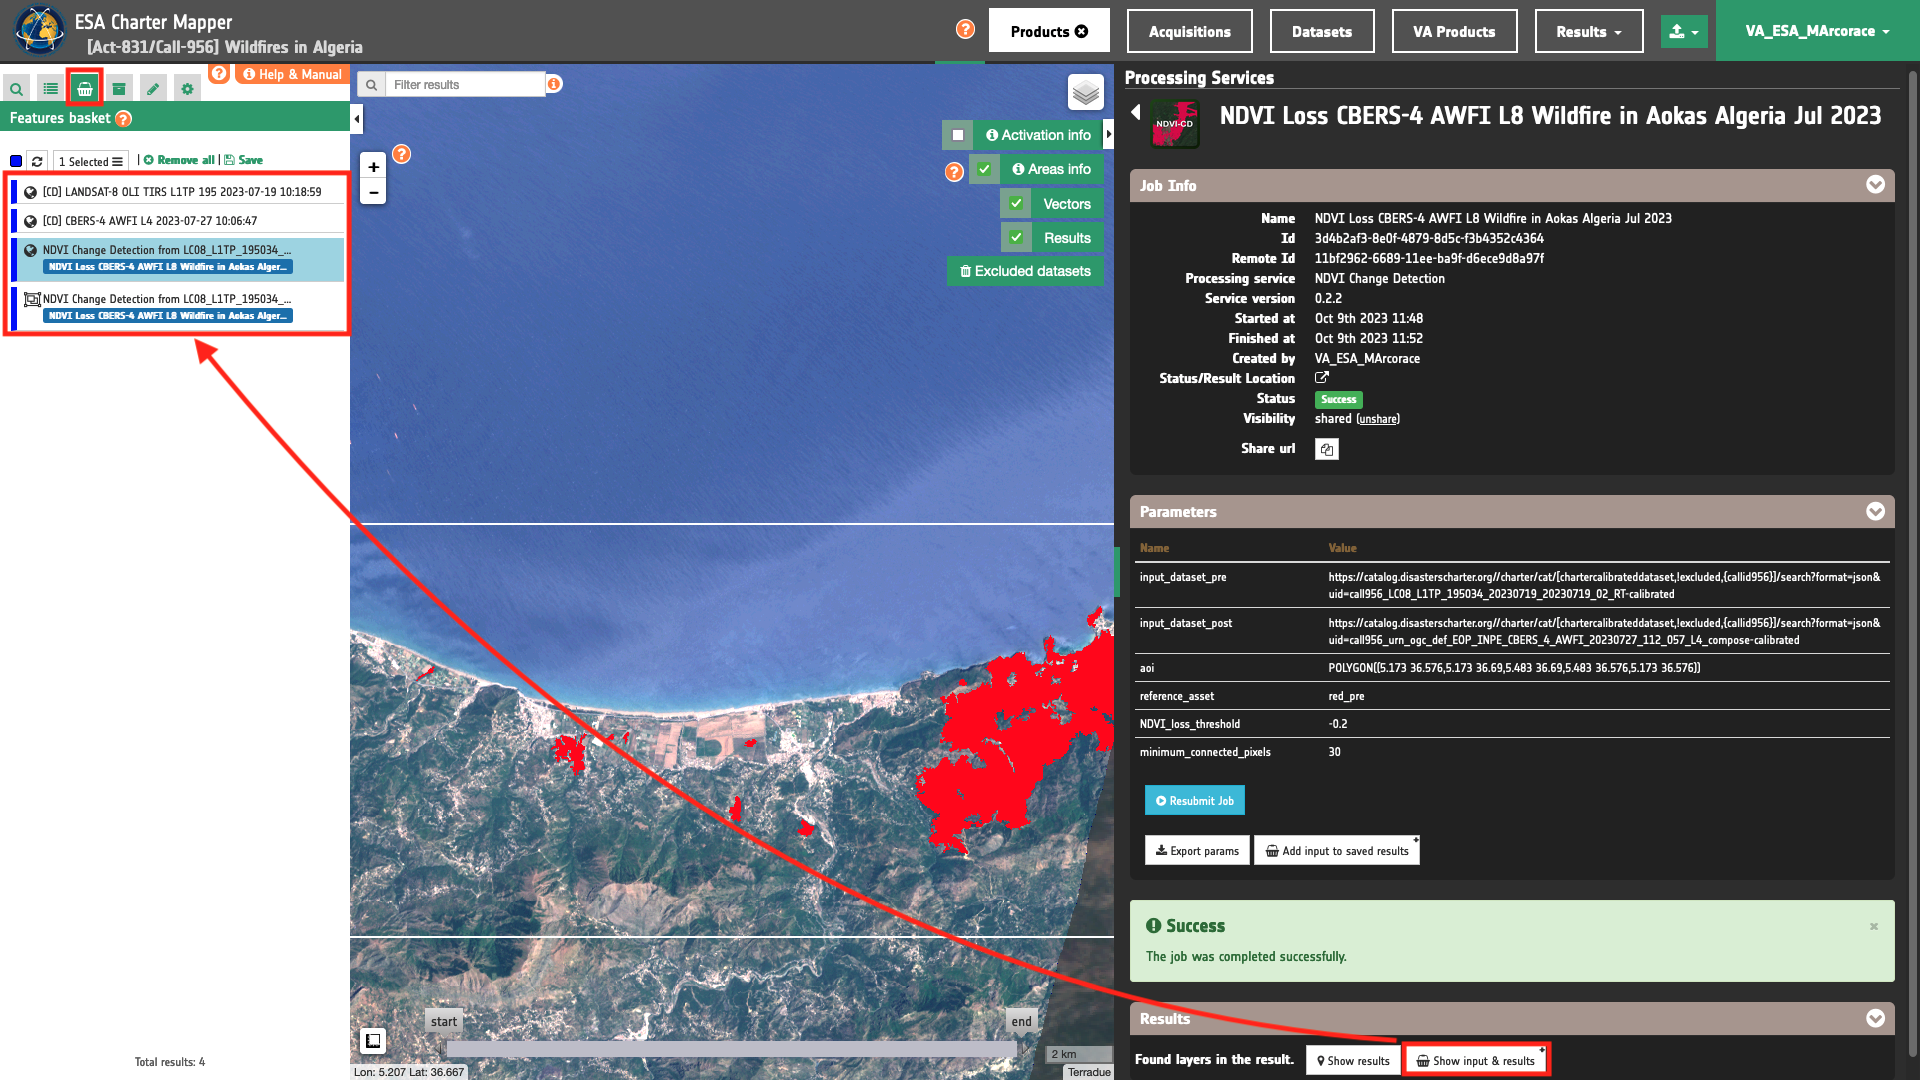
When evaluating a product derived from on demand processing, it is often useful to retrieve input data. From the job details available in the job results panel, a dedicated button Show Input and Results next to the Show Result one, is available for this scope. The Show input and results button allows users to quickly add in the Feature Basket the job input Datasets and the generated results.
When clicking on the Show input and results a list of features will appear in the left panel under the Features Basket tab, representing both input and output of the job.
Hint
Employ the Show input and results button to compare the result with the input.
The Show Input and Results button is meant to let users analyse input images together with the service output. The Feature Basket is used because it is the area in the platform designed to allow handling in the same place items of different nature.
Hint
Find more information about the features basket here.
Job name under the result feature title
Under the feature titles of results from on-demand processing include an information tag with the name that the user has assigned to the job.
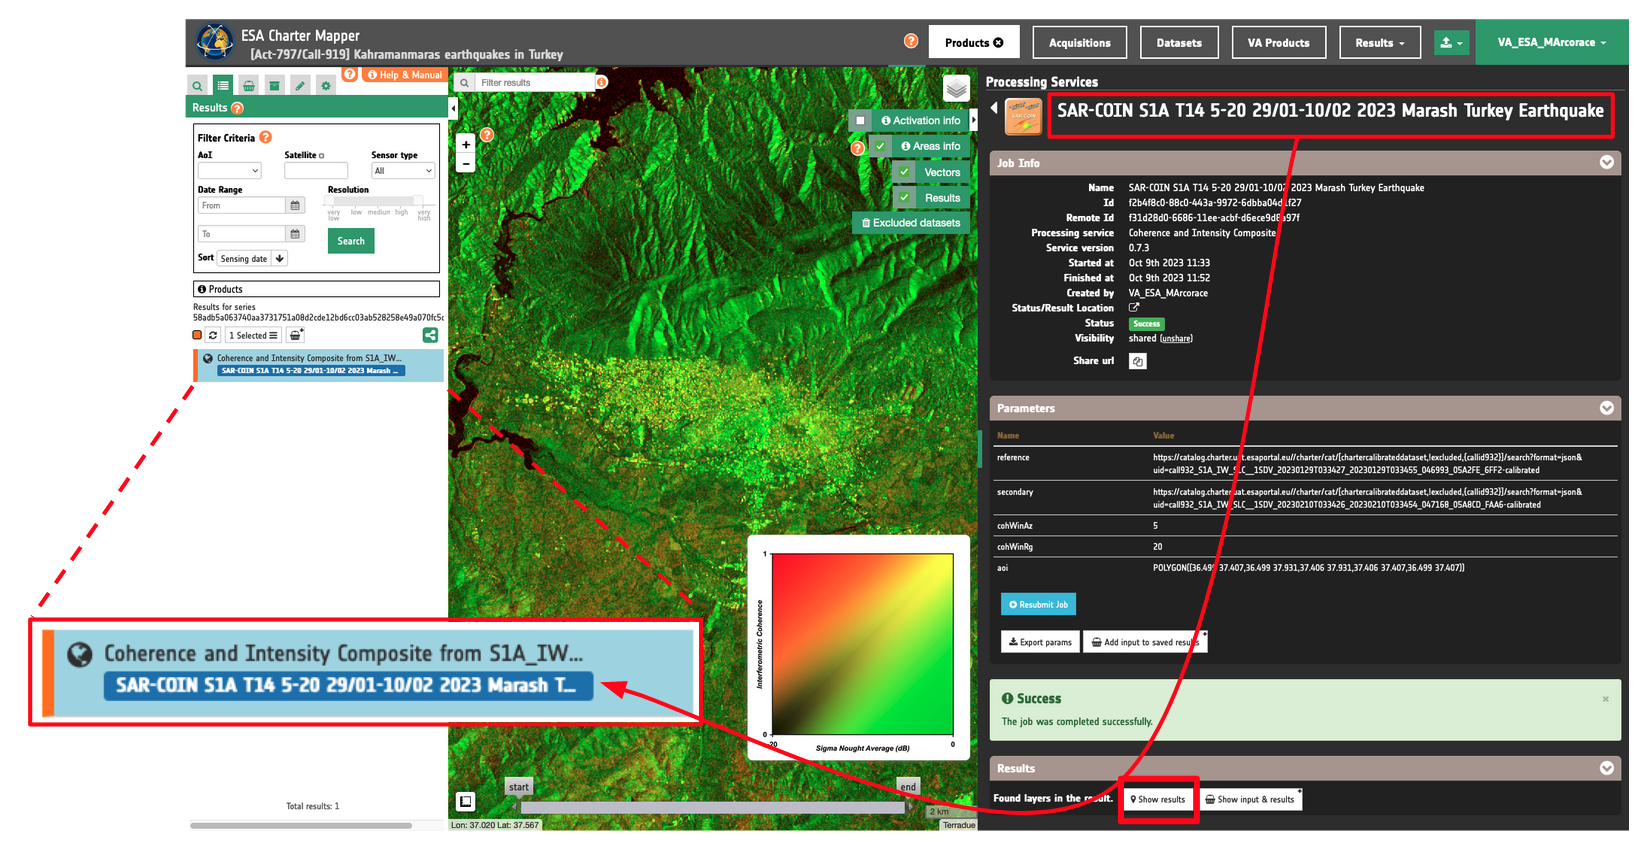
This is particularly useful to quickly retrieve a job of interest when searching under the Results panel the features from the Results data context.
Change job visibility
By default the visibility of the job is set to Private which means that the job is visible only to the owner of the job.

When needed the job can be shared with other users. This is possible by clicking on the (share) button. After that the visibility of the job will change to Shared. Once shared the job is visible to the other users that have access to the activation workspace.

Note
It is also possible to change the visibility of a Shared job to Private by clicking on the (unshare) button.
Delete a job
If needed the user can delete a failed or successful job by clicking on the x icon located in the upper left corner of a job feature in the list.
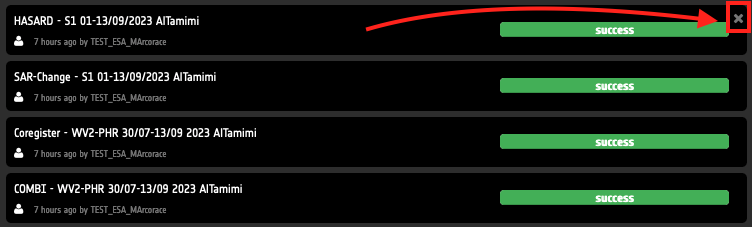
Warning
It is not possible to delete or kill a running job. Only jobs having status as Success or Failed can be deleted from the list.
Contact the support in case of failure
In case of failure of a job the user can contact the support team by clicking on the Contact Support button.
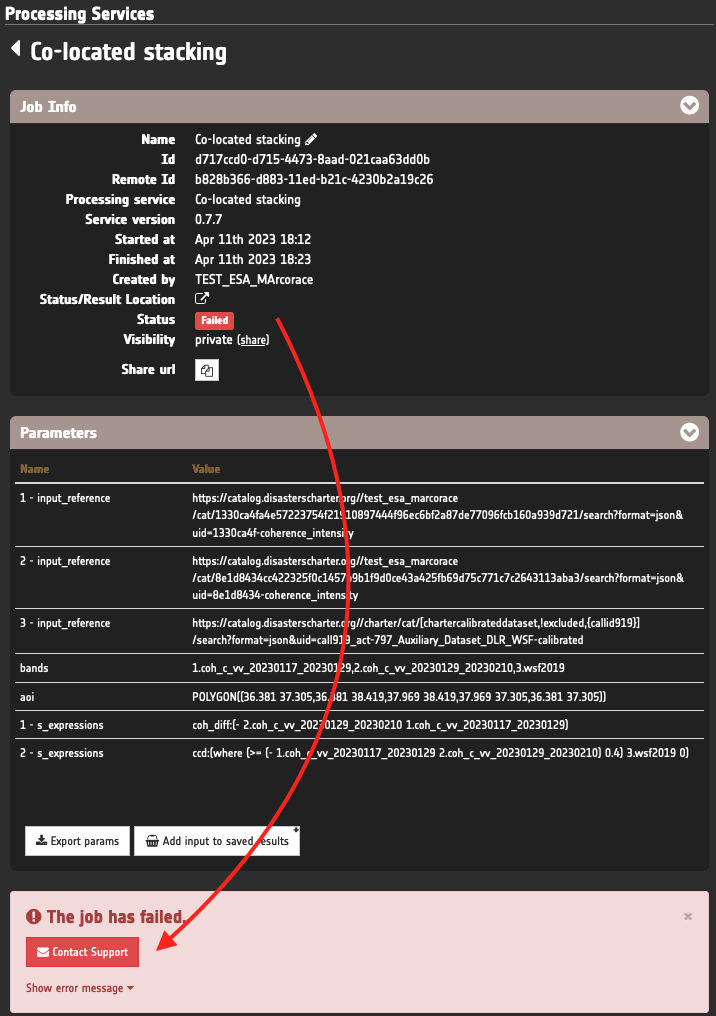
A popup with a pre-filled form providing essential information about the job will appear. The user must insert the email address where he/she wants to receive the ticket updates. The user can also edit the subject and the body of the message before sending it to the help-desk.

For any other issues in the usage of the processing services of ESA Charter Mapper please send an e-mail to: helpdesk@disasterscharter.org
08:00 to 16:00 UTC
07:00 to 15:00 UTC (end March - end October, daylight saving time period)
and (outside above hours and days) also to: cos_support@disasterscharter.org