IRIS Co-register tutorial
![]()
This service performs a multi-sensor co-registration of two optical calibrated single band assets employing a full field displacement measurement based on the Dense Inverse Search (DIS) method for Optical Flow. Output of the service are two single band rasters from the reference asset and the co-registered secondary one.
IRIS Co-Register service description and specifications are available in this section.
Select the processing service
After the opening of the activation workspace, in the right panel of the interface, open the Processing Services tab.
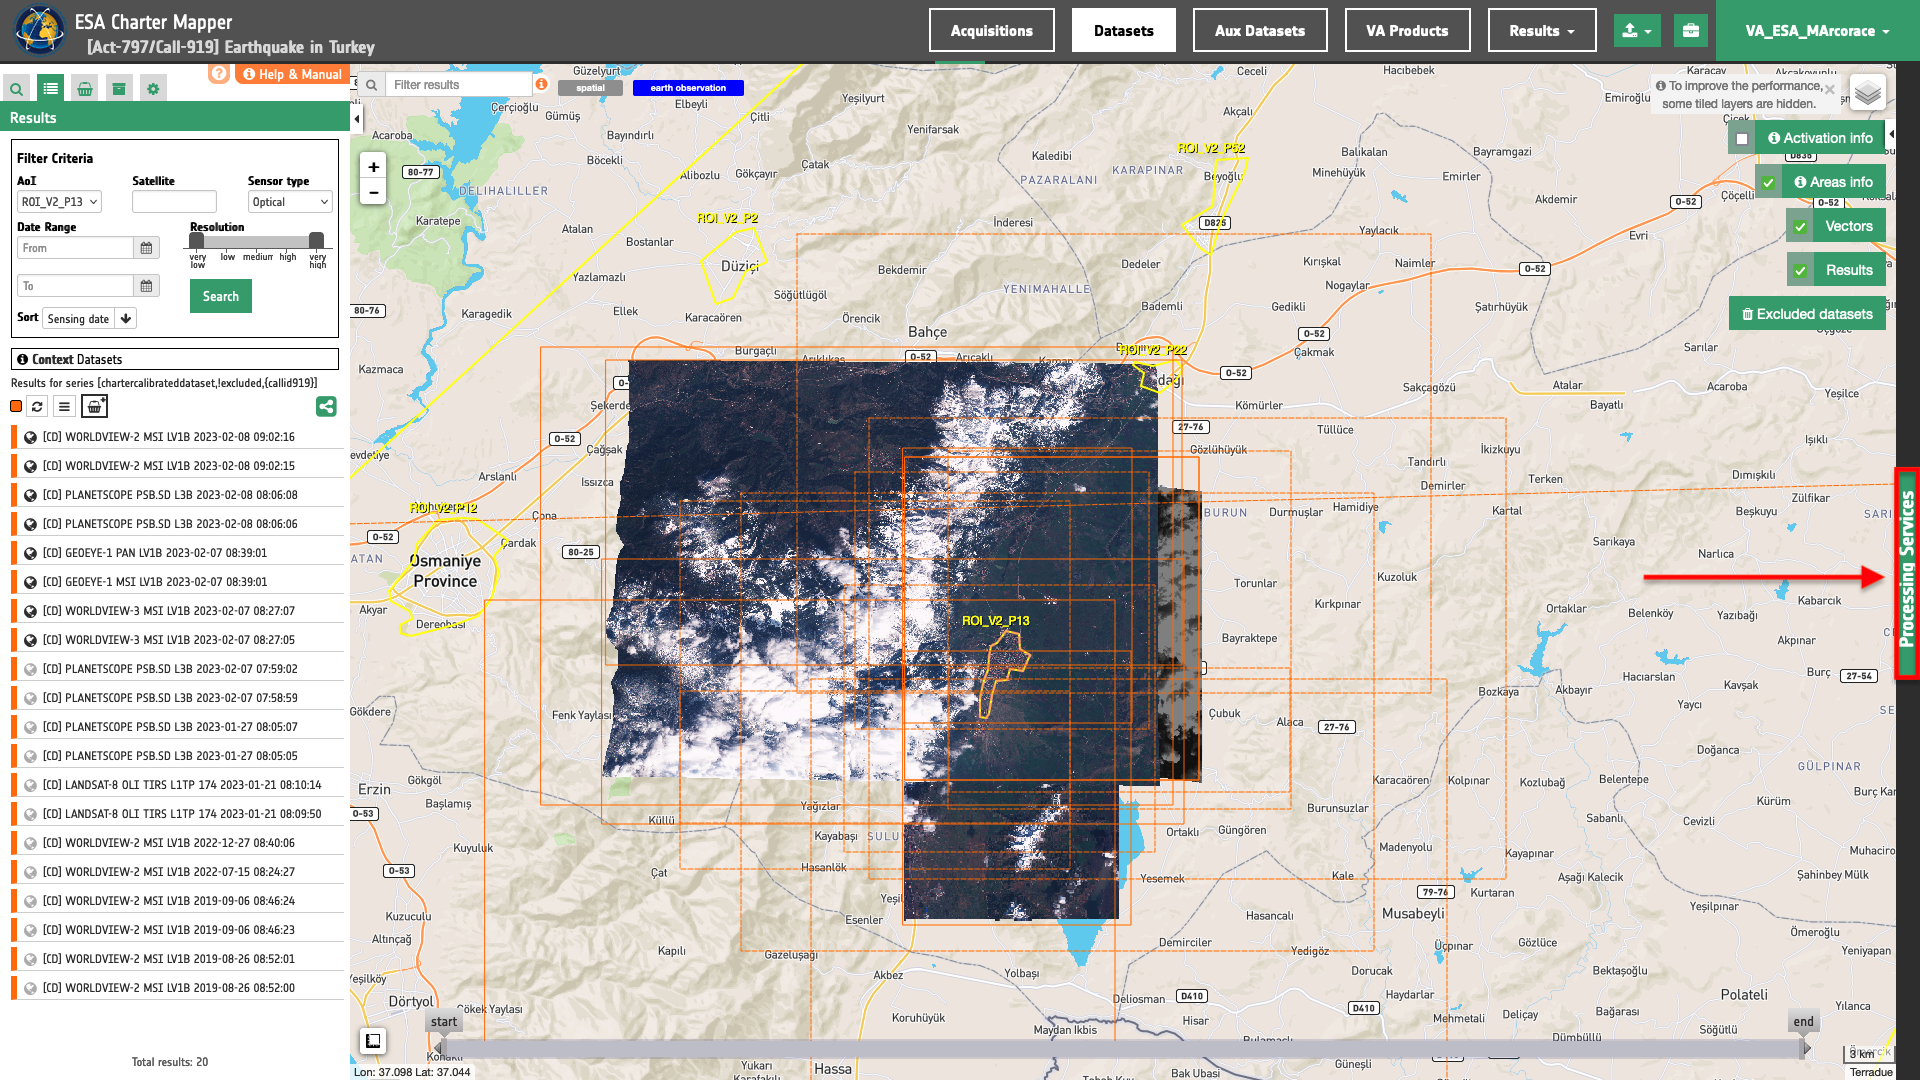
Select the processing service IRIS Optical Image Co-registration (IRIS Co-Register).
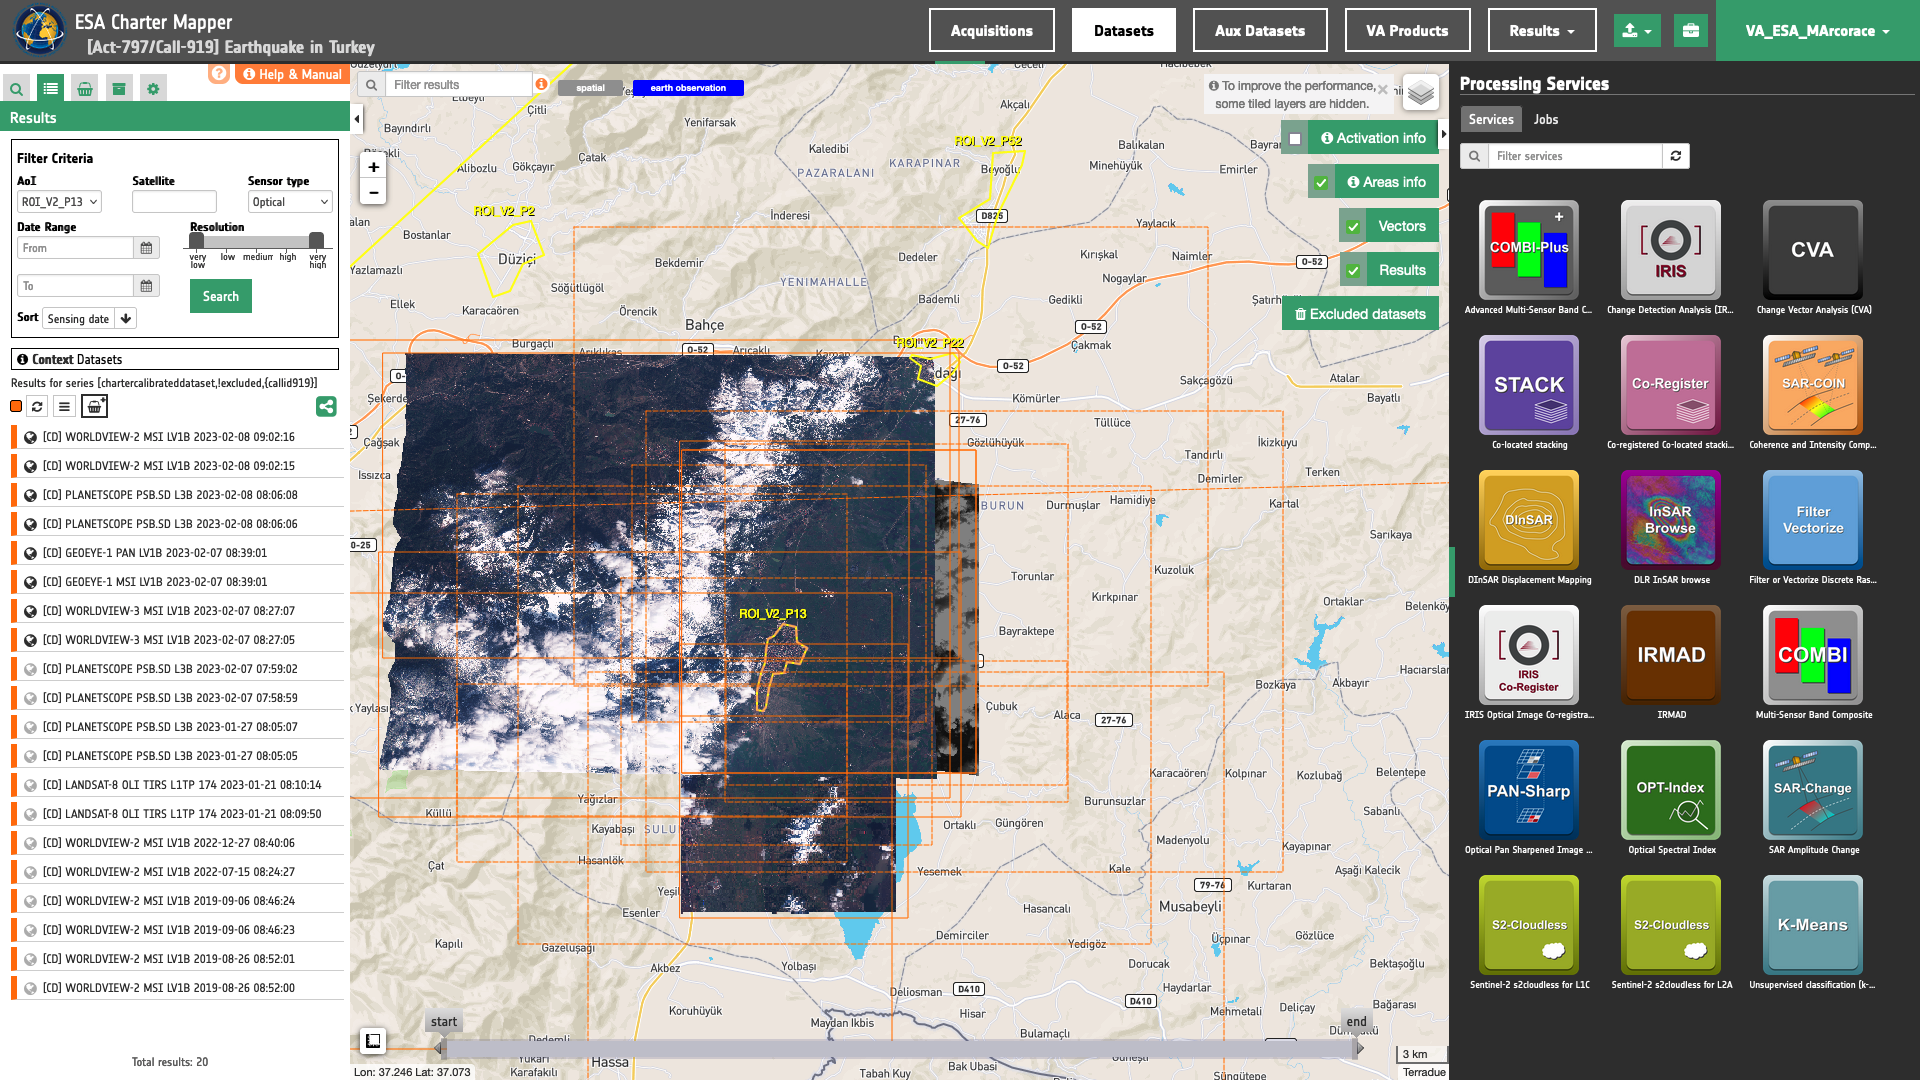
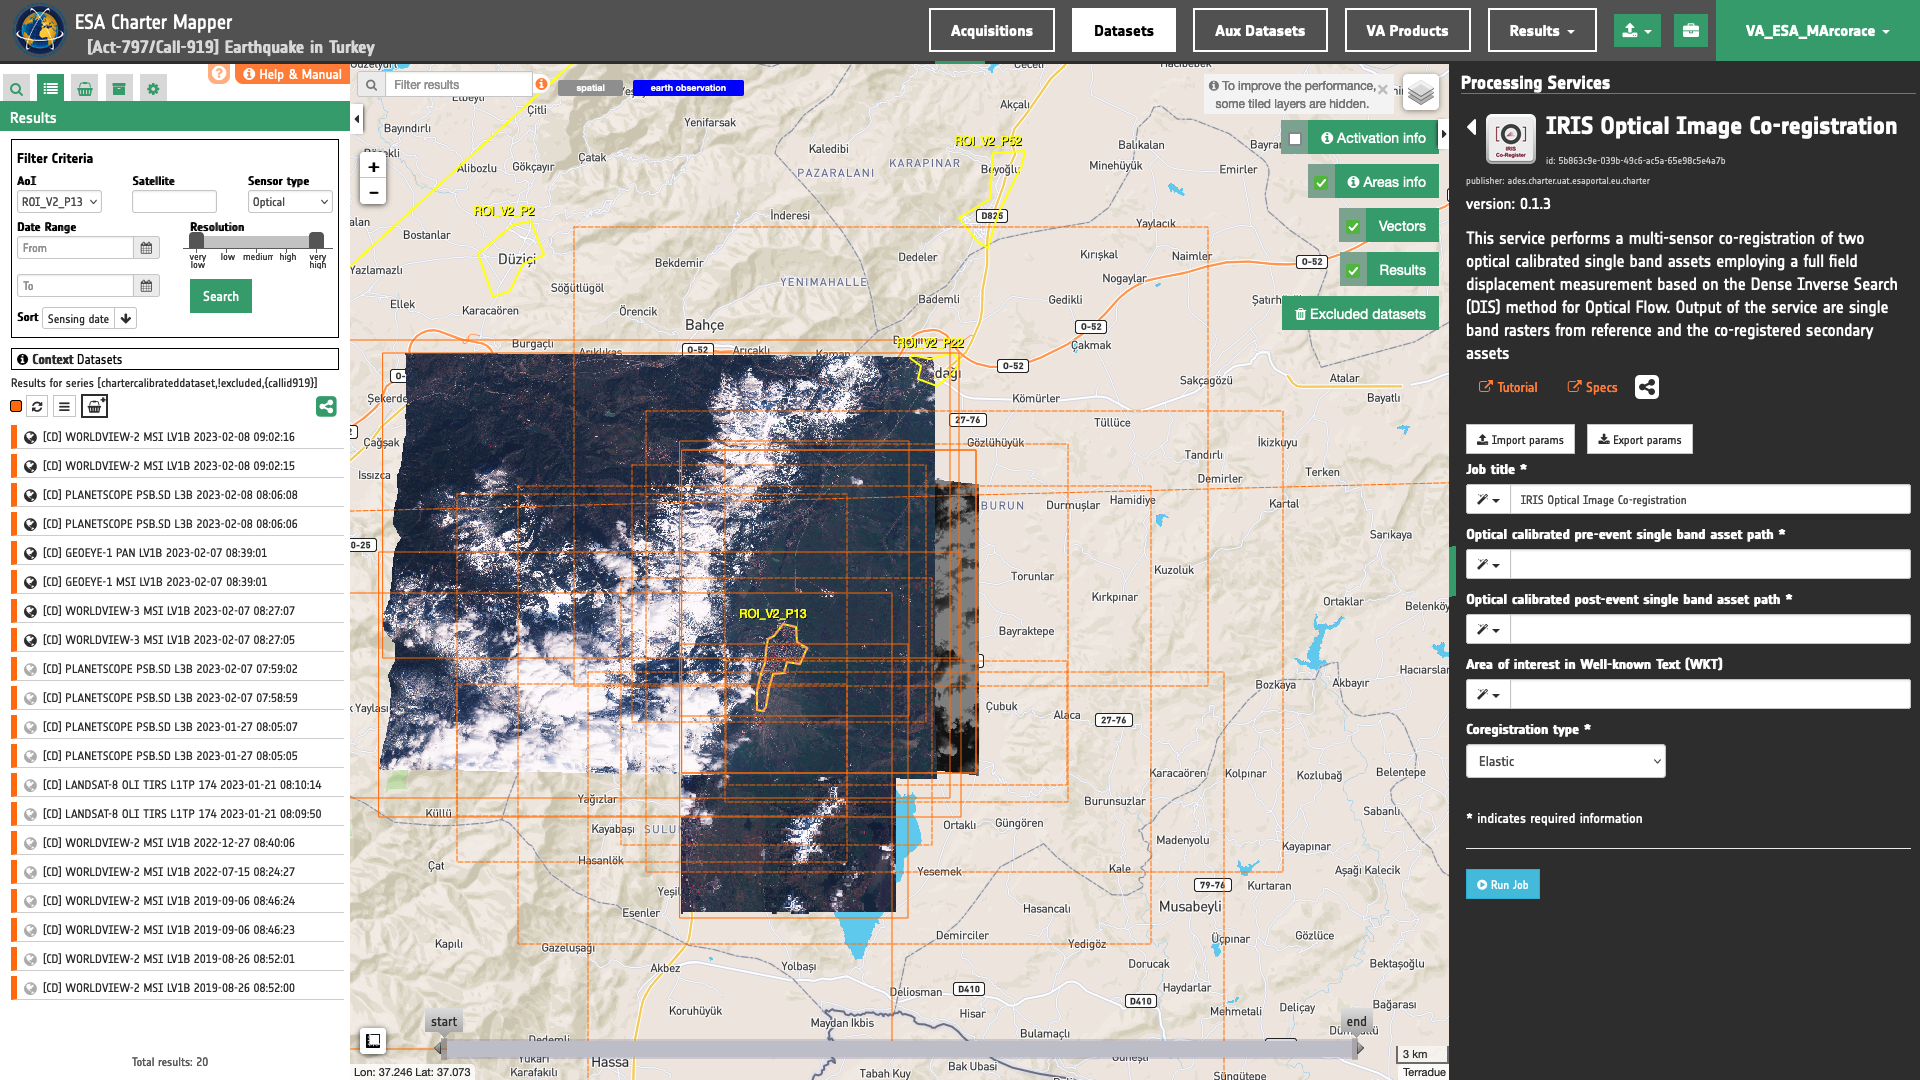
The IRIS Optical Image Co-registration (IRIS Co-Register) panel is displayed with parameters values to be filled-in.
Find the data using multiple filter criteria
Select the area for which you want to do an analysis (e.g. post-earthquake damage assessment), e.g over Gaziantep Province in southeastern Turkey. From the Navigation and Search toolbar (located in the upper left side of the map), click on the Spatial Filter and draw a square AOI over the Islahiye town, Gaziantep Province in southeastern Turkey. This spatial filter allows you to select only the EO data acquired over this area.
Now it is possible to choose a pair of pre- and post-event reflectance images from Optical Calibrated Datasets to be used for the change detection analysis. This pair must come from the same sensor.
From the top of the left panel, use Filter Criteria to search for Optical data collections from the list. Employ as satellite filter worldview-2 and worldview-3. Set as a temporal filter the time range from 01/12/2022 to 07/02/2023.
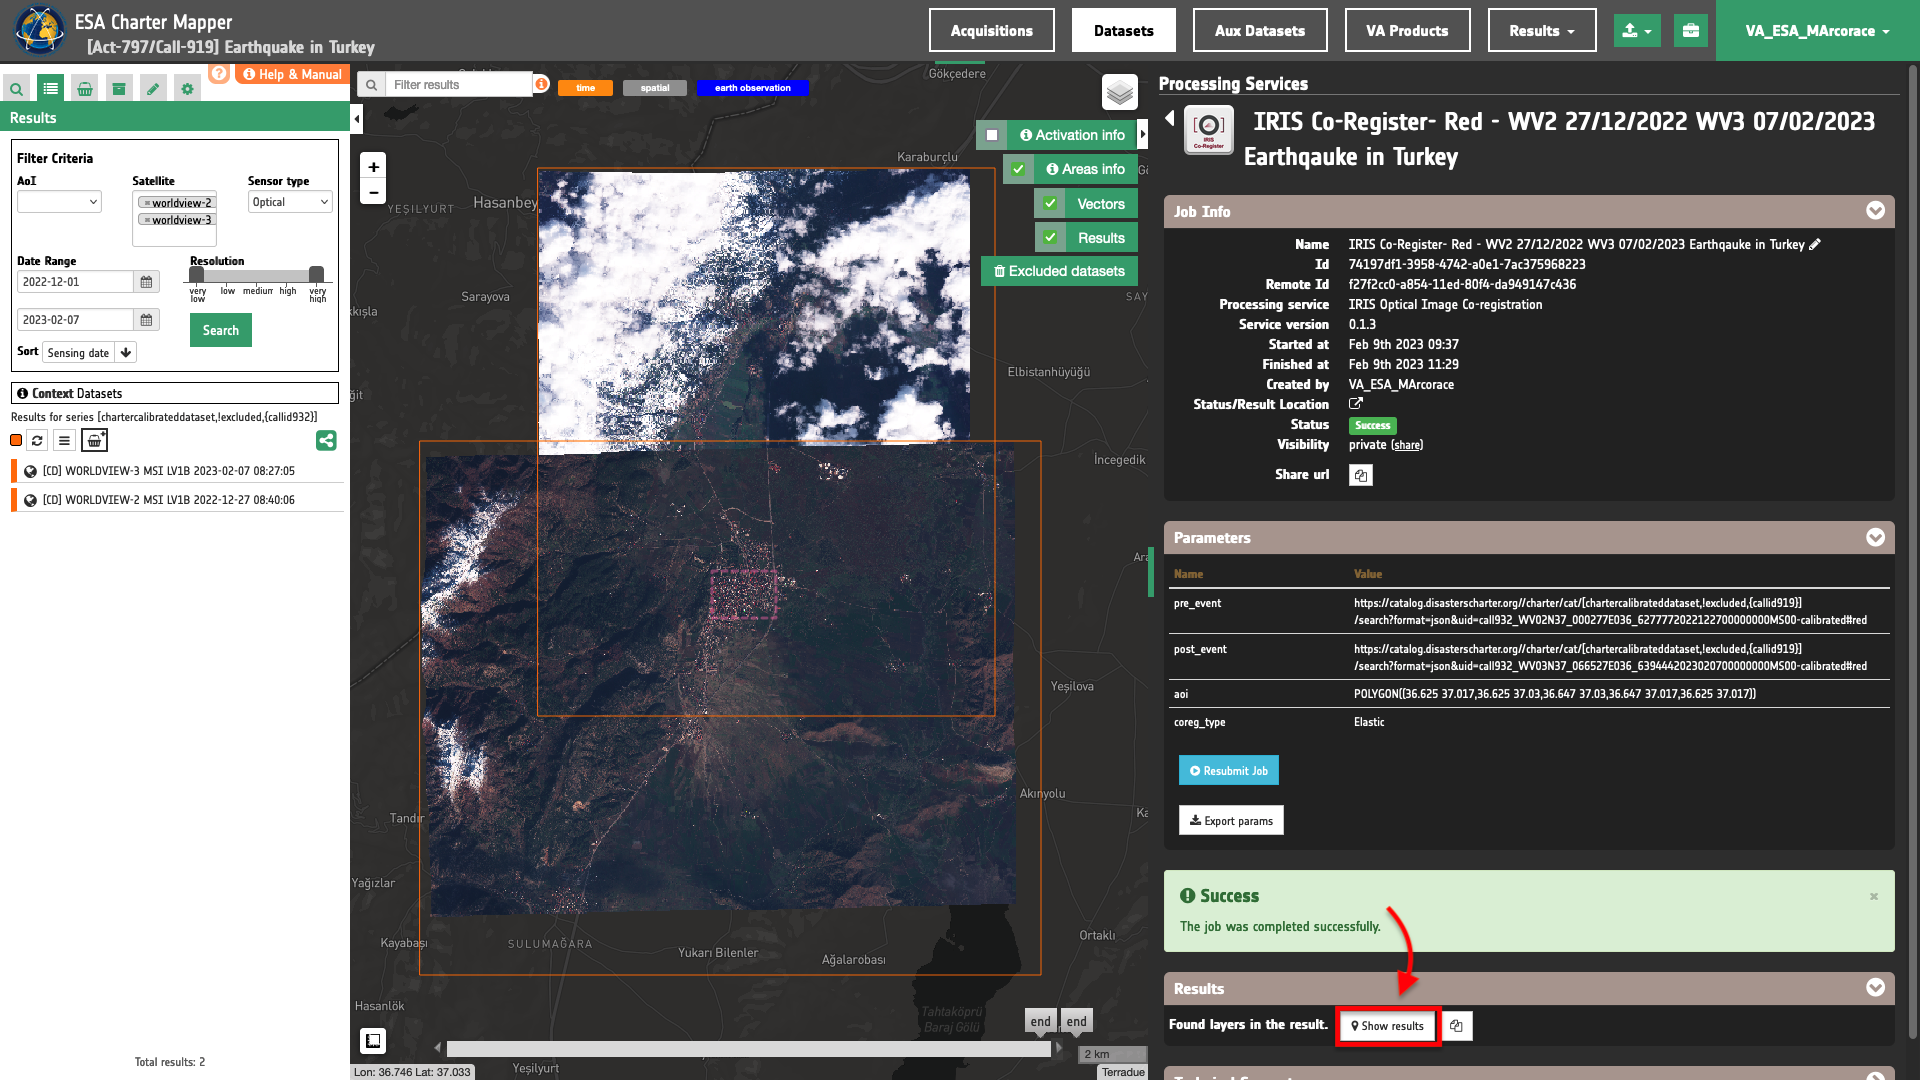
After the query the list will be updated as the one shown in the next image.
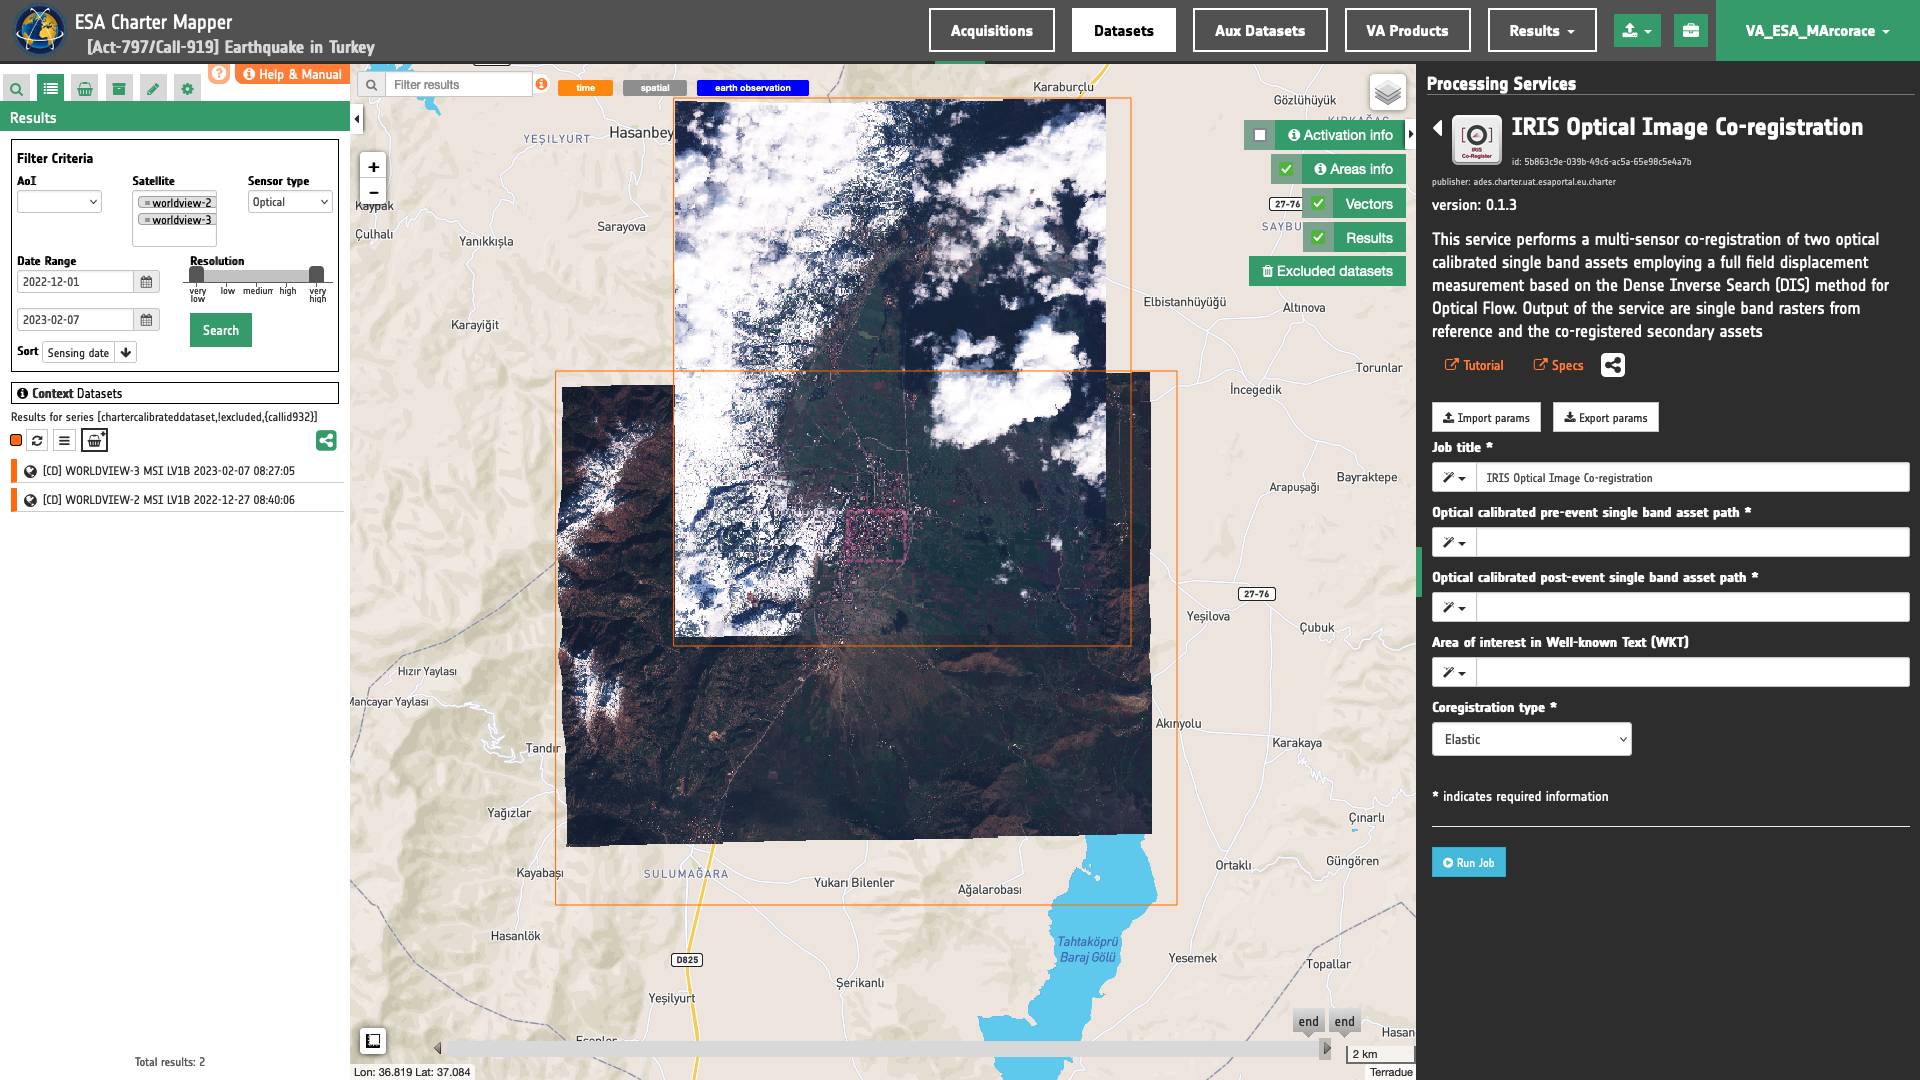
In this example the selected pair of calibrated datasets are:
-
Reference calibrated dataset (before earthquake): [CD] WORLDVIEW-2 MSI LV1B 2022-12-27 08:40:06
-
Secondary calibrated dataset (after the event): [CD] WORLDVIEW-3 MSI LV1B 2023-02-07 08:27:05
Fill the parameters
After the definition of spatial and time filters, you can employ IRIS Co-Register, by using a suitable pair of single band assets (e.g. red assets) from WorldView-2 and 3 Calibrated Datasets. To do so you can fill the parameters as described in the following sections.
Job name
- Insert as job name:
IRIS Co-Register - Red WV2 27/12/2022 WV3 07/02/2023 Earthquake in Turkey
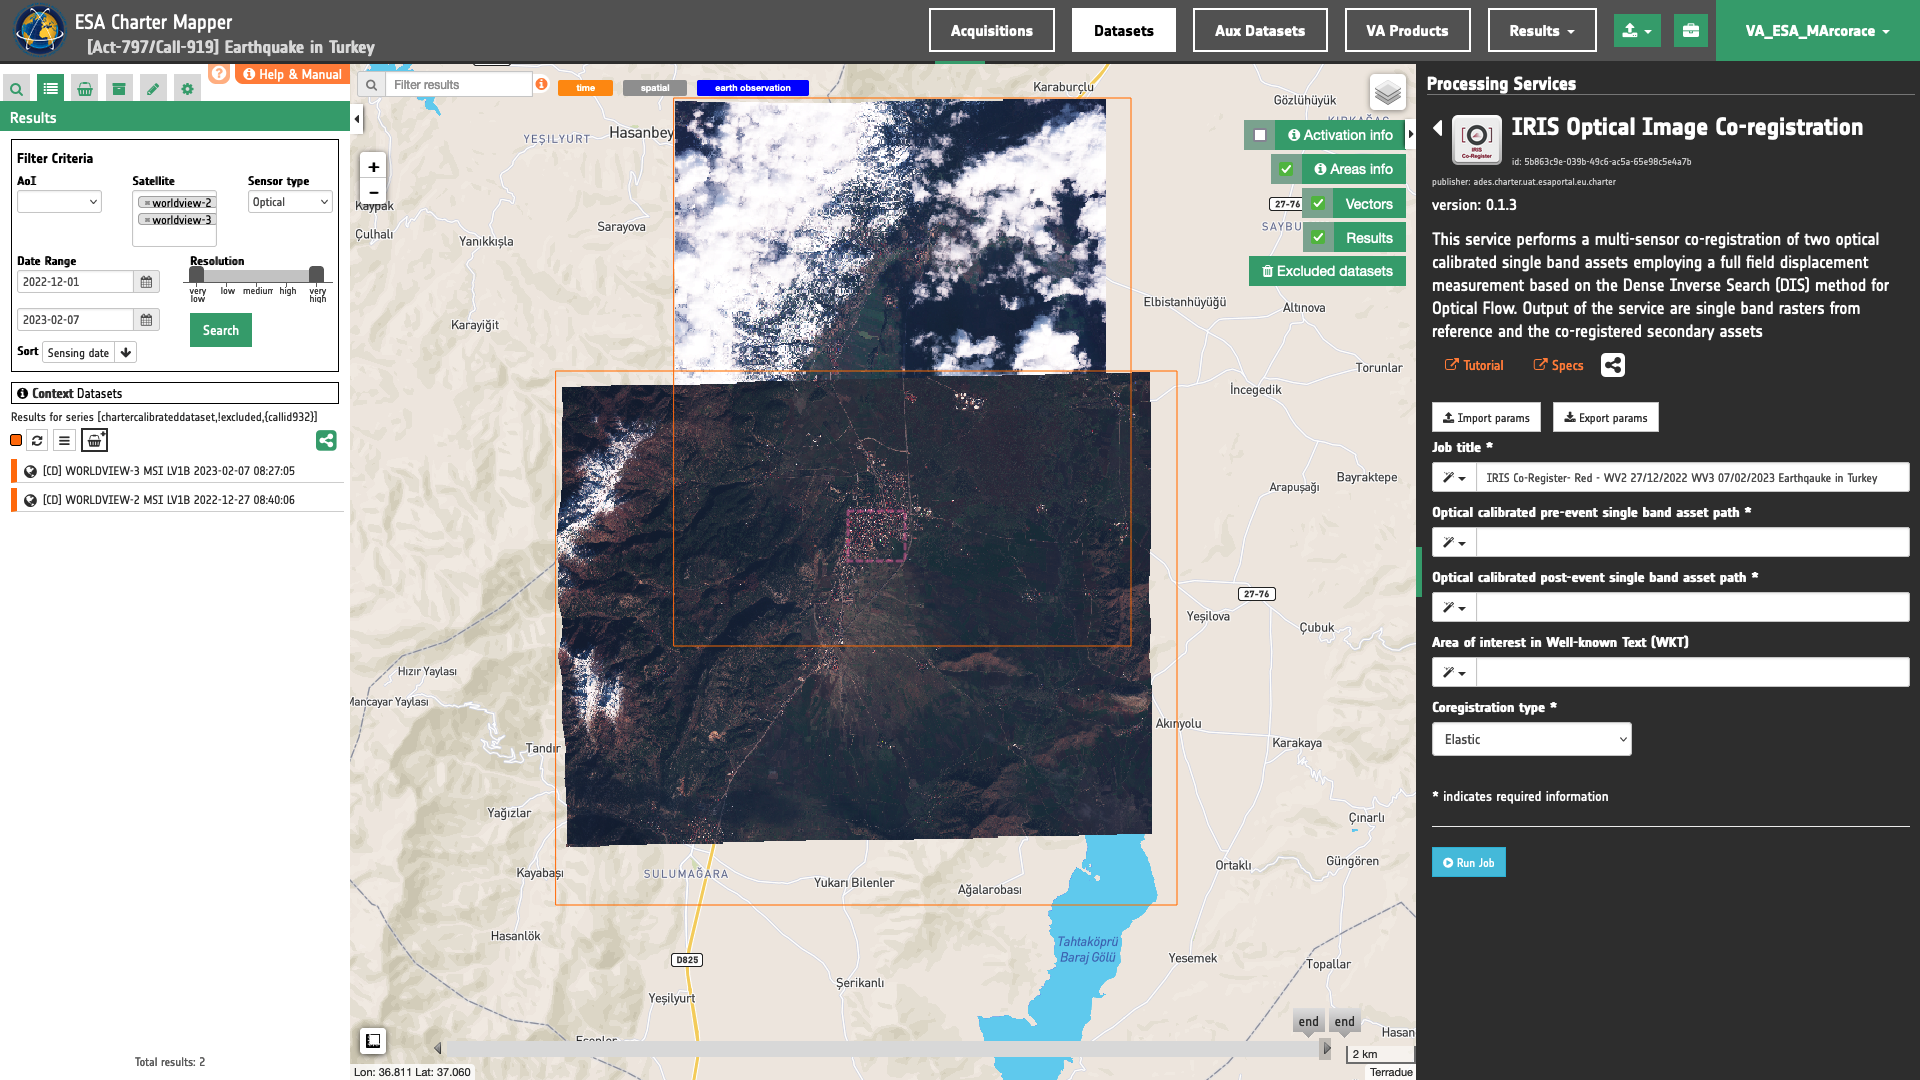
Input pair of single-band geophysical assets
First two mandatory parameters are input "Reference" and "Secondary" single band assets from Optical Calibrated Datasets. This parameter is required to specify both the reference to the Calibrated Dataset and the band to be use for the image co-registration by specifying the CBN (e.g. red).
Hint
To consults the bands of a Calibrated Dataset just Click on Show assets button available near the feature title. After the click a list with all single-band assets (CBNs) included within the Calibrated Dataset will appear under the feature title.
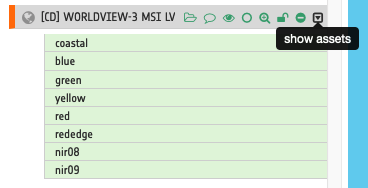
Thus, drag and Drop the selected assets:
-
single band reflectance asset from reference Calibrated Dataset for CBN =
red -
single band reflectance asset from secondary Calibrated Dataset for CBN =
red
in the Optical calibrated reference single band asset path and Optical calibrated secondary single band asset path fields respectively.
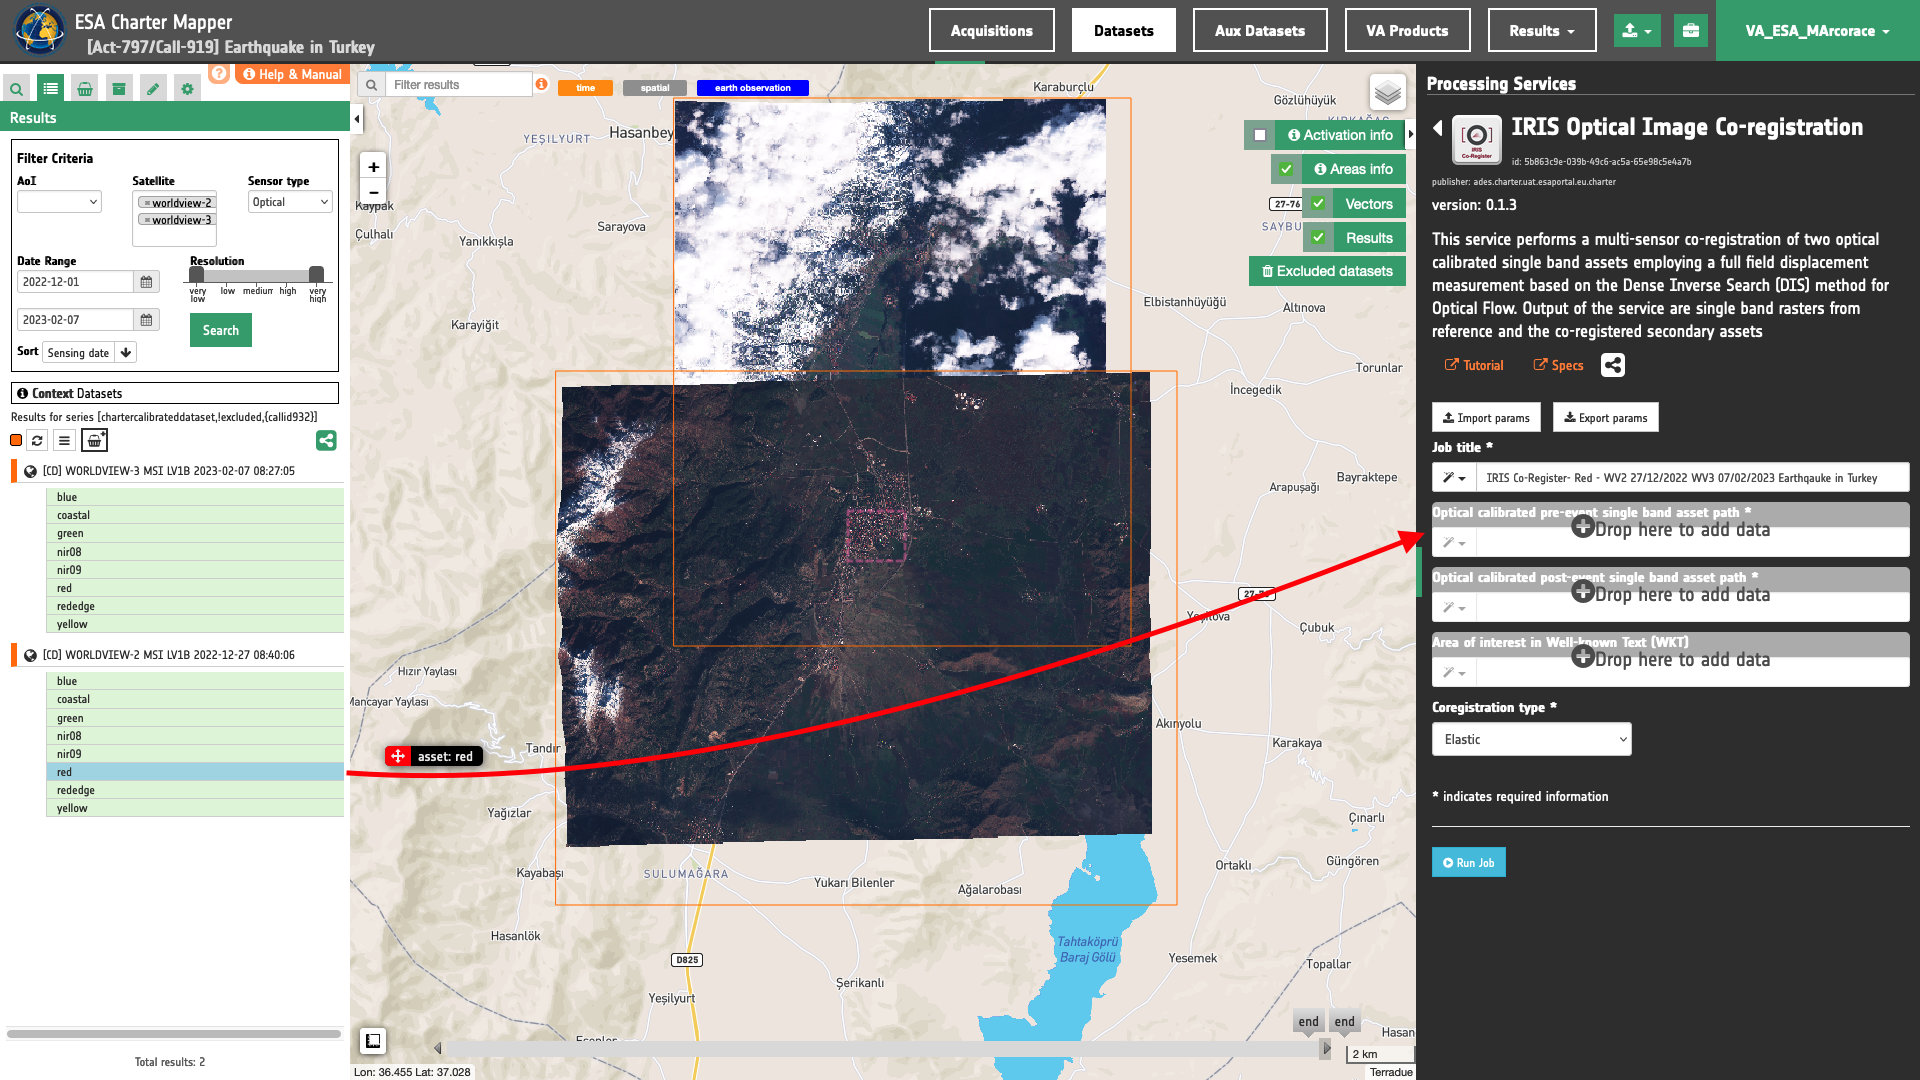
Warning
Users must drag and drop the single-band asset (e.g. red) into both Optical calibrated pre-event single band asset and Optical calibrated post-event single band asset fields. The drag and drop of the Calibrated Dataset (e.g. [CD] WORLDVIEW-2 MSI LV1B 2022-12-27 08:40:06) is not enough.
Area of interest expressed as Well-known text (optional)
The “Area of interest as Well Known Text” can be defined by using the drawn polygon defined with the area filter.
Tip
In the definition of “Area of interest as Well Known Text” it is possible to apply as AOI the drawn polygon defined with the area filter. To do so, click on the button in the left side of the "Area of interest expressed as Well-known text" box and select the option AOI from the list. The platform will automatically fill the parameter value with the rectangular bounding box taken the from current search area in WKT format.
Note
This parameter is optional.
Co-registration method
In this last mandatory parameter the user shall choose the co-registration method to employ. Under Co-registration type a list of selectable options are available. Find specifications of each option here. Insert, for example, the default value Elastic to employ an elastic co-registration of secondary and reference input assets. The full-field displacement is used to freely warp the secondary image.
Run the job
Click on the button Run Job and see the Running Job.
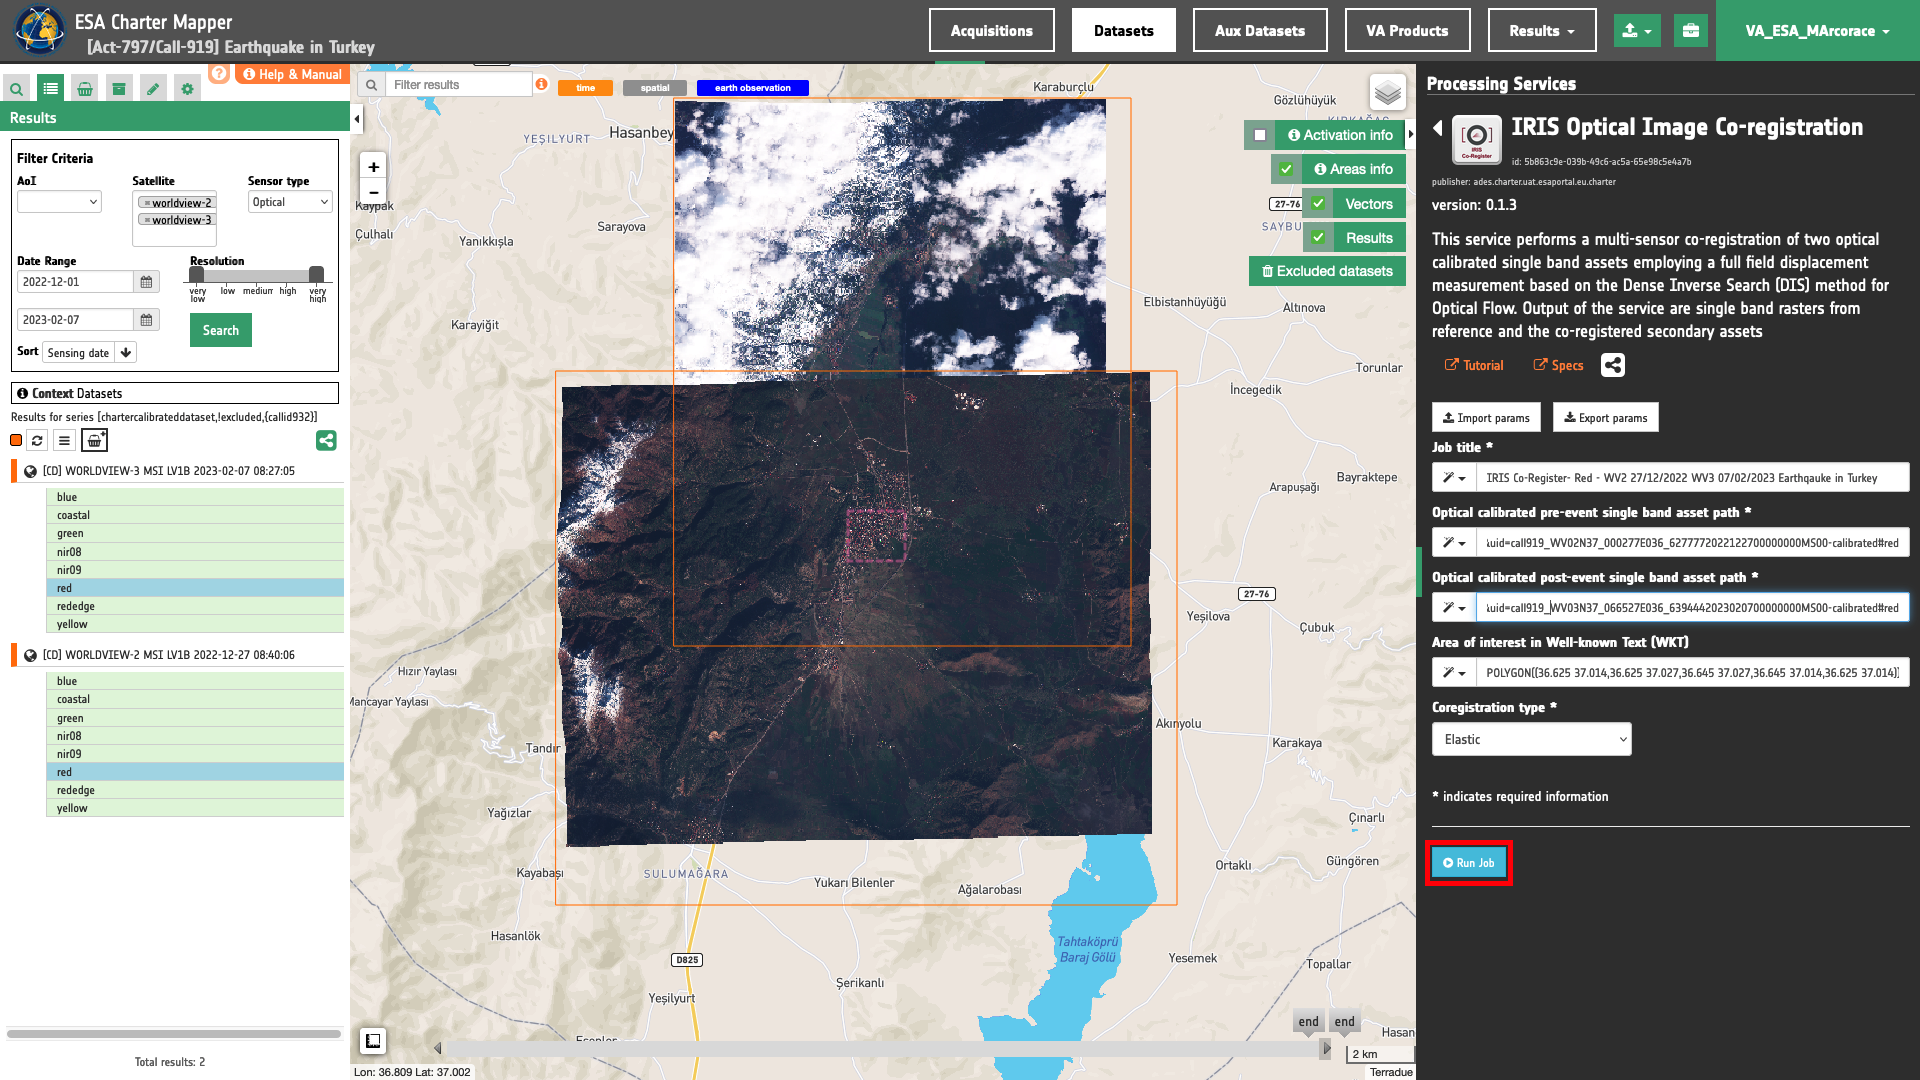
You can monitor job progress through the progress bar.
Results: download and visualization
Once the job is completed, click on the Show results button located at the bottom of the processing service panel.
Tip
You can also save the parameters employed in this job by clicking on the Export params button in the right panel. This allows you to copy all your entries to the clipboard. This is meant to be used for a quick re-submission of a similar job after a change of the parameters.
Below is reported the syntax which includes all the parameters employed in this example.
{
   "pre_event": "https://catalog.disasterscharter.org//charter/cat/[chartercalibrateddataset,!excluded,{callid919}]/search?format=json&uid=call932_WV02N37_000277E036_6277772022122700000000MS00-calibrated#red",
   "post_event": "https://catalog.disasterscharter.org//charter/cat/[chartercalibrateddataset,!excluded,{callid919}]/search?format=json&uid=call932_WV03N37_066527E036_6394442023020700000000MS00-calibrated#red",
   "aoi": "POLYGON((36.625 37.017,36.625 37.03,36.647 37.03,36.647 37.017,36.625 37.017))",
   "coreg_type": "Elastic"
}
Visualization
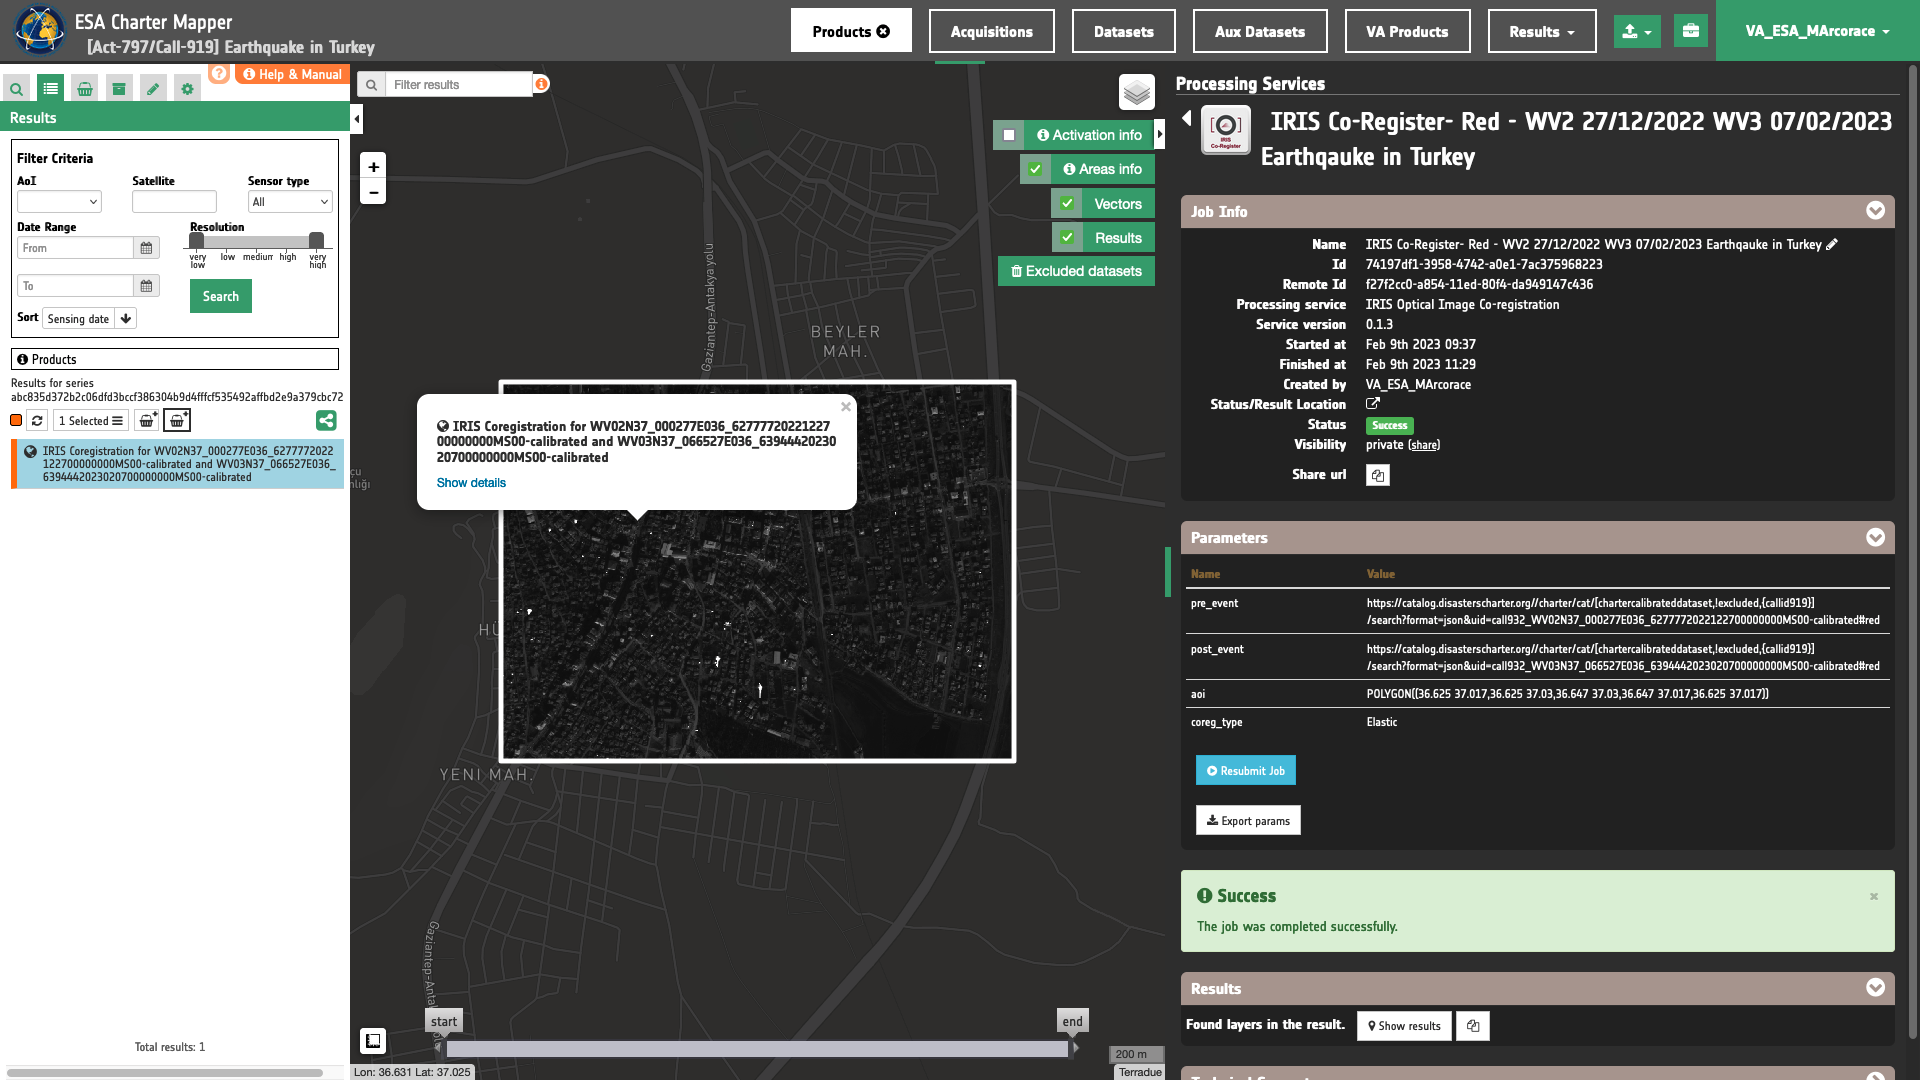
See the result on the map. The preview appears within the area defined in the spatial filter.
To get more information about the product just click on the preview in the map, a bubble showing the name of the layer IRIS Coregistration for WV02N37_000277E036_6277772022122700000000MS00-calibrated and WV03N37_066527E036_6394442023020700000000MS00-calibrated will appear and then click on the Show details button.
Tip
To quickly access Product Details double click on the layer from the Results list.
In the left panel of the interface, the details of Job Result will appear with Product metadata. Furthermore by clicking on Layer styling you can also access to the View options.
In here it is possible to see histogram/s of the Product which is visible in the map, set color formula, change Filters (e.g. Brightness, Opacity).
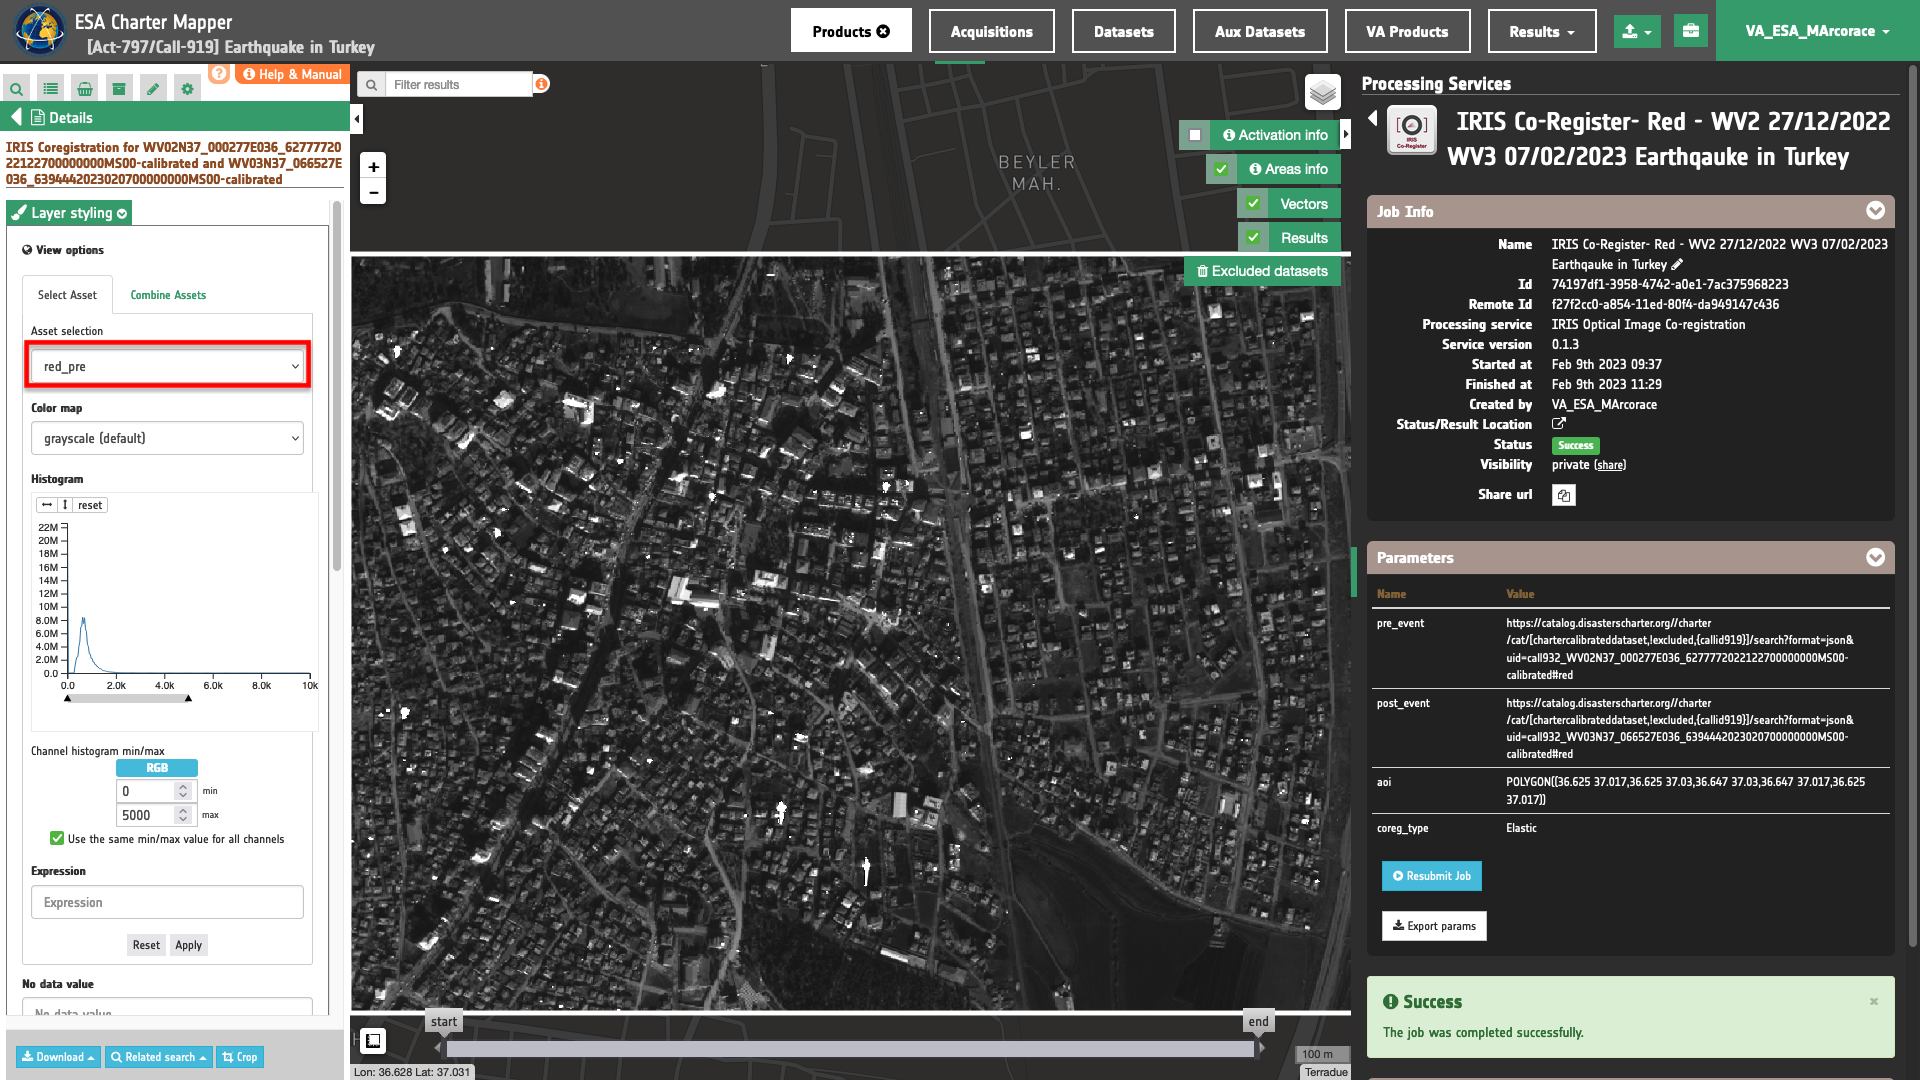
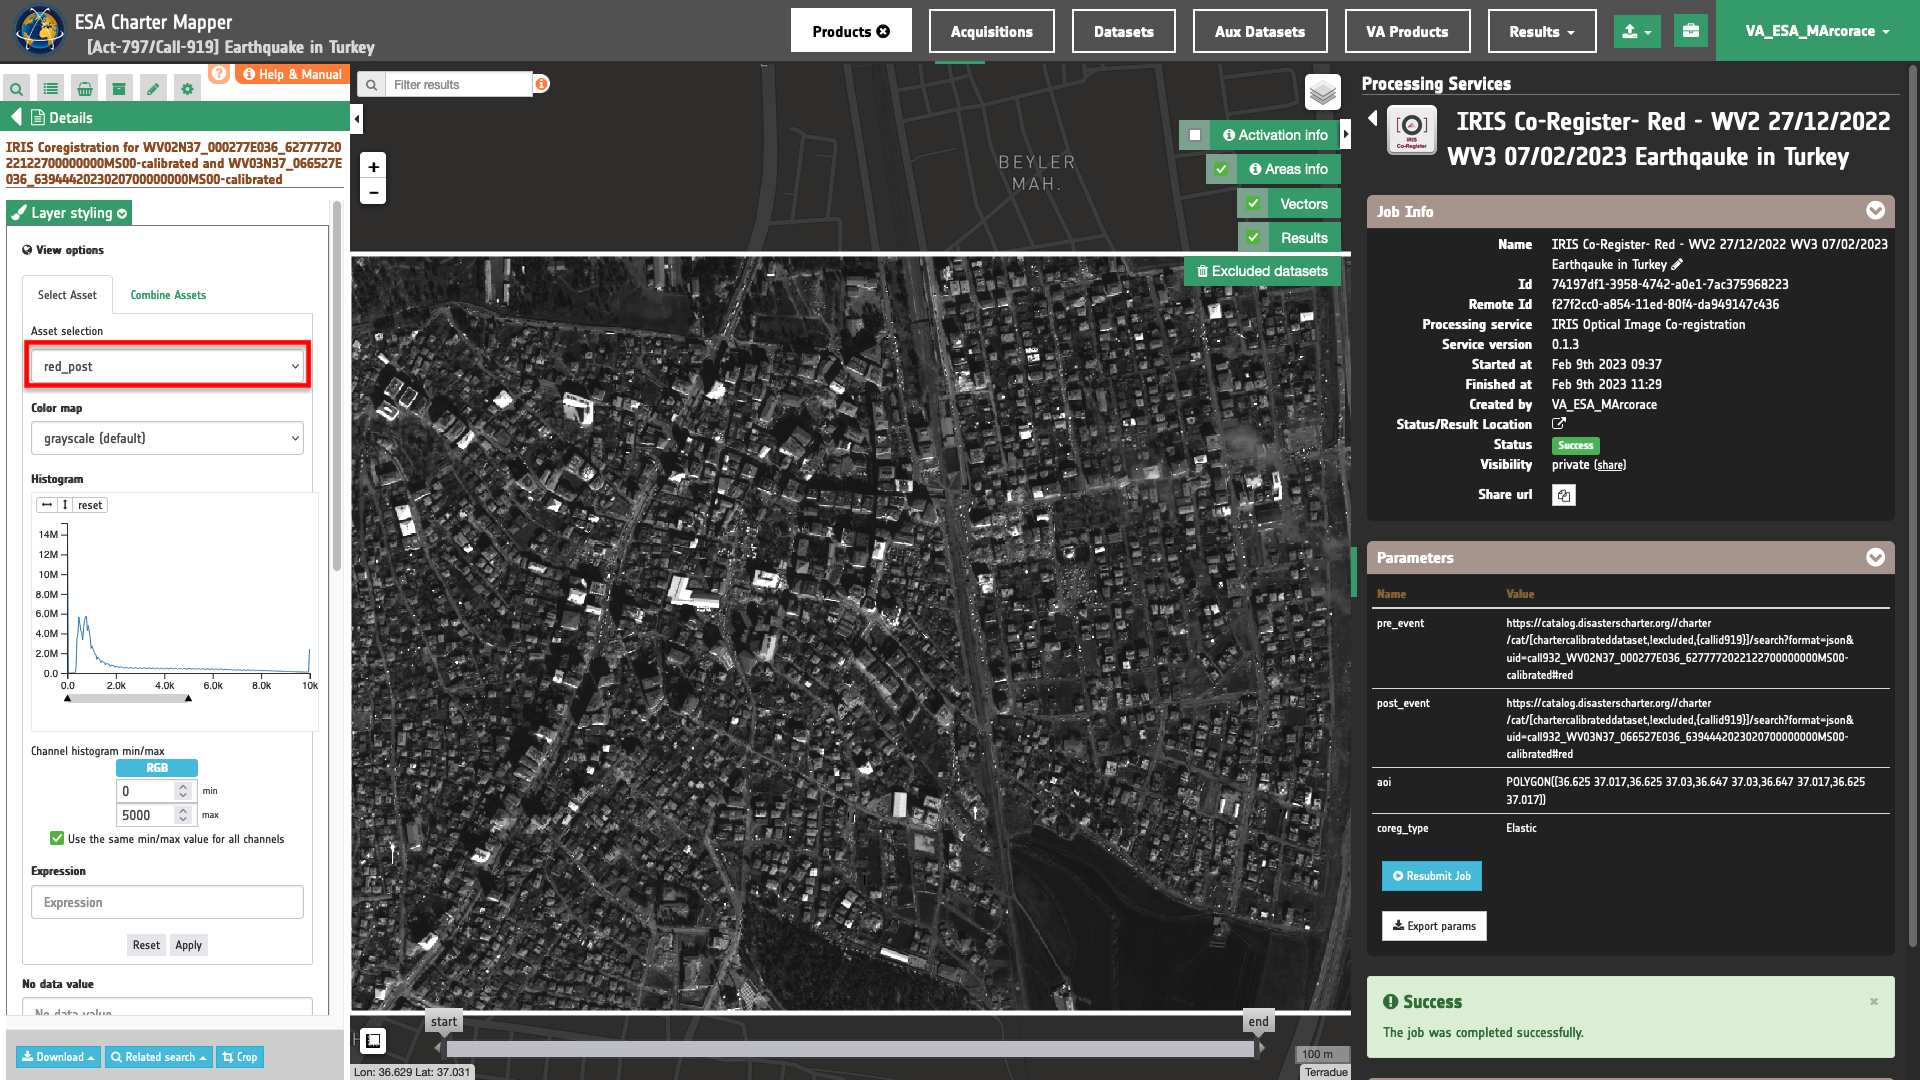
In the left panel under the result Details is possible to switch from the default asset to another one included into the IRIS results by clicking on Layer Styling and Select Assets. To visualize another asset on the map just select another asset:
red_pre asset
red_post asset
In the left panel under the result Details is possible to create customized overview on the fly by clicking on Layer Styling and Combine Assets. As an example under Combine Assets you can create on the fly a Red-Cyan band composite by setting the red_post single-band asset in the RED channel, and the co-registered red_pre one in the GREEN and BLUE channels.
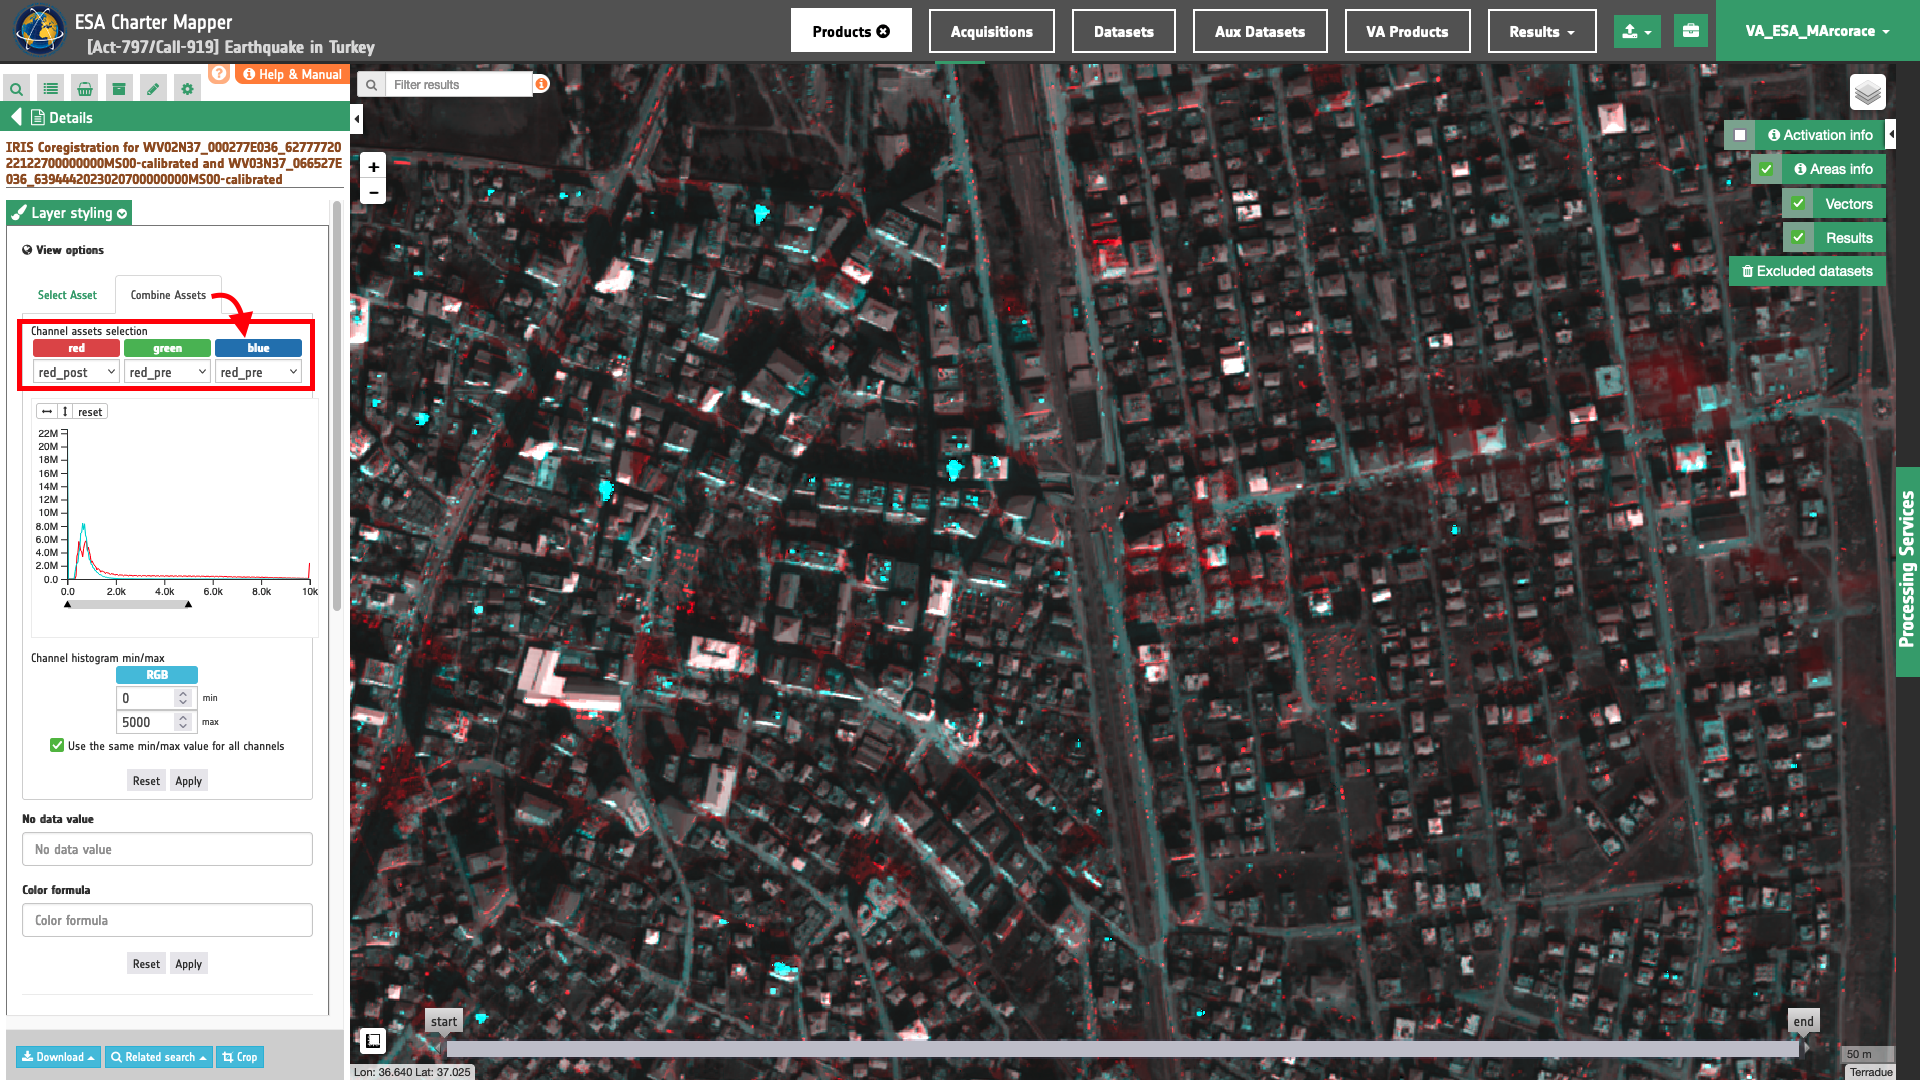
This Red-Cyan band composite highlights reflectance changes in the red derived from the co-registered pair of Worldview-2 and 3 calibrated MS data. In red is shown the loss of vegetation due to building shadows (different view angle of acquisitions), clouds, and damages to building.
Tip
To visually compare the on the fly RGB composite with the underlying base layer (e.g. Dark map) you can set the Opacity filter under View options as 40%.
Download
In this use case the IRIS Optical Image Co-registration (IRIS Co-Register) service offers the following products:
- red_pre: single band asset product from reference
redreflectance given as single band raster in COG format, - red_post: single band asset product from co-registered secondary
redreflectance given as single band raster in COG format.
These products can be downloaded by clicking on the Download button located at the bottom of the Product Details tab in the left panel.
