S2-Cloudless tutorial
![]()
This service generates cloud masks (CLM) and probabilities (CLP) using the s2cloudless algorithm developed at Sinergise. It supports both Sentinel-2 Level-1C and Level-2A Calibrated Datasets.
 S2-Cloudless service description and specifications are available in this section.
Select the processing service
After the opening of the activation workspace, in the right panel of the interface, open the Processing Services tab and select the processing service Sentinel-2 Cloudless for L1C or Sentinel-2 Cloudless for L2A.
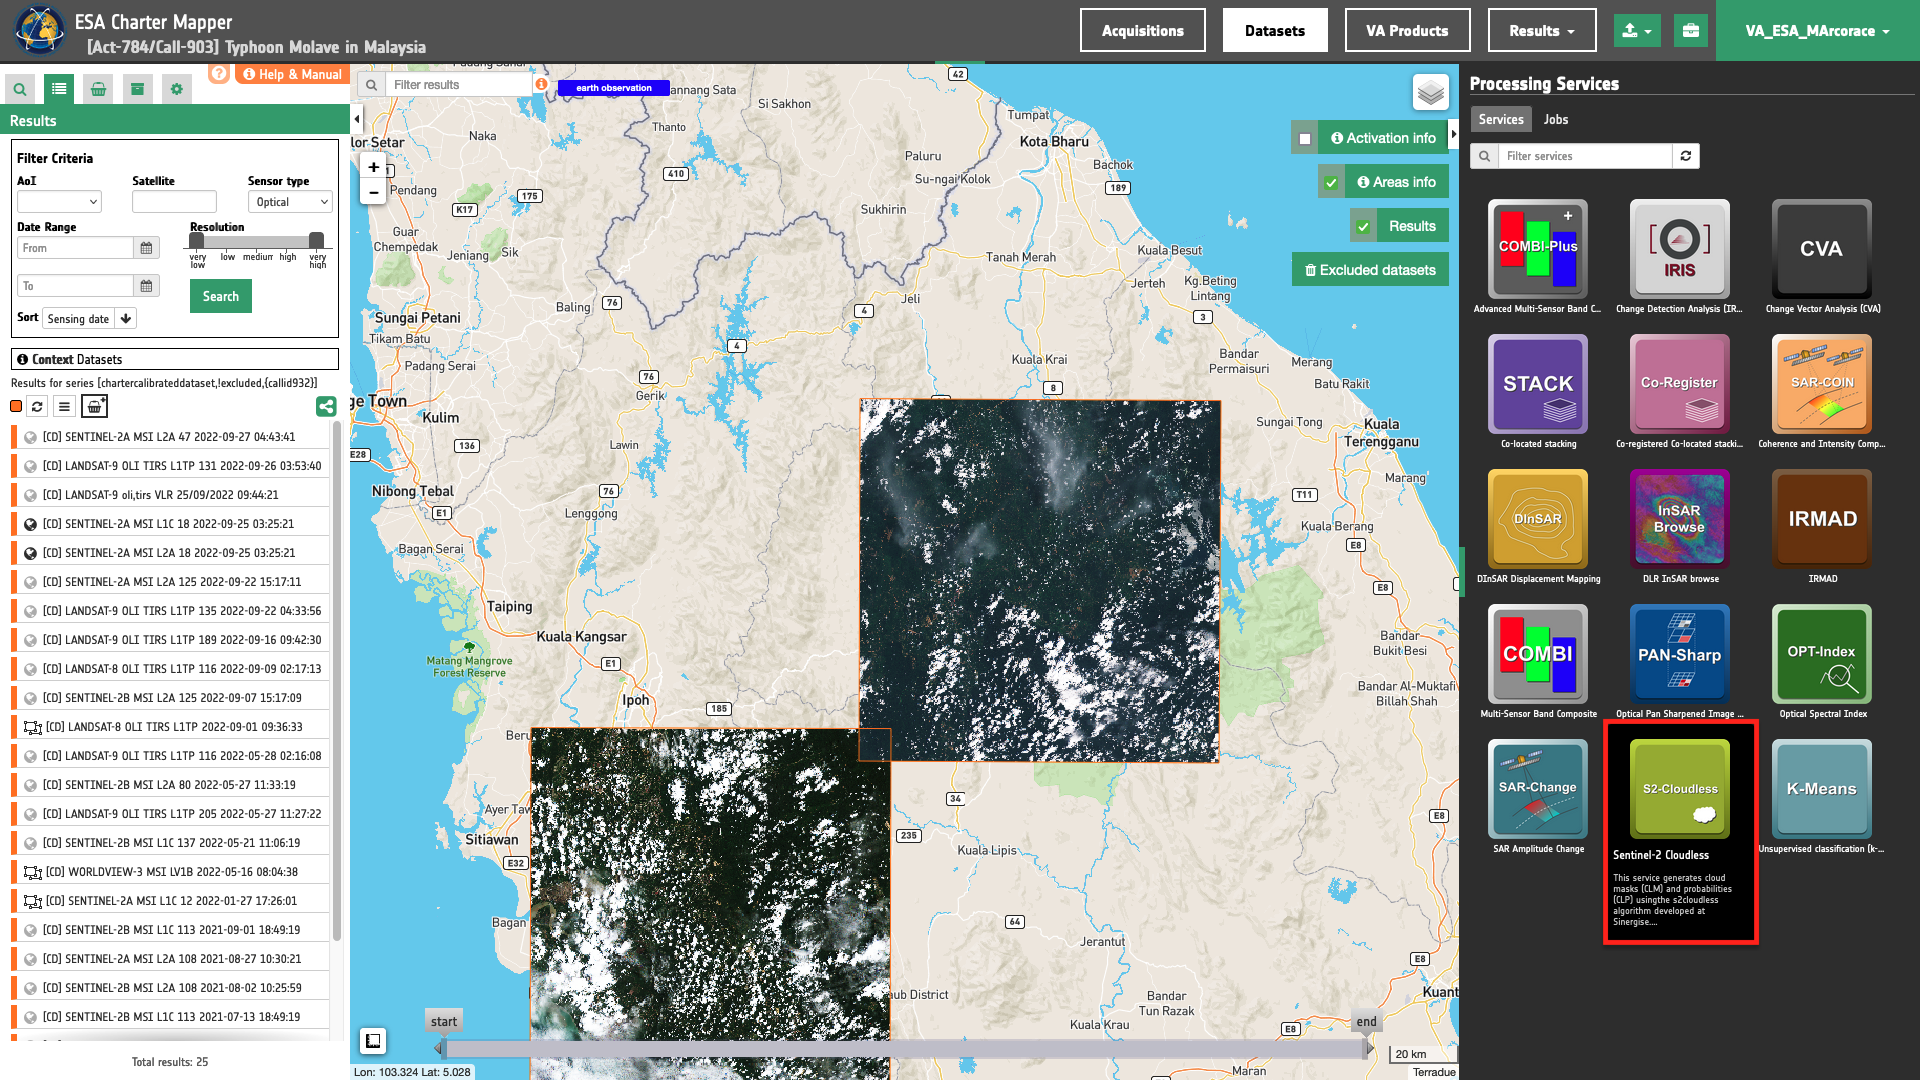
The "Sentinel-2 Cloudless (S2-Cloudless)" panel is displayed with parameters values to be filled-in.
Find the data using multiple filter criteria
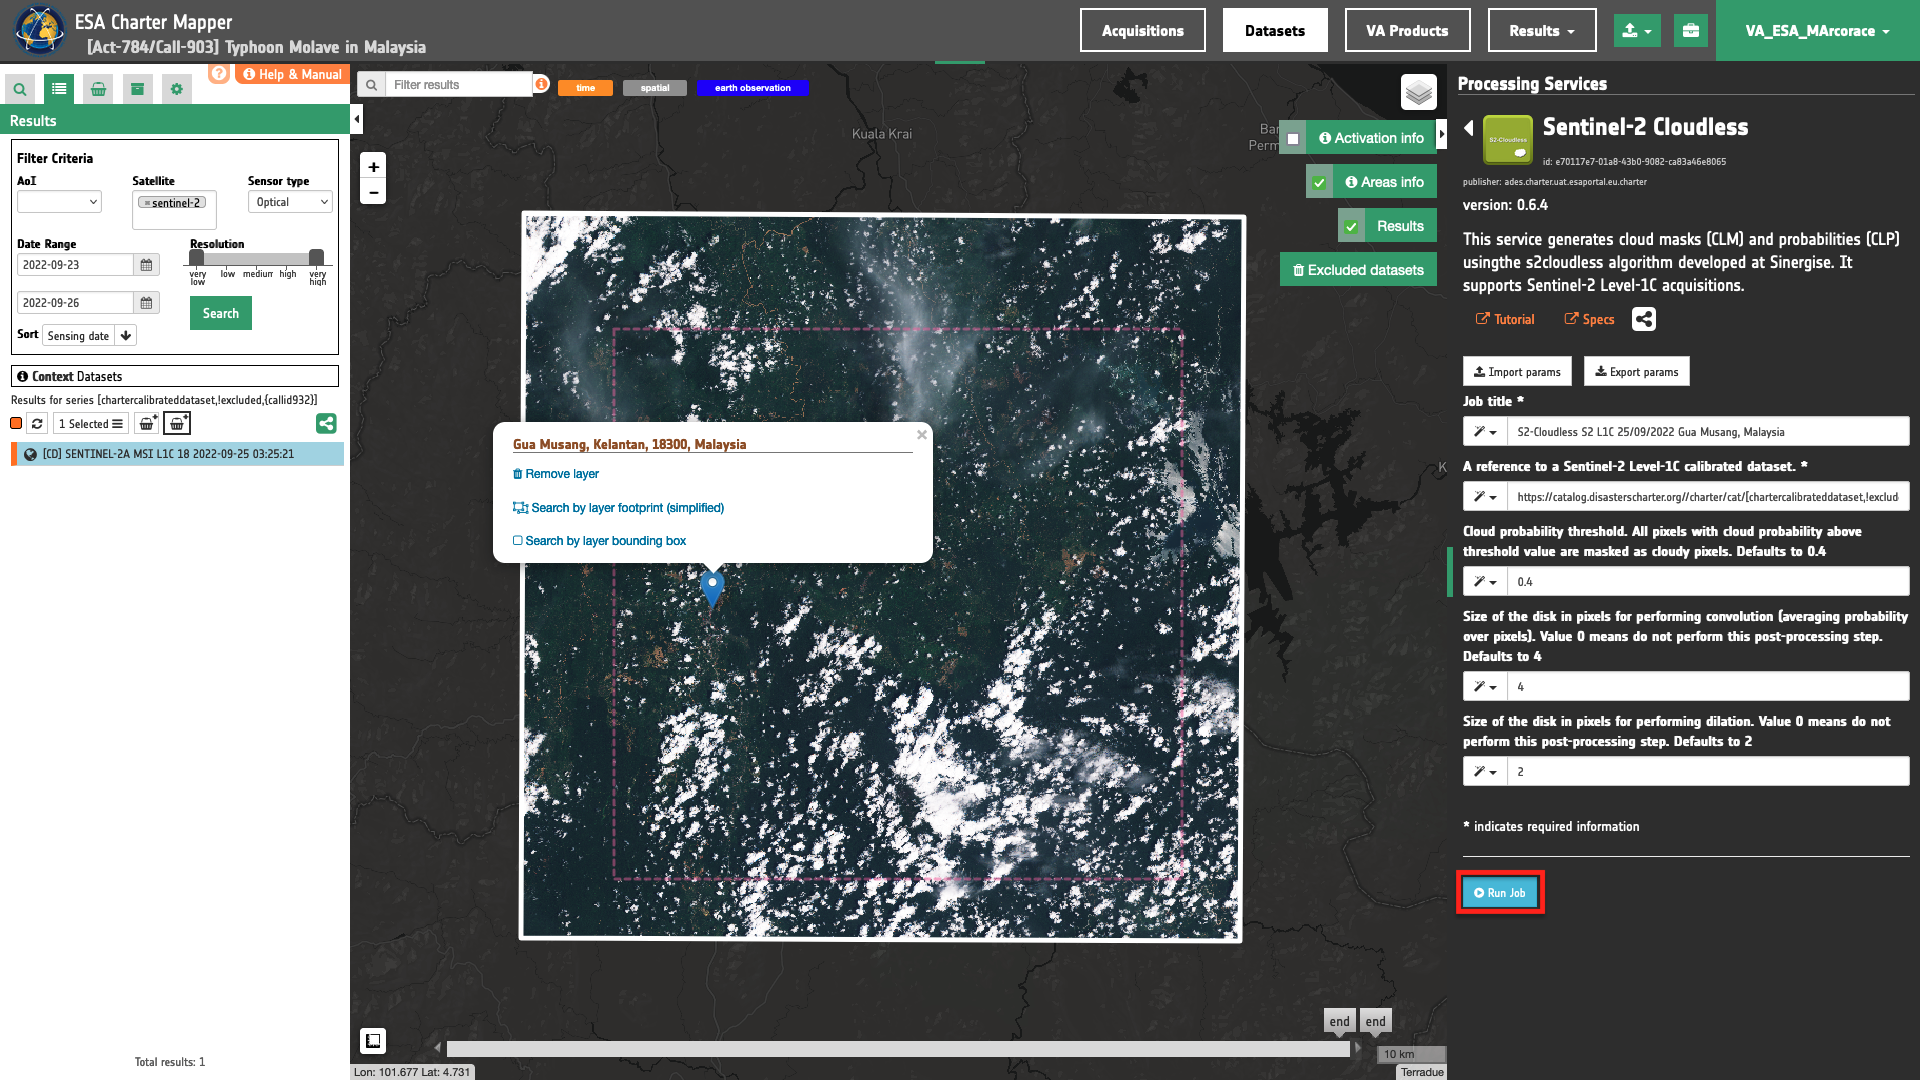
Select the area for which you want to do an analysis, e.g over Gua Musang area, Malaysia.
From the Navigation and Search toolbar (located in the upper left side of the map), click on the Spatial Filter and draw a square AOI over Gua Musang, Malaysia. This spatial filter allows you to select only the EO data acquired over this area.
From the top of the left panel, use Filter Criteria to search for Optical and sentinel-2 data collections from the list. Set as a temporal filter the time range from 23/09/2022 to 26/09/2022.
After the query the list will be updated as the one shown in the next image.
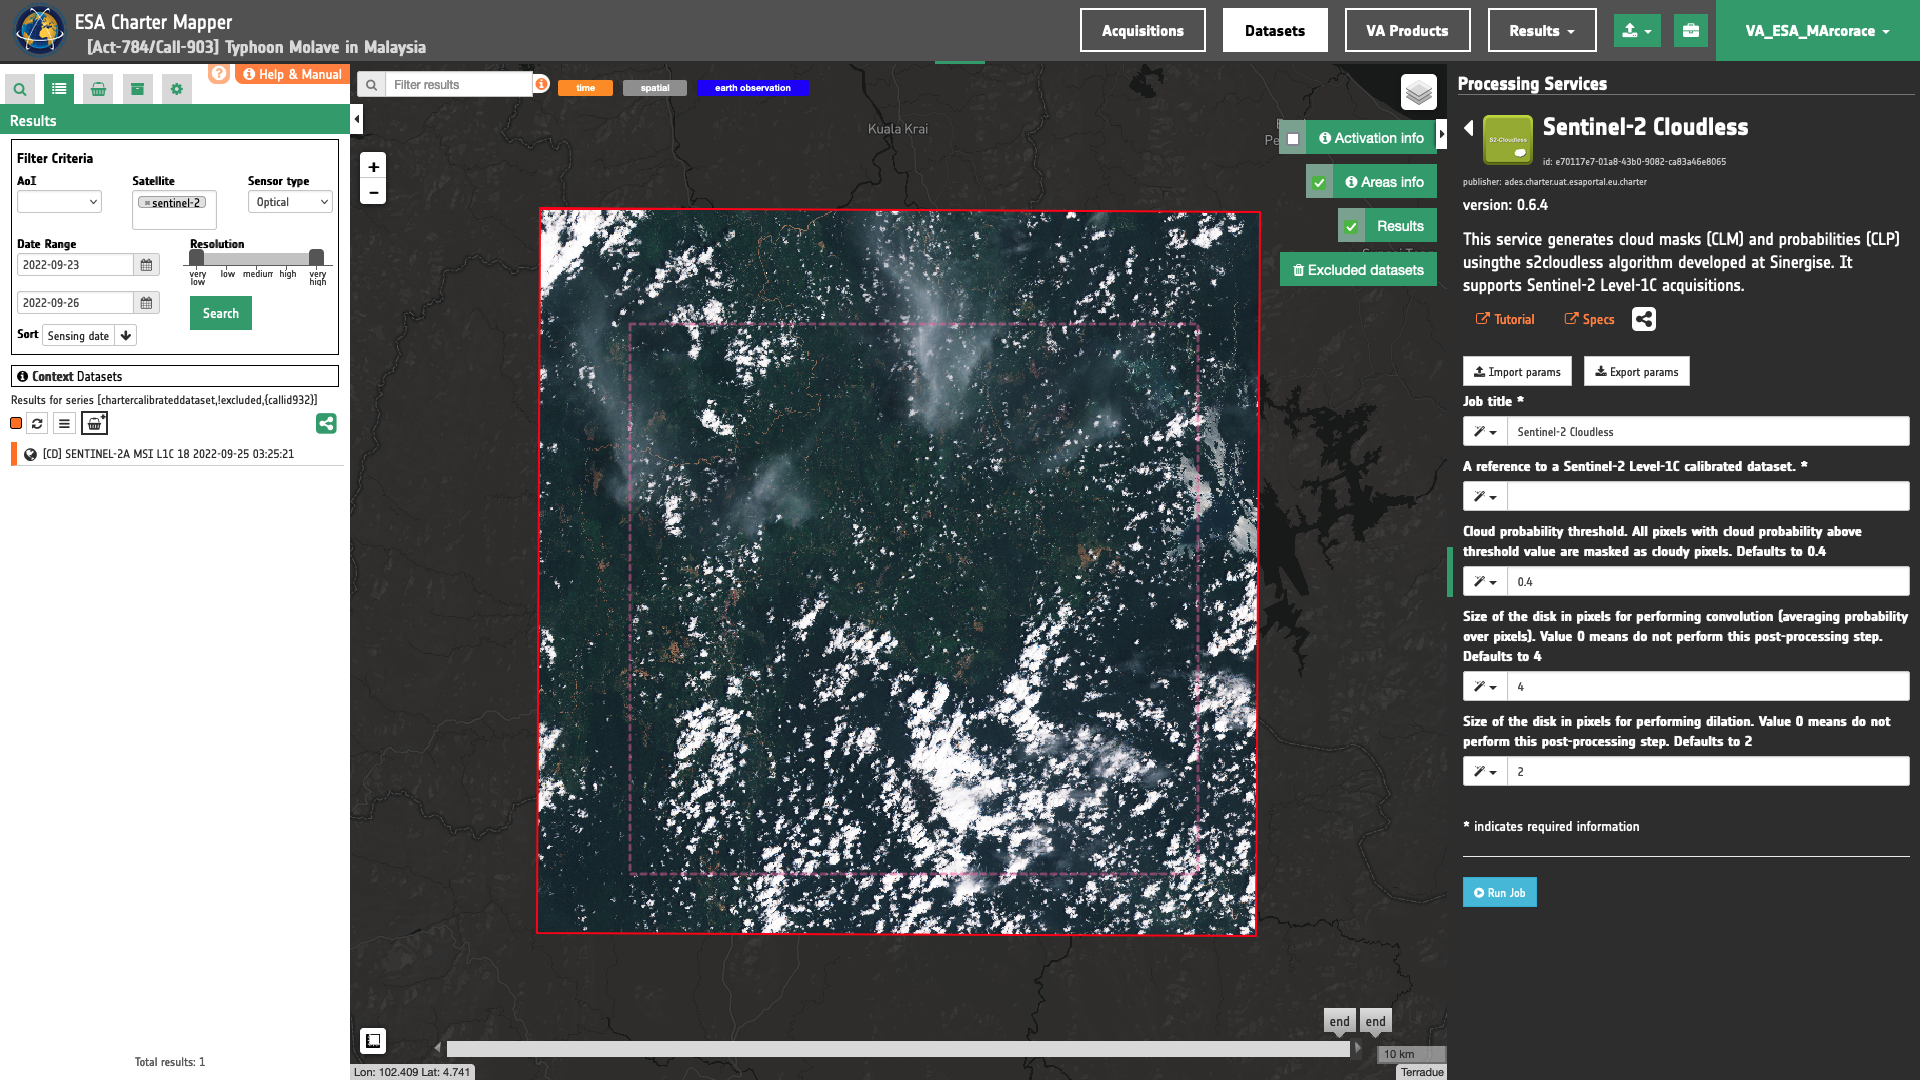
Now it is possible to choose a Sentinel-2 Optical Calibrated Dataset to be used in the S2-Cloudless service. As an example you can choose the Dataset:
- [CD] SENTINEL-2A MSI L1C 18 2022-09-25 03:25:21
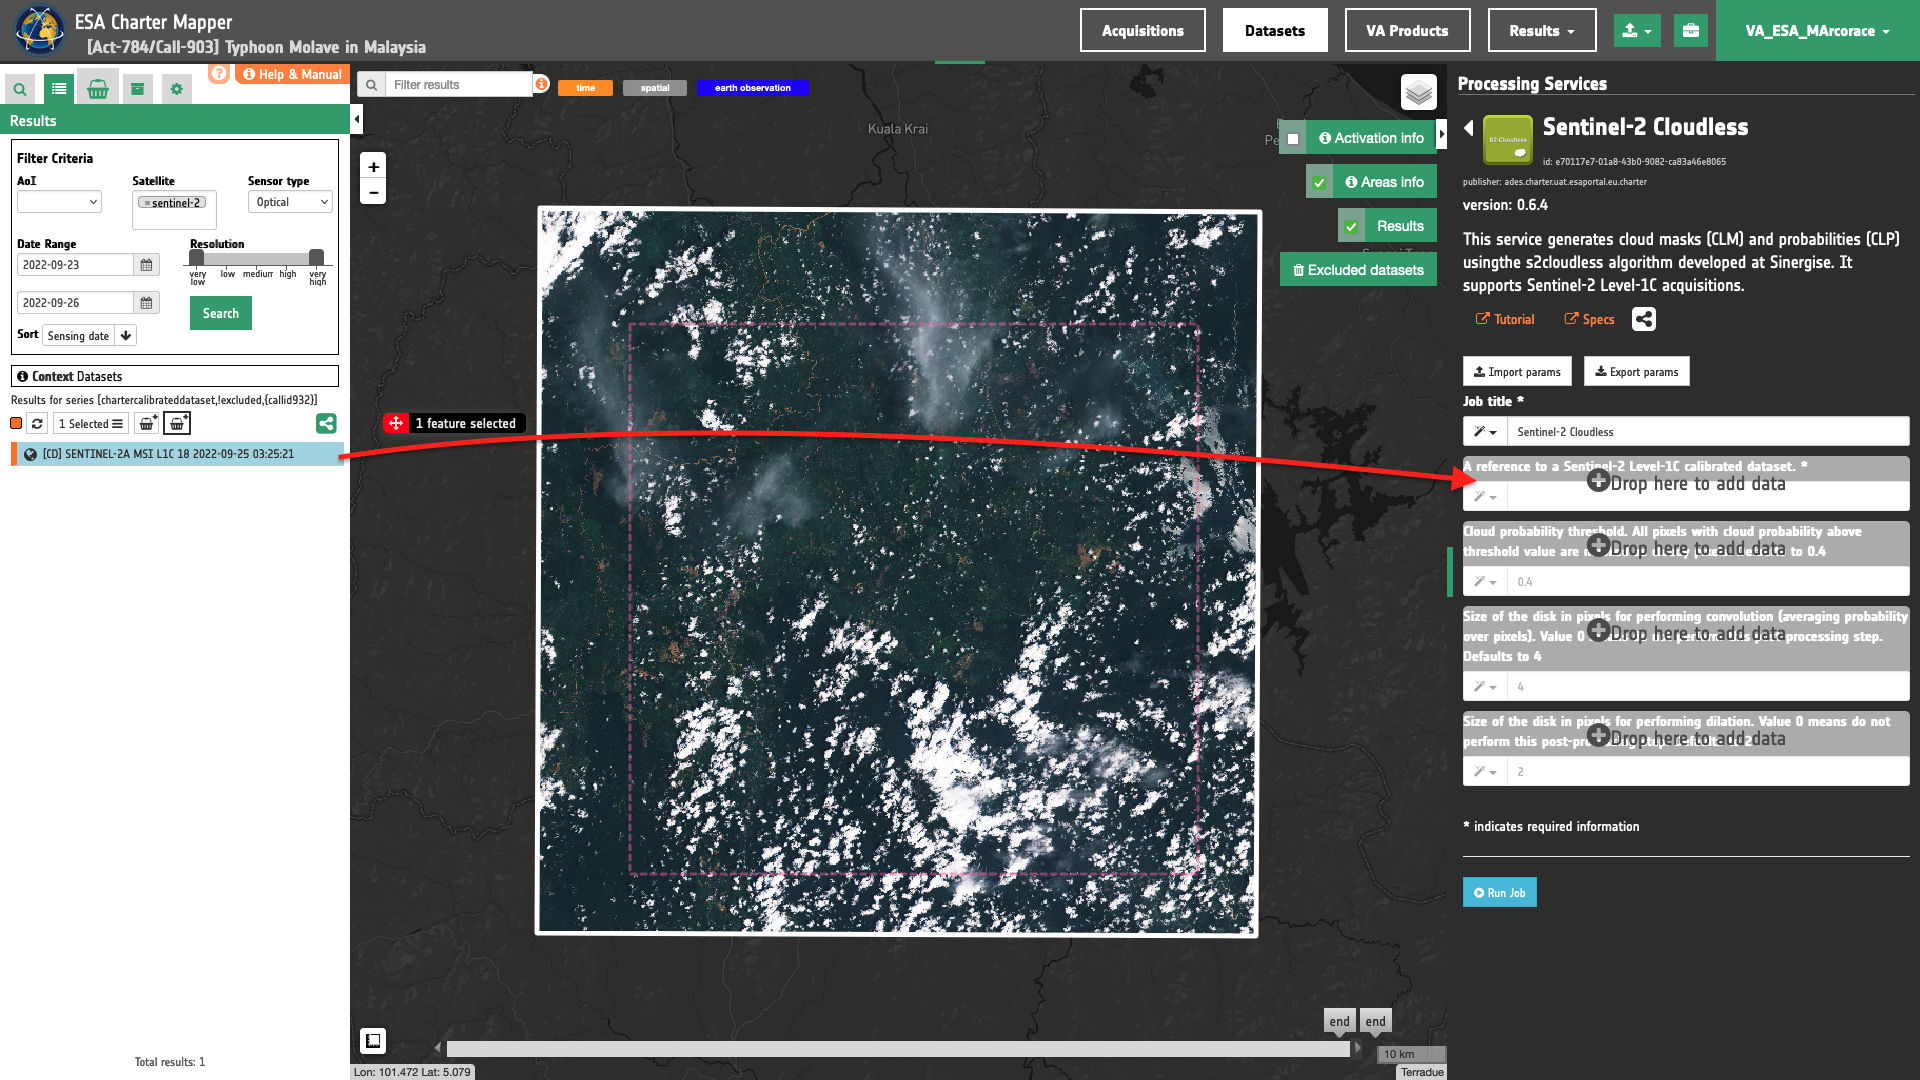
Fill the parameters
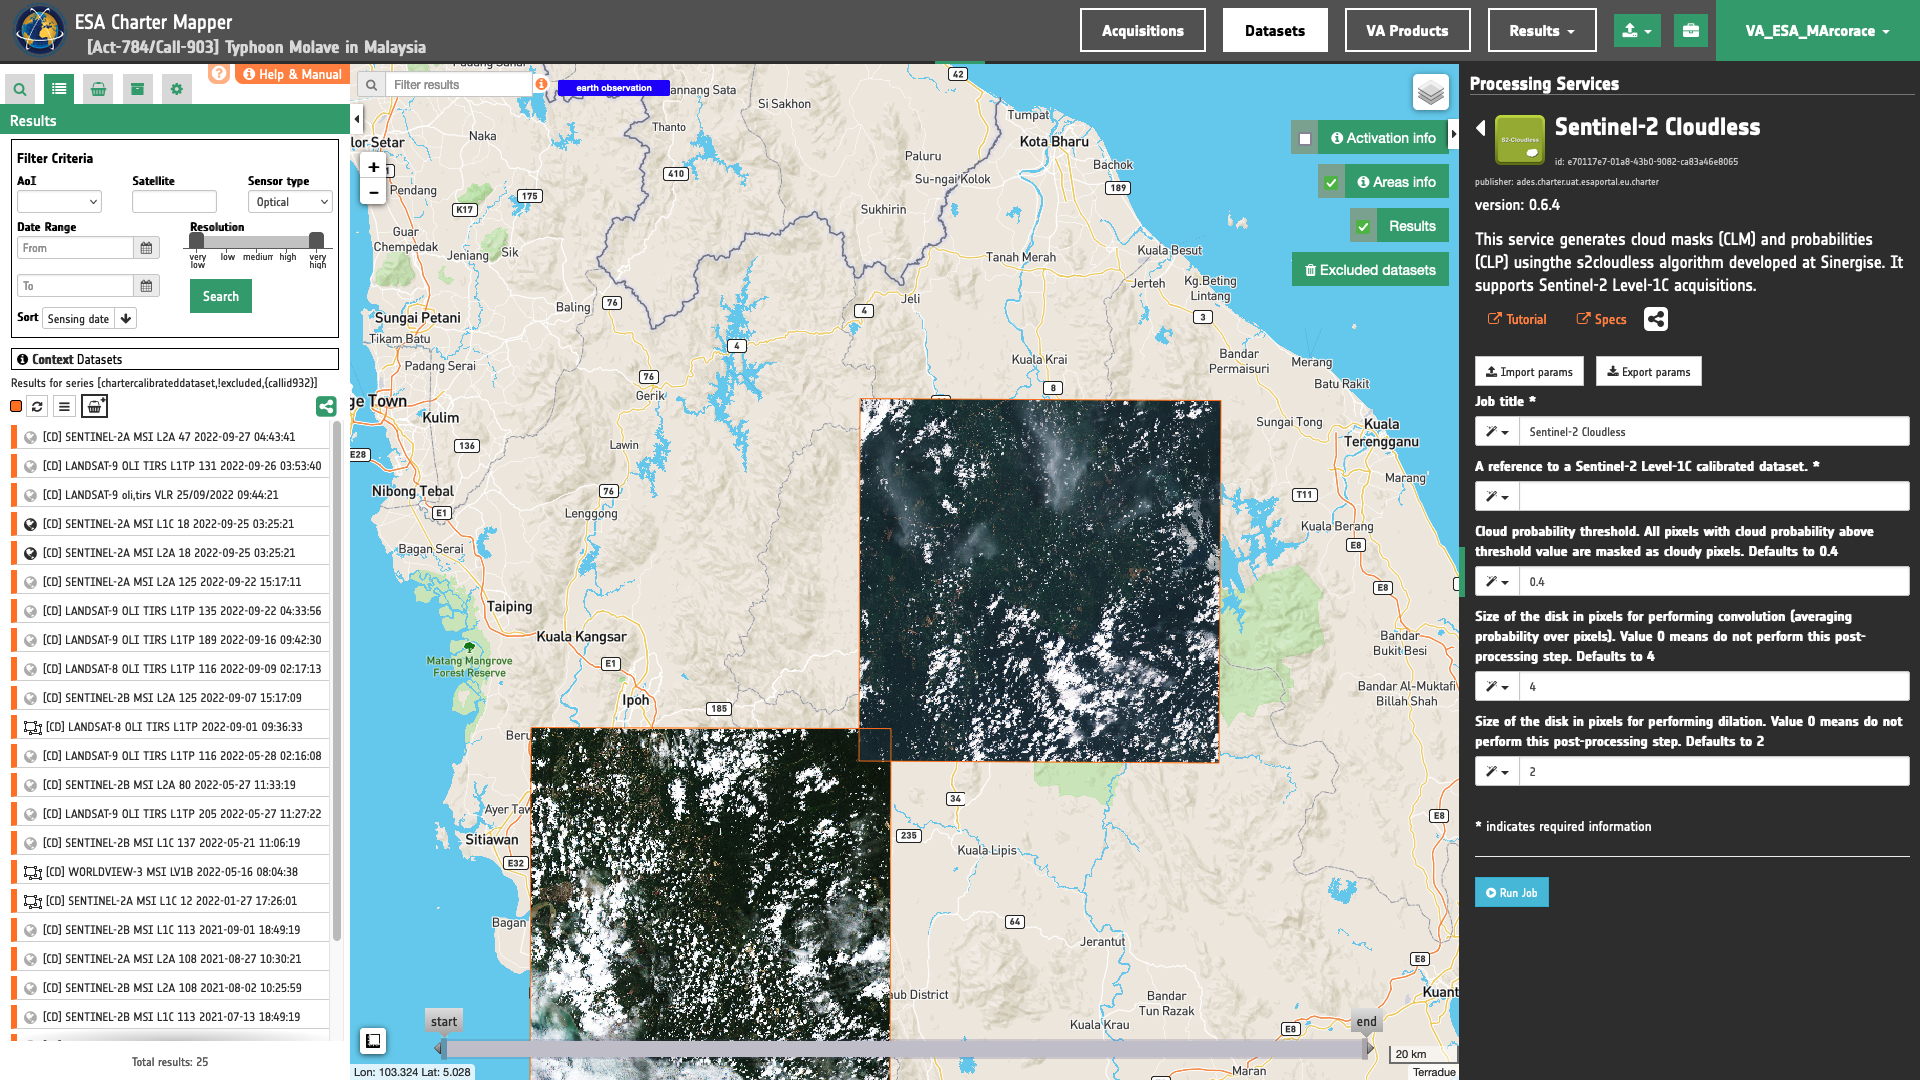
After the definition of spatial and time filters, you can employ S2-Cloudless, by using the chosen Calibrated Dataset from Sentinel-2 data. To do so you can fill the parameters as described in the following sections.
Job name
Insert as job name:
S2-Cloudless S2 L1C 25/09/2022 Gua Musang, Malaysia
Input Sentinel-2 Calibrated Dataset
Drag and Drop a reference to a Sentinel-2 Level-1C calibrated dataset.
Warning
Drag and drop the Dataset (e.g. "[CD] SENTINEL-2A MSI L1C 18 2022-09-25 03:25:21") and not the single-band asset (e.g. "red") into Sentinel-2 Level-1C calibrated dataset field.
Cloud probability threshold
In this mandatory parameter the user shall specify the cloud probability threshold. All pixels with cloud probability above threshold value are masked as cloudy pixels. Leave as a value for the window size the default value of 39.
Size of the disk in pixels for performing convolution
In this parameter you need to define the size of the disk in pixels for performing convolution (averaging probability over pixels). Leave as a value for the window size the default value of 4.
Note
Value 0 means do not perform this post-processing step.
Size of the disk in pixels for performing dilation
This last mandatory parameter allows to define the size Size of the disk in pixels for performing dilation. Leave as a value for the window size the default value of 2.
Note
Value 0 means do not perform this post-processing step.
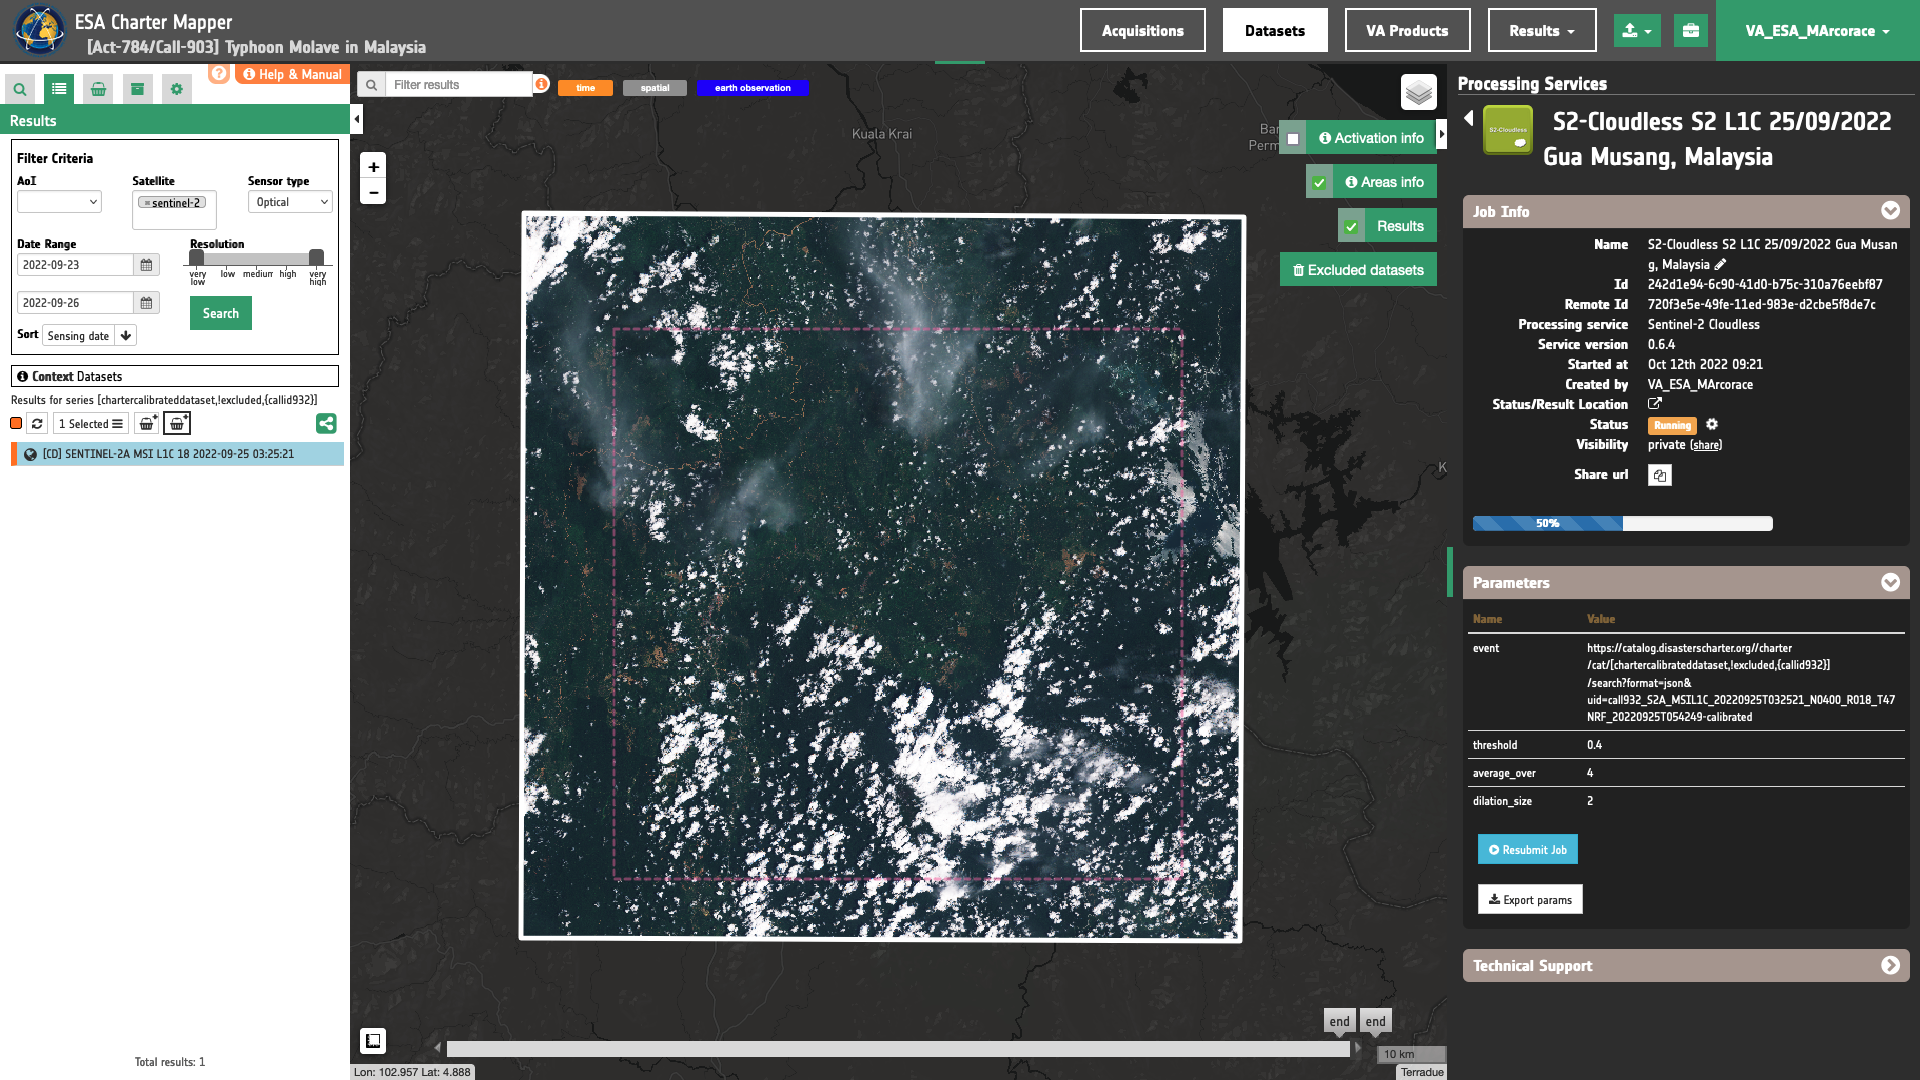
Run the job
Click on the button Run Job and see the Running Job
You can monitor job progress through the progress bar.
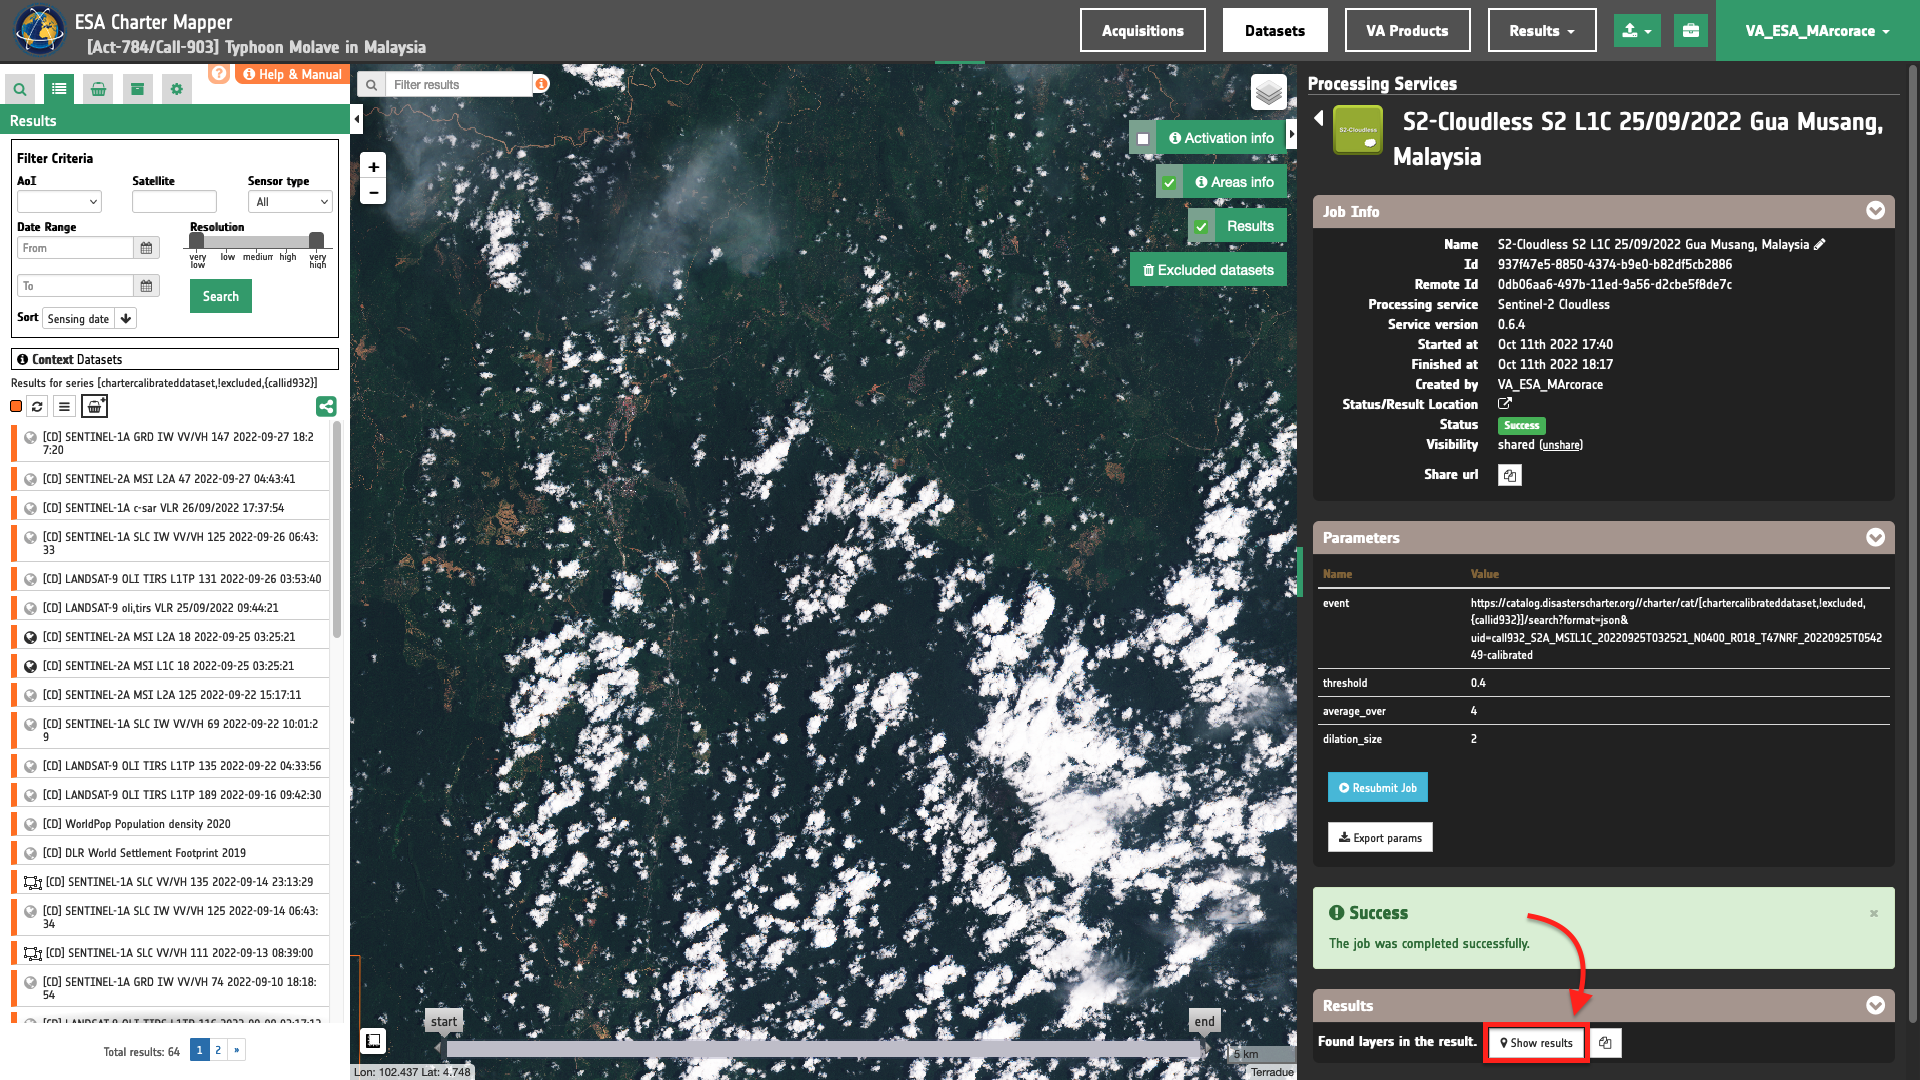
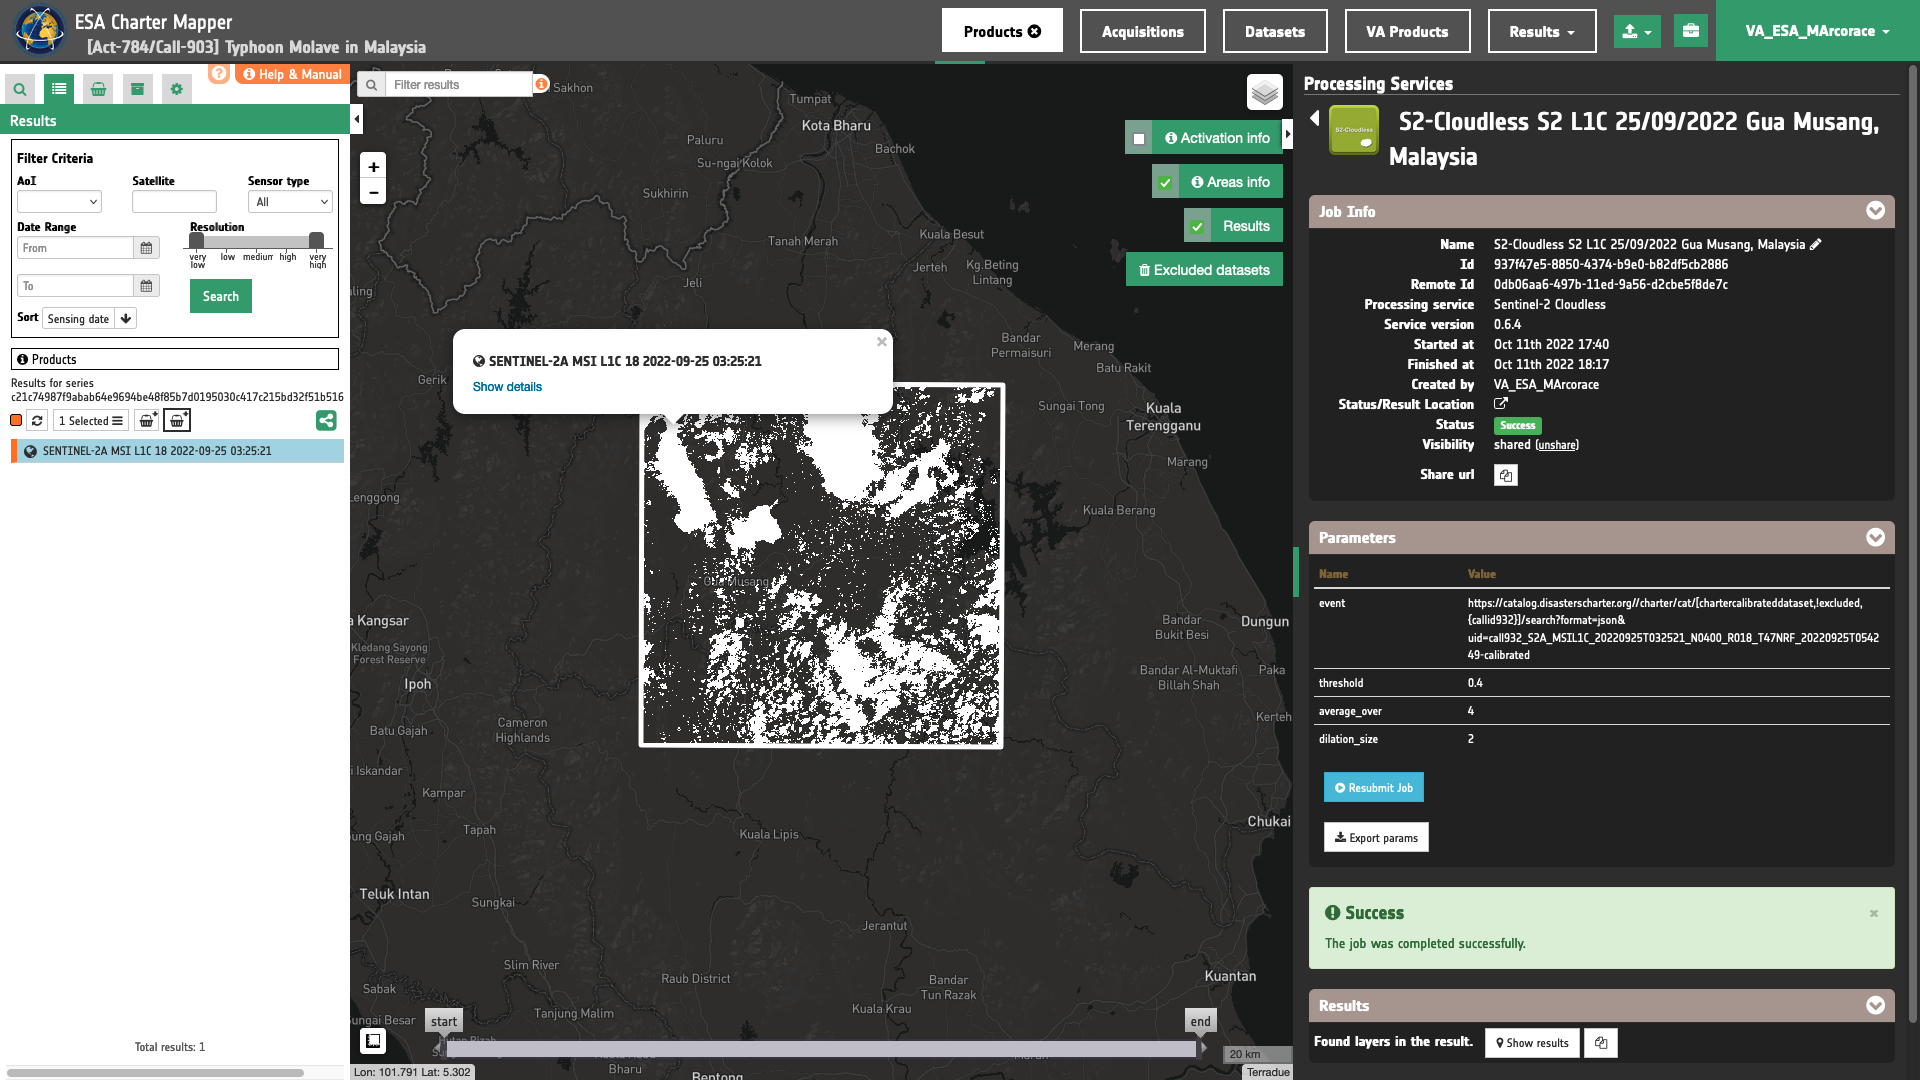
Results: download and visualization
Once the job is completed, click on the Show results button located at the bottom of the processing service panel.
Tip
You can also save the parameters employed in this job by clicking on the Export params button in the right panel. This allows you to copy all your entries to the clipboard. This is meant to be used for a quick re-submission of a similar job after a fine tuning of the parameters (e.g. to add a color formula later).
Below is reported the syntax which includes all the parameters employed in this example.
{
   "event": "https://catalog.disasterscharter.org//charter/cat/[chartercalibrateddataset,!excluded,{callid932}]/search?format=json&uid=call932_S2A_MSIL1C_20220925T032521_N0400_R018_T47NRF_20220925T054249-calibrated",
   "threshold": "0.4",
   "average_over": "4",
   "dilation_size": "2"
}
Visualization
See the result on the map. The preview appears within the area defined in the spatial filter.
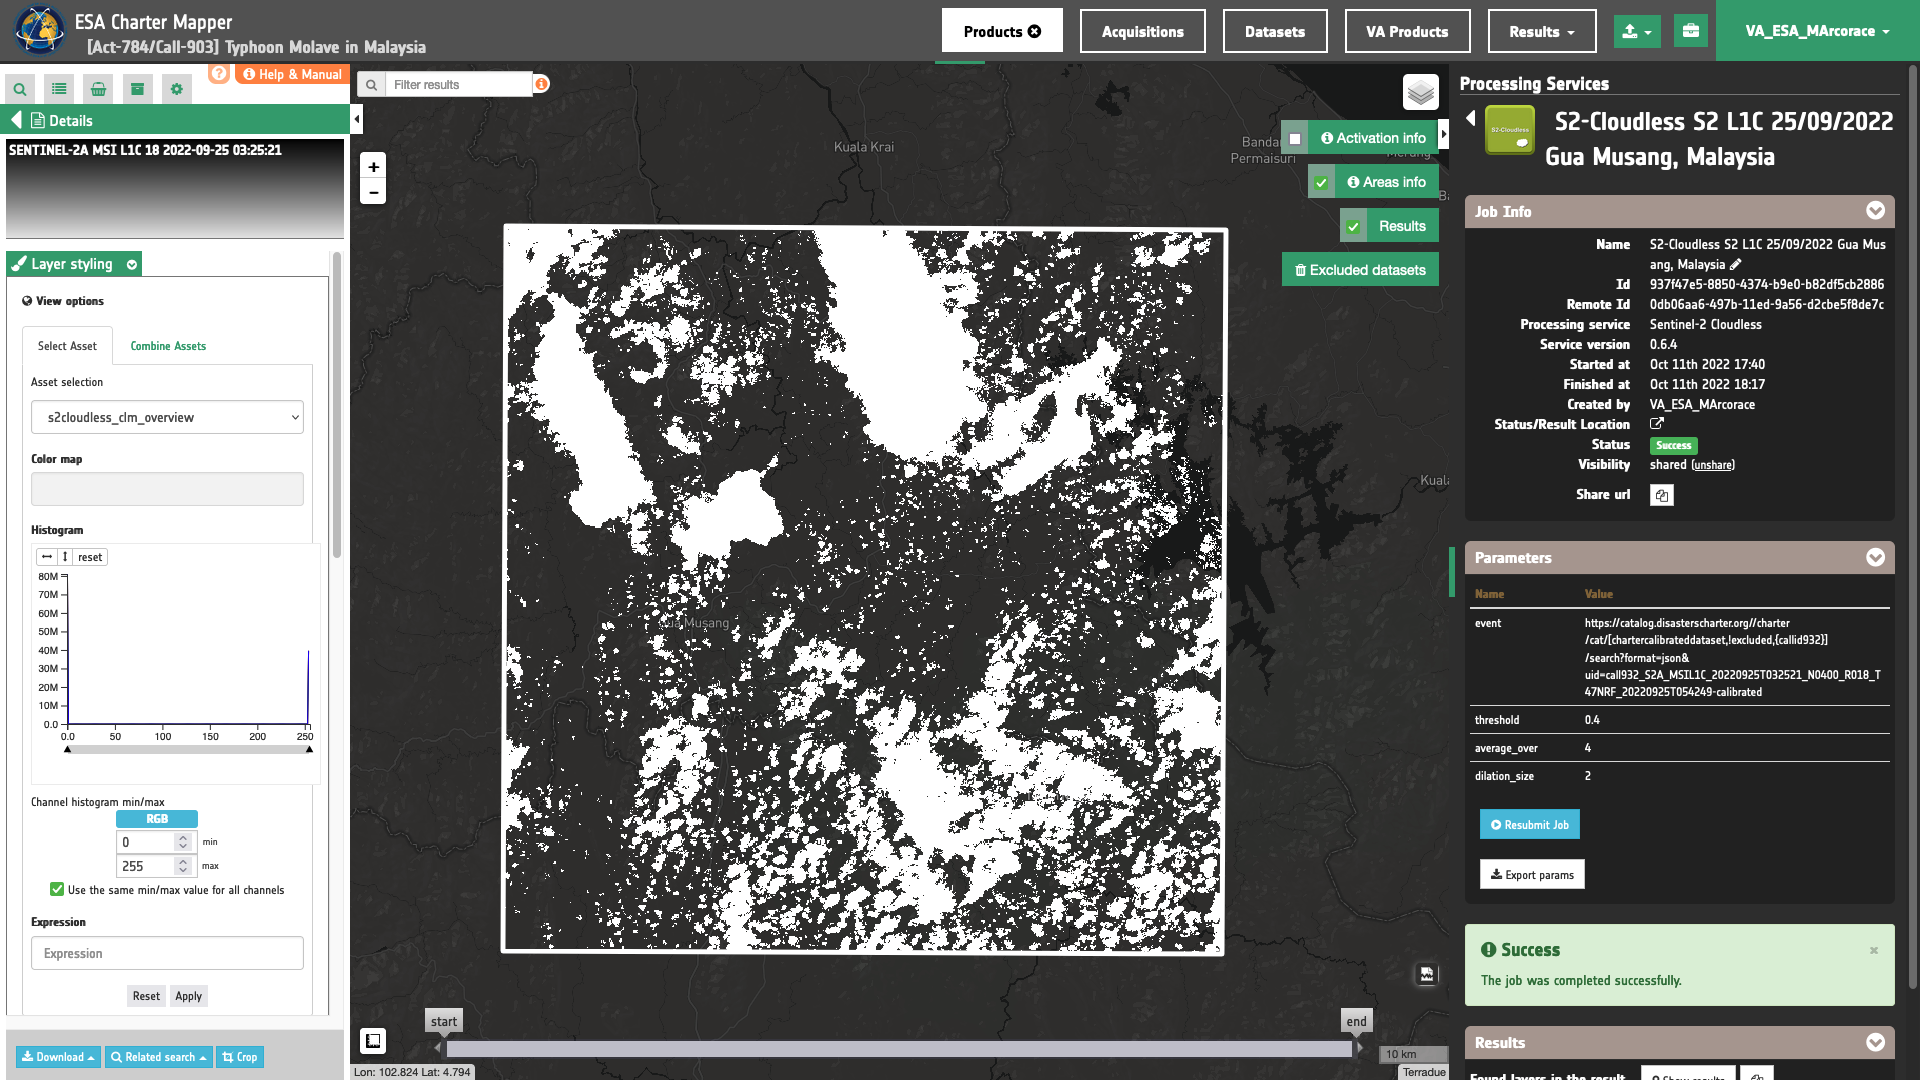
To get more information about the product just click on the preview in the map, a bubble showing the name of the layer SENTINEL-2A MSI L1C 18 2022-09-25 03:25:21 will appear and then click on the Show details button.
Tip
To quickly access Product Details double click on the layer from the Results list.
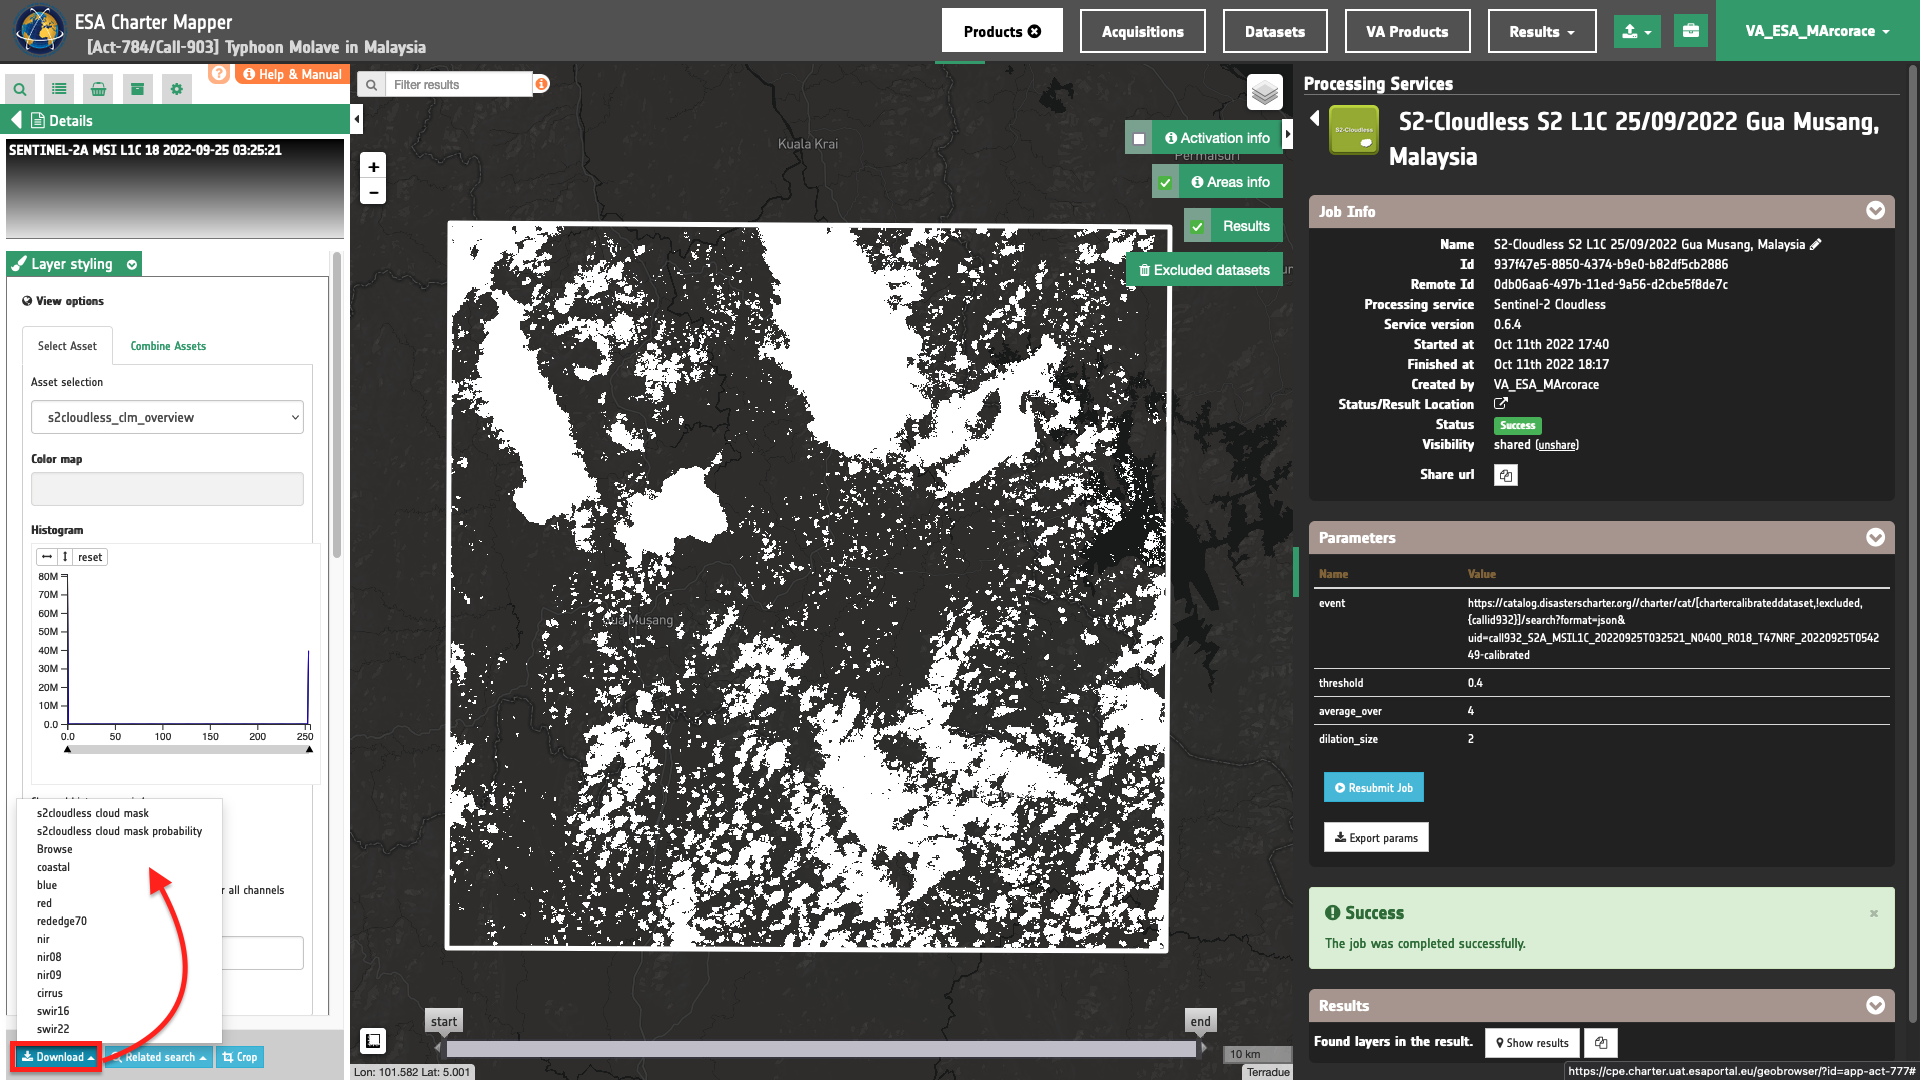
In the left panel of the interface, the details of Job Result will appear with Product metadata. Furthermore by clicking on Layer styling you can also access to the View options.
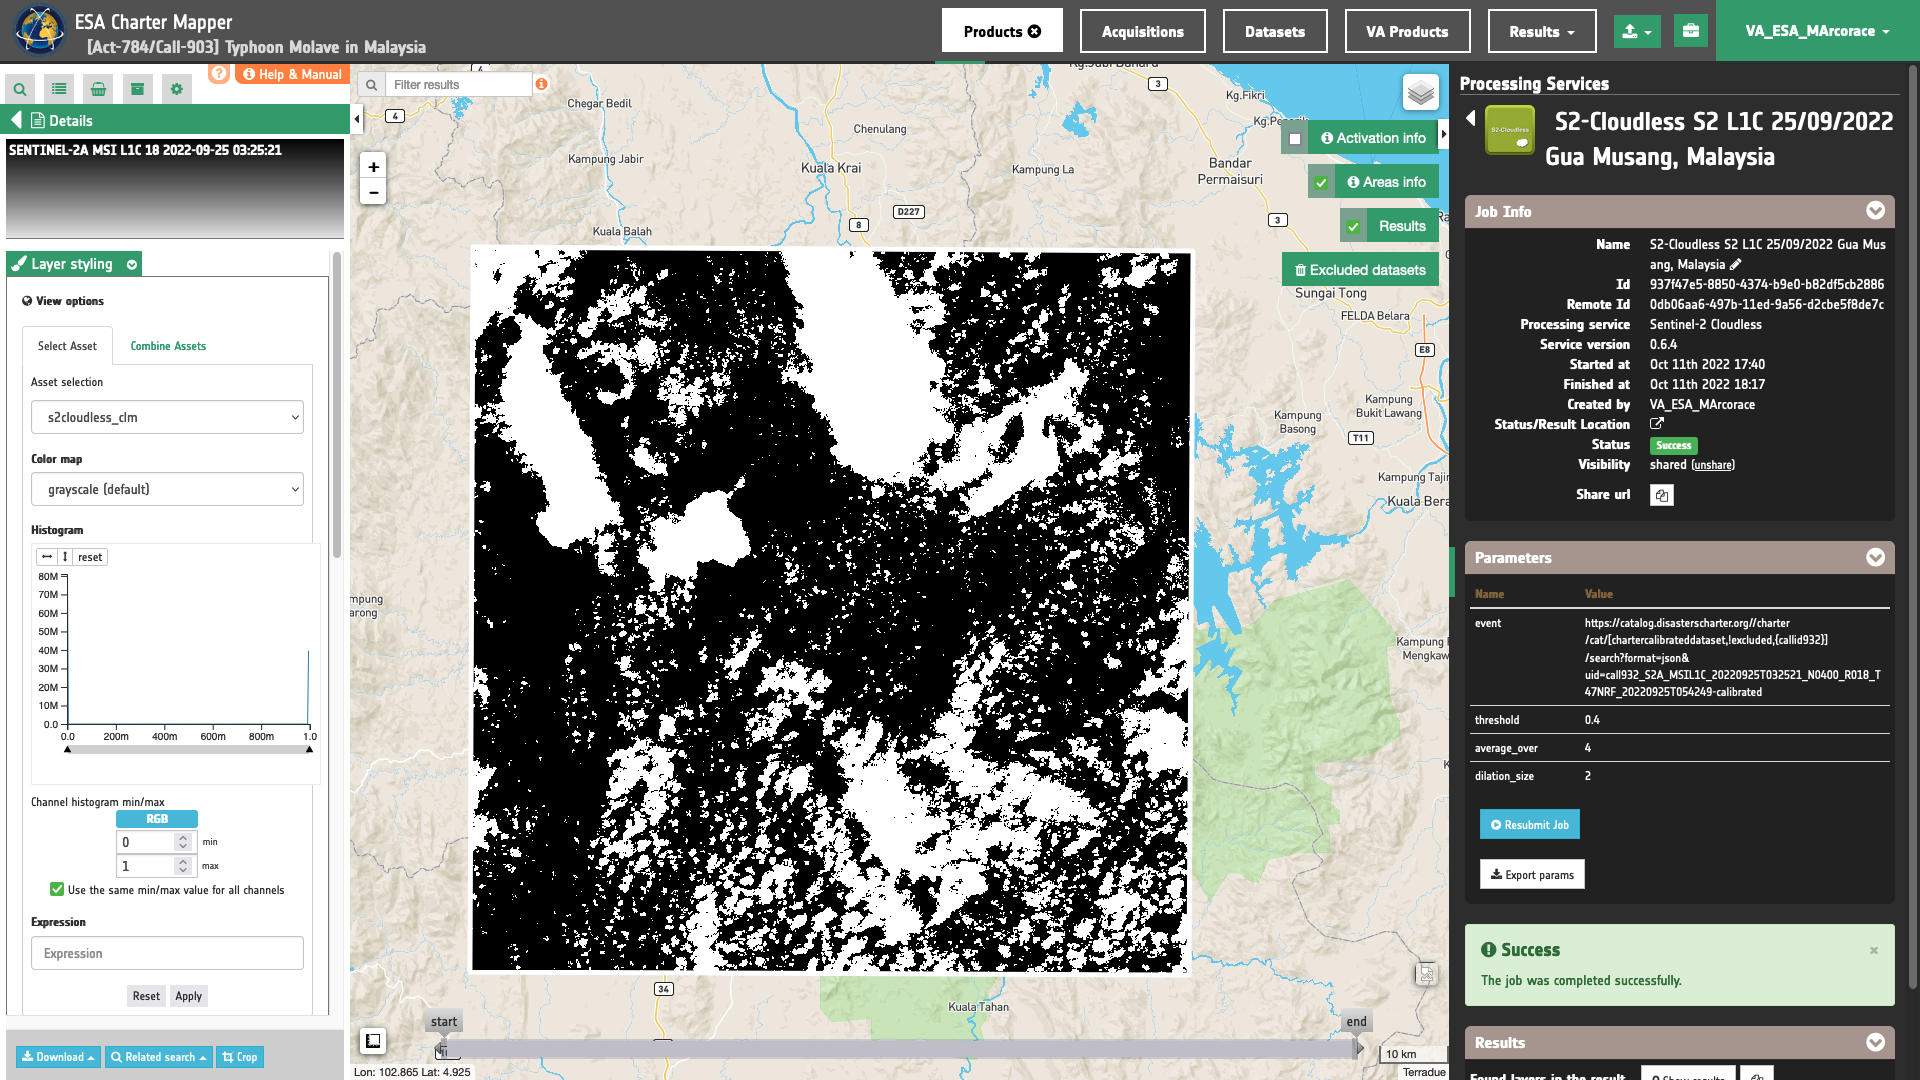
In here it is possible to see histogram/s of the Product which is visible in the map, set color formula, change Filters (e.g. Brightness, Opacity).
In the left panel under the result Details is possible to switch from the default asset to another one included into the S2-Cloudless results by clicking on Layer Styling and Select Assets. To visualize another asset on the map just select another asset:
s2cloudless_clm asset

s2cloudless_clp asset
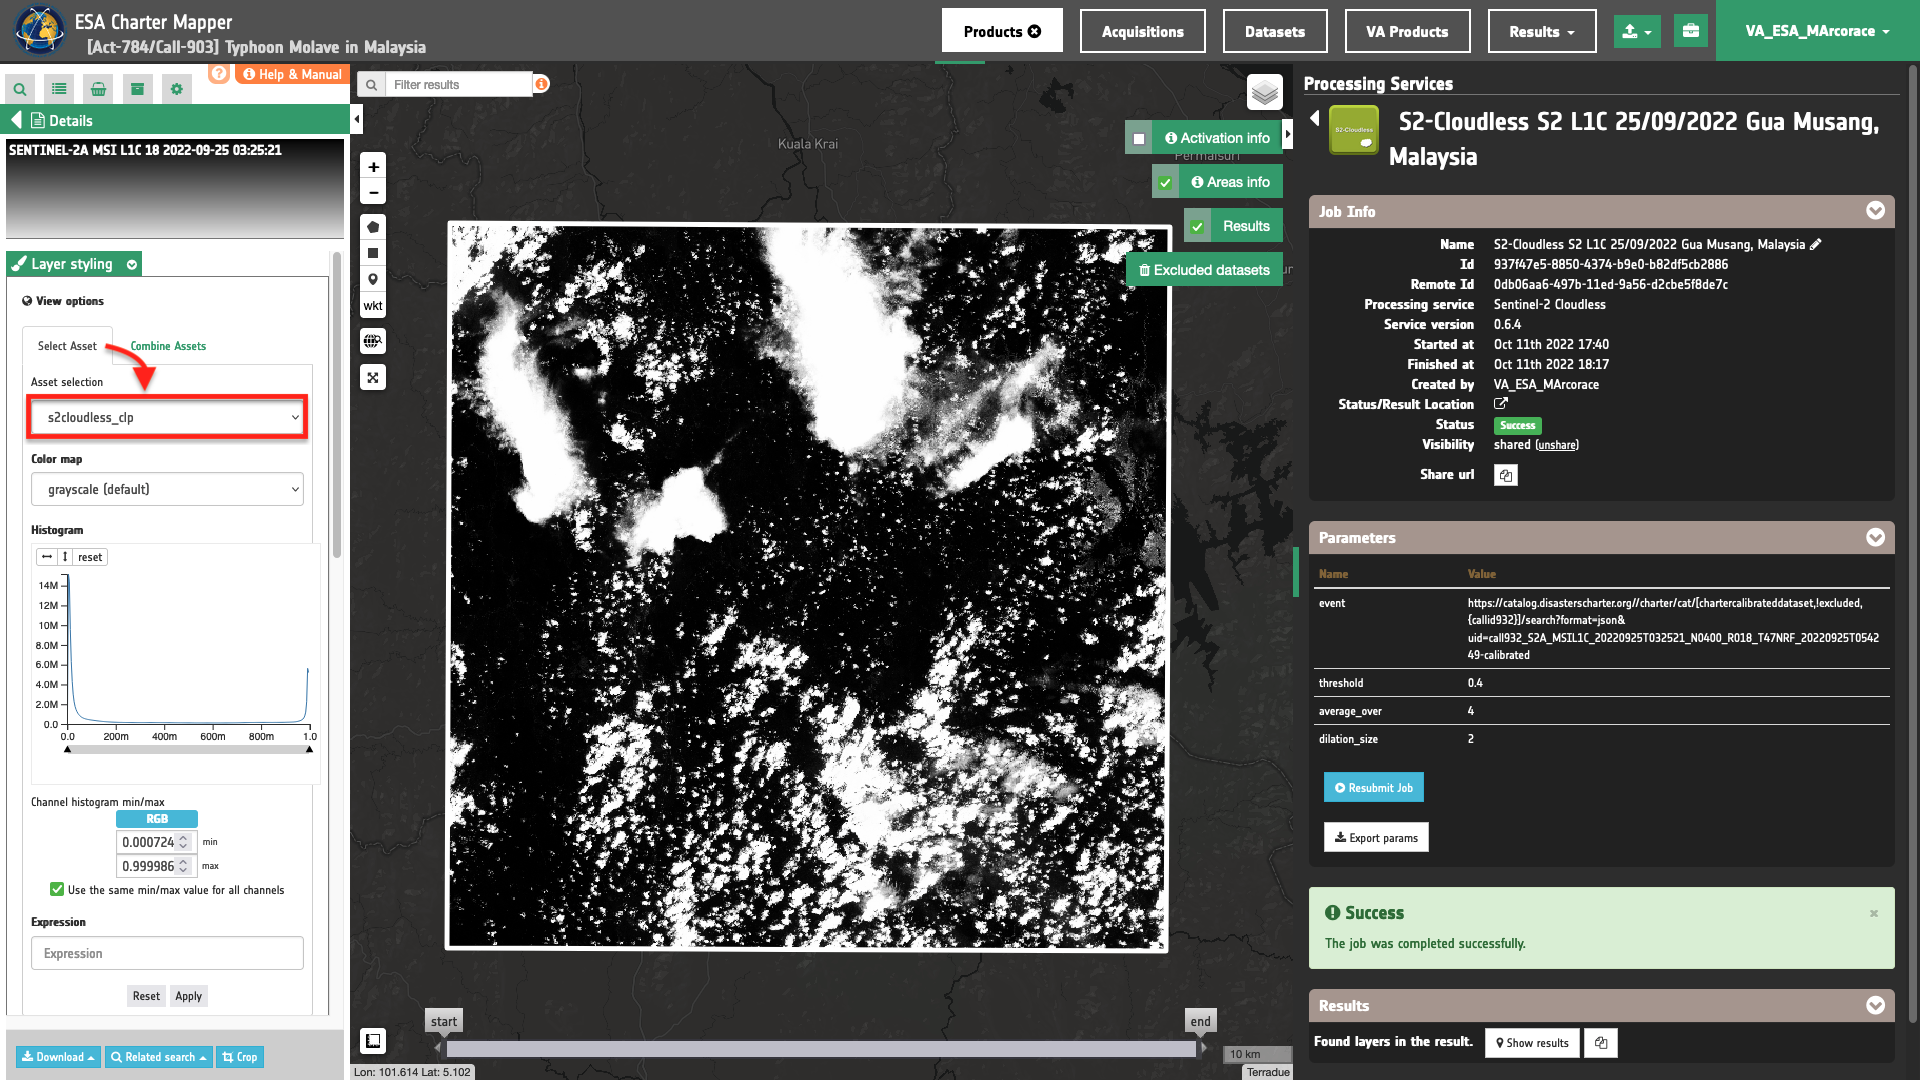
Under View options in the left panel it is also possible to insert an Expression to employ band arithmetic with assets and visualize changes on the fly in the map.
As an example it is possible to employ an Expression to make a binarization of the S2-Cloudless Cloud Probability asset by using a threshold chosen within the valid range [0,1] of the CLP asset. Thus, under the Details panel it is possible to make an on-the fly binarization of the CLP map by following the below step by step procedure.
-
Firstly, under Select Asset choose the
s2cloudless_clpsingle-band asset to be used for the binarization. -
Choose a Color map as the
grayscale (default)one. -
Being a binarization of an asset, set values
0and1for Min and Max respectively. -
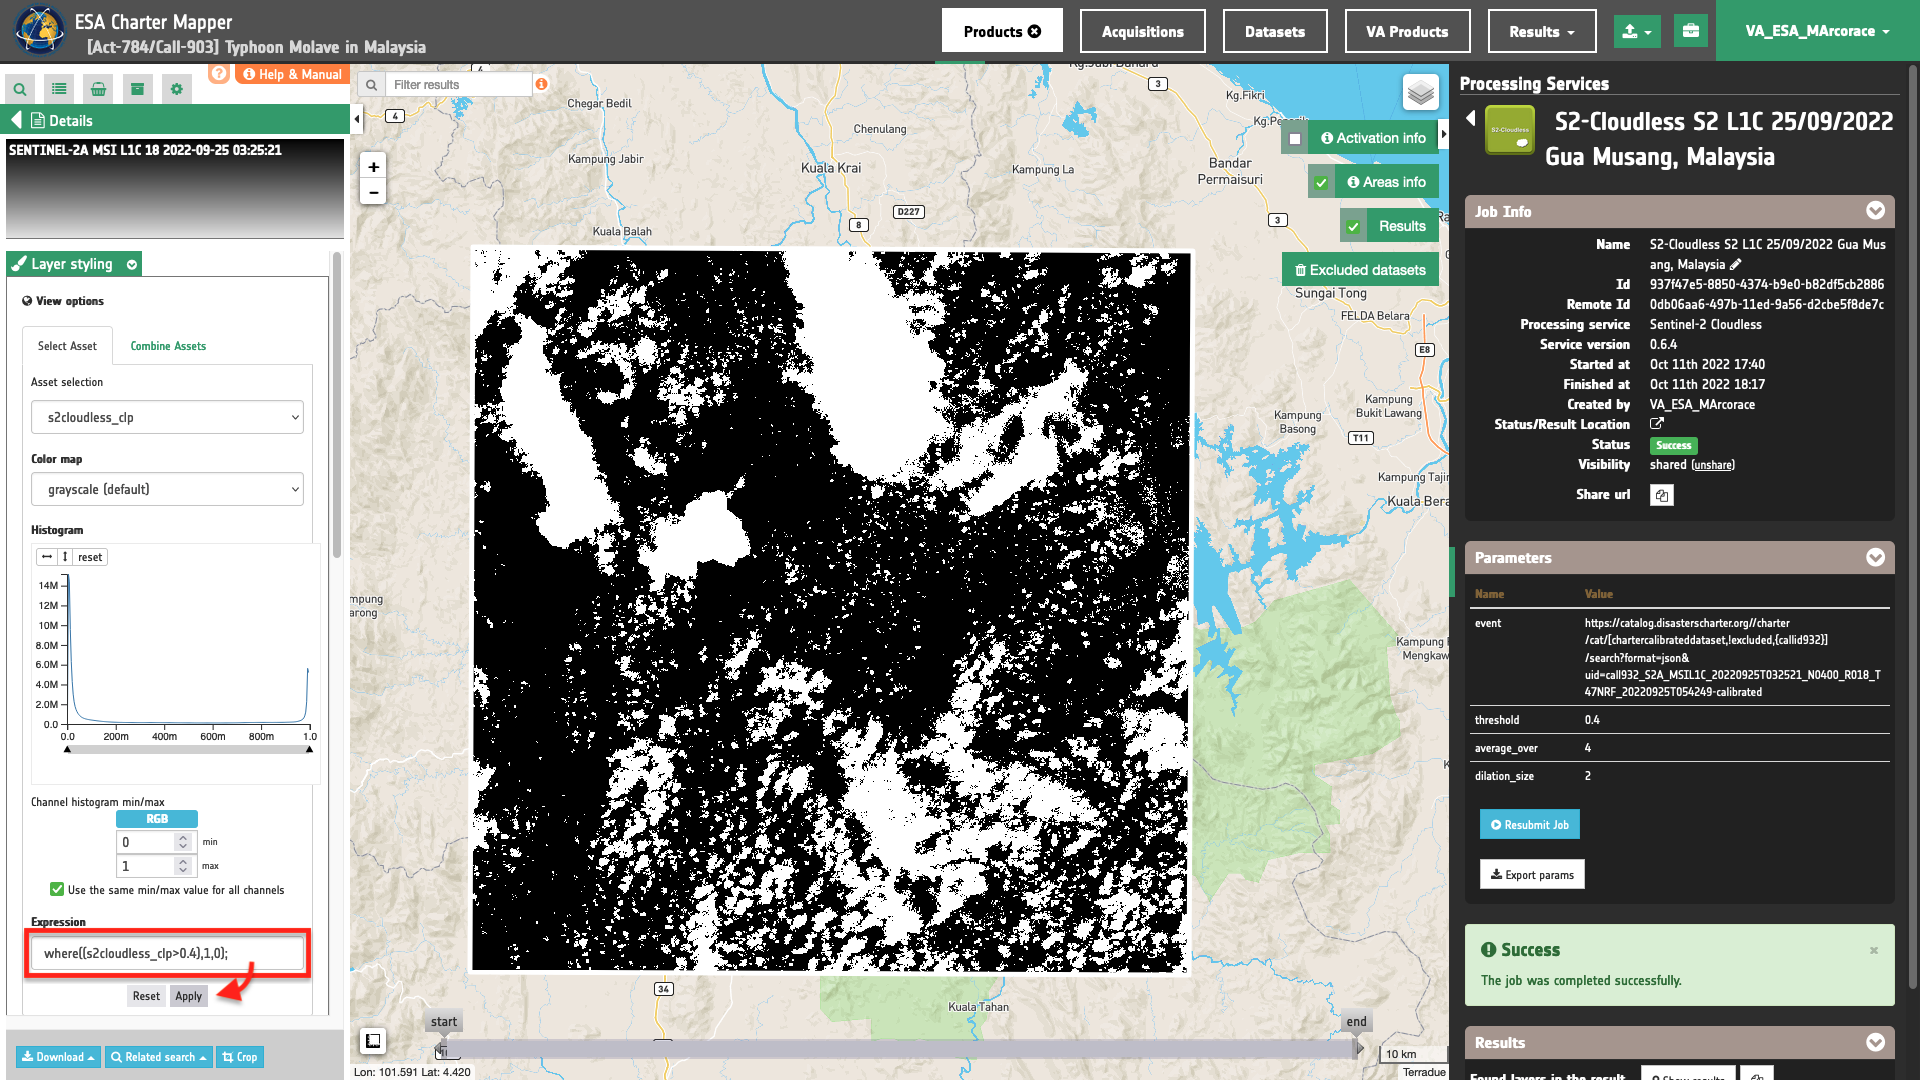
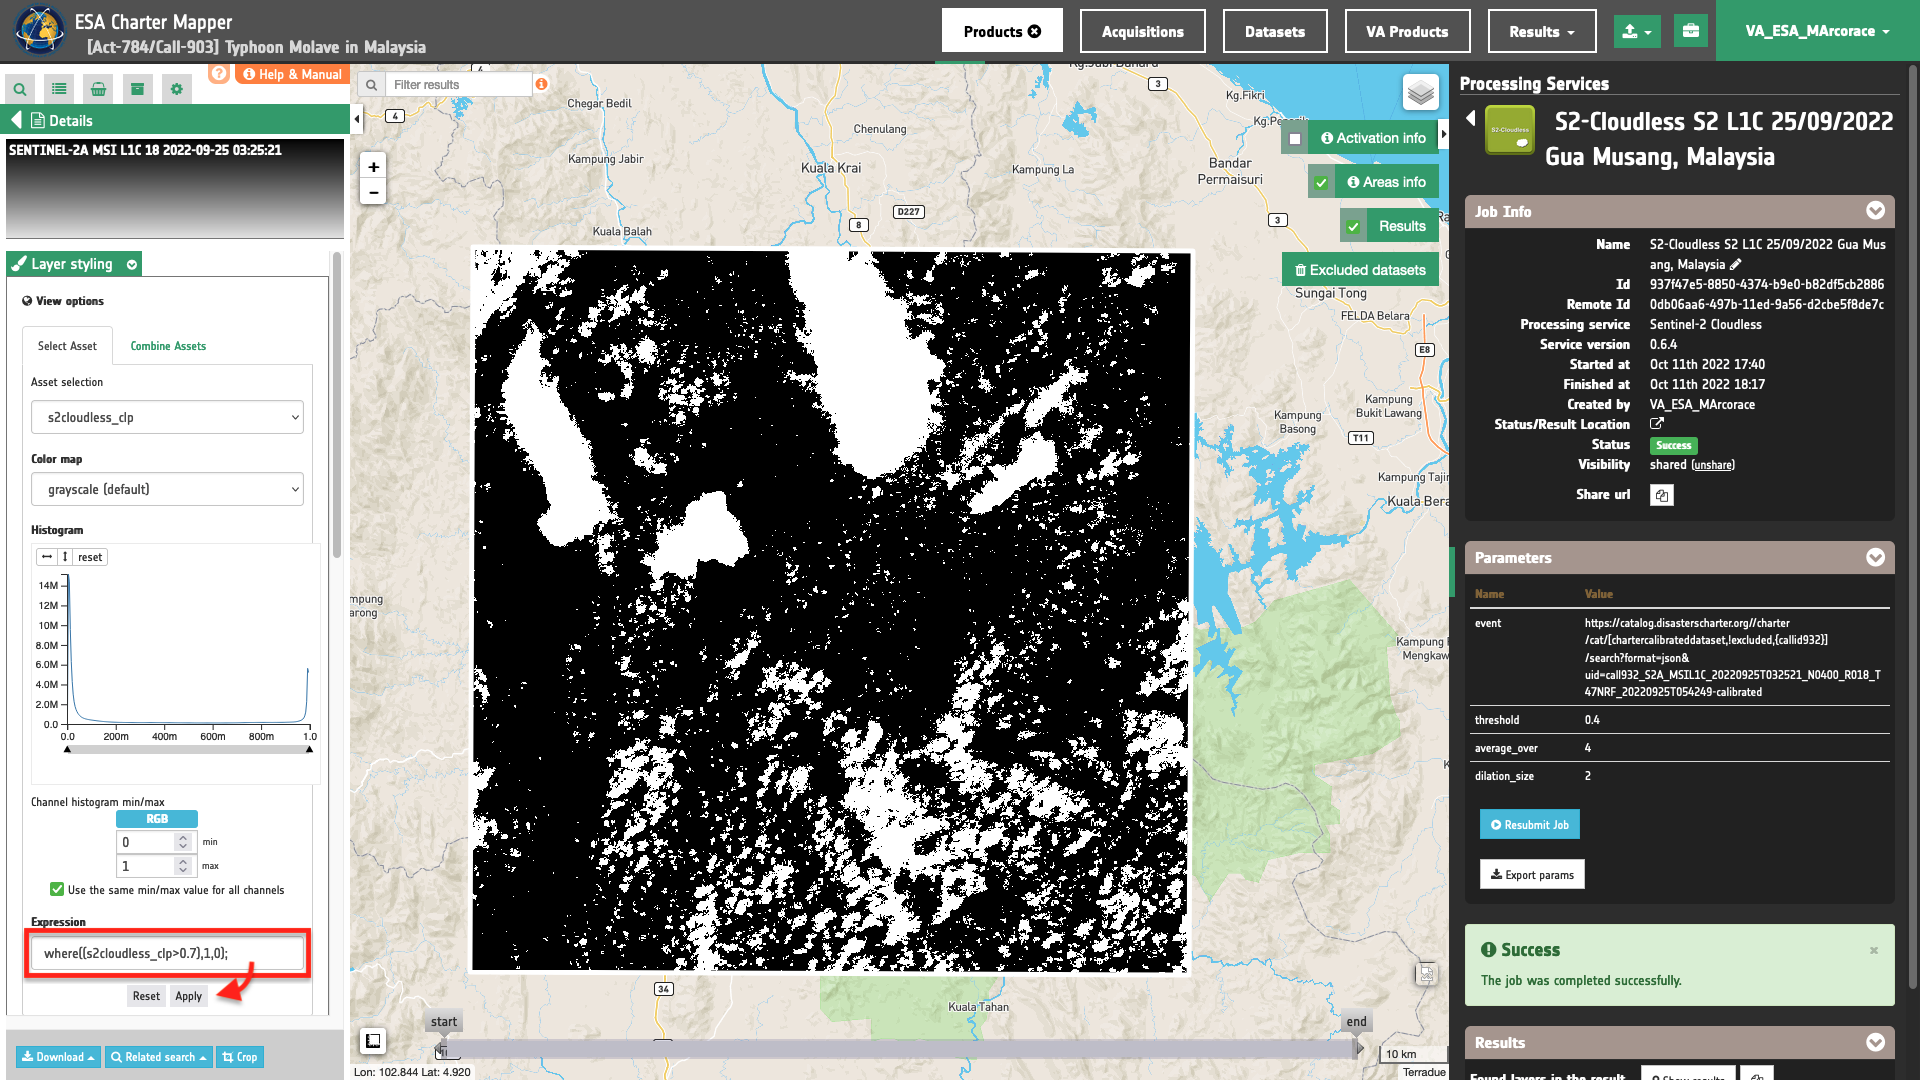
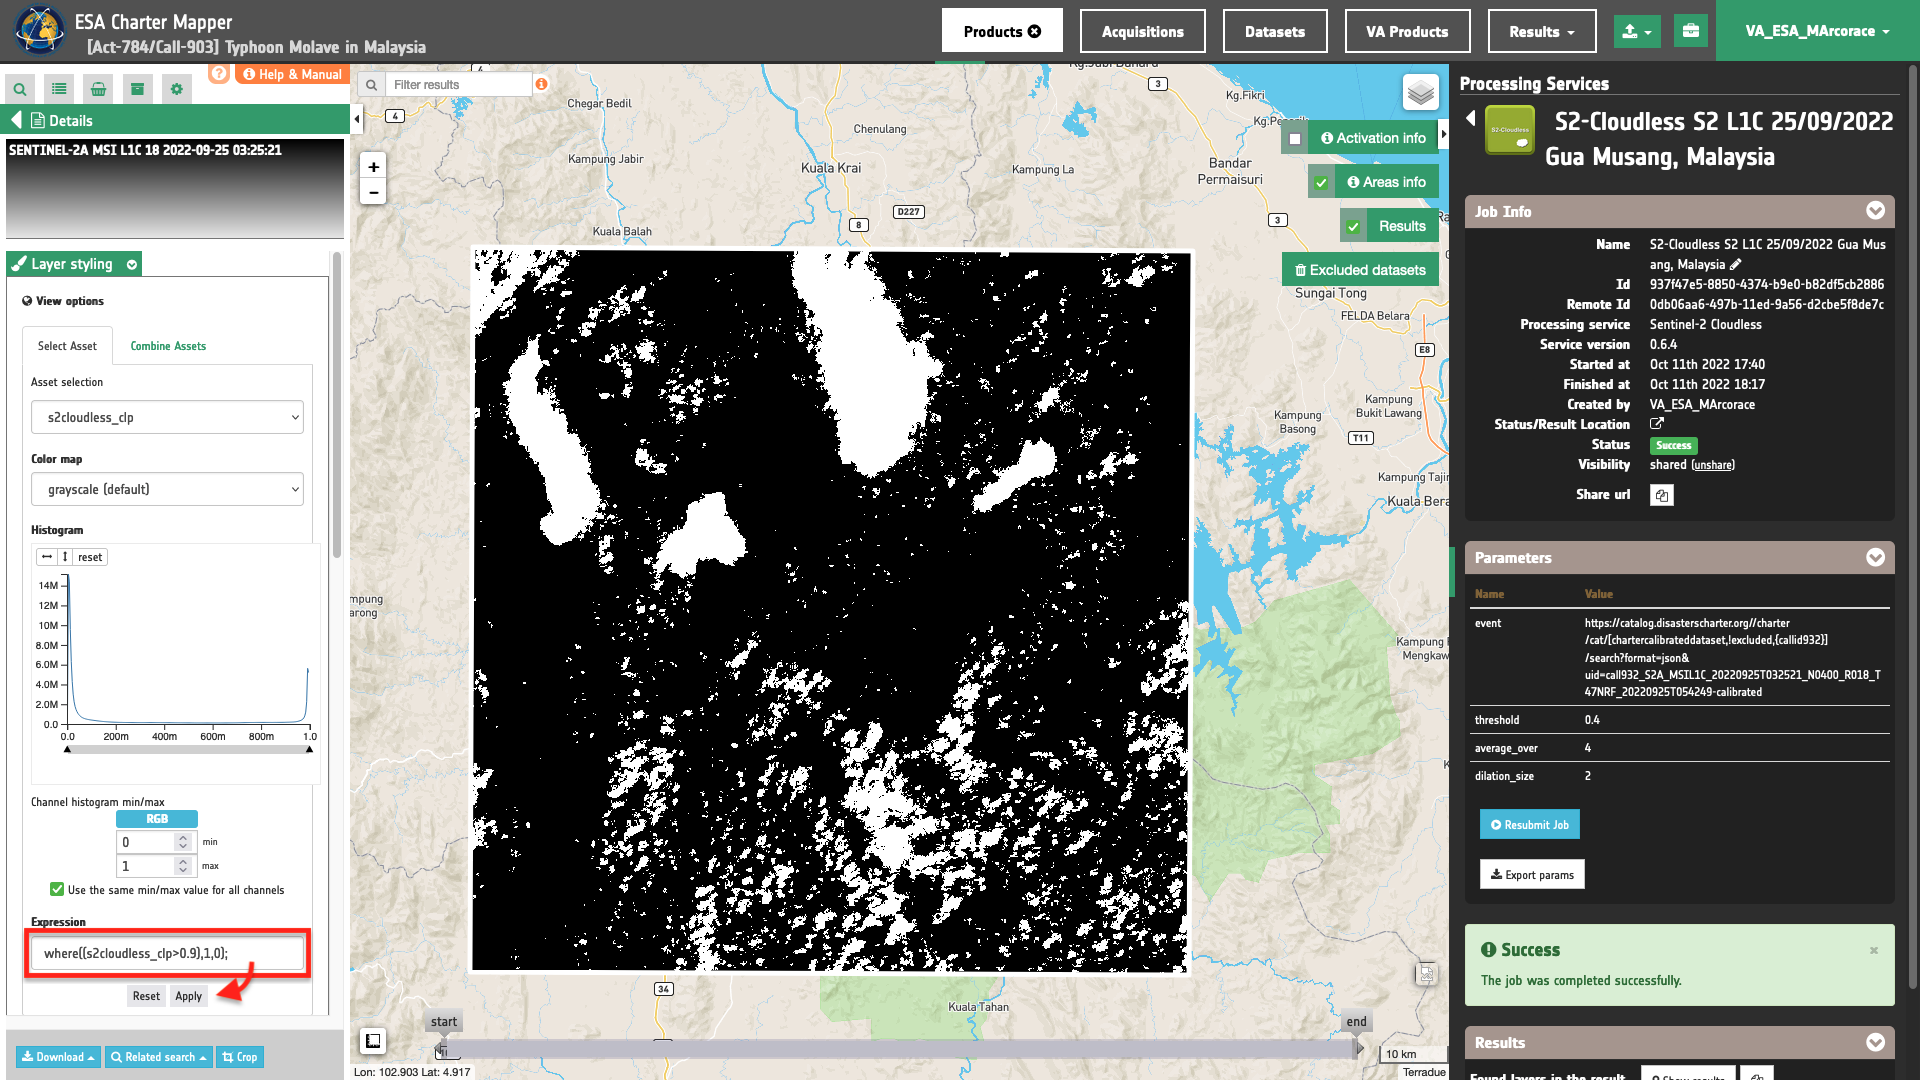
To derive a binary mask from source asset insert under Expression the following:
where((s2cloudless_clp>0.2),1,0);which transforms the CLP asset to a binary array with
truepixels for values of thes2cloudless_clpgreater than to0.2.To visualize the change of the asset on the fly just click on the Apply button underneath.

Tip
If not satysfied with this first binarization result you can create another on-the fly binary of CLP by simply changing the threshold in the Expression and clicking again to the Apply button underneath to refresh the image in the map.
Below examples of CLP binarization with 0.4, 0.7 and 0.9 thresholds.
Tip
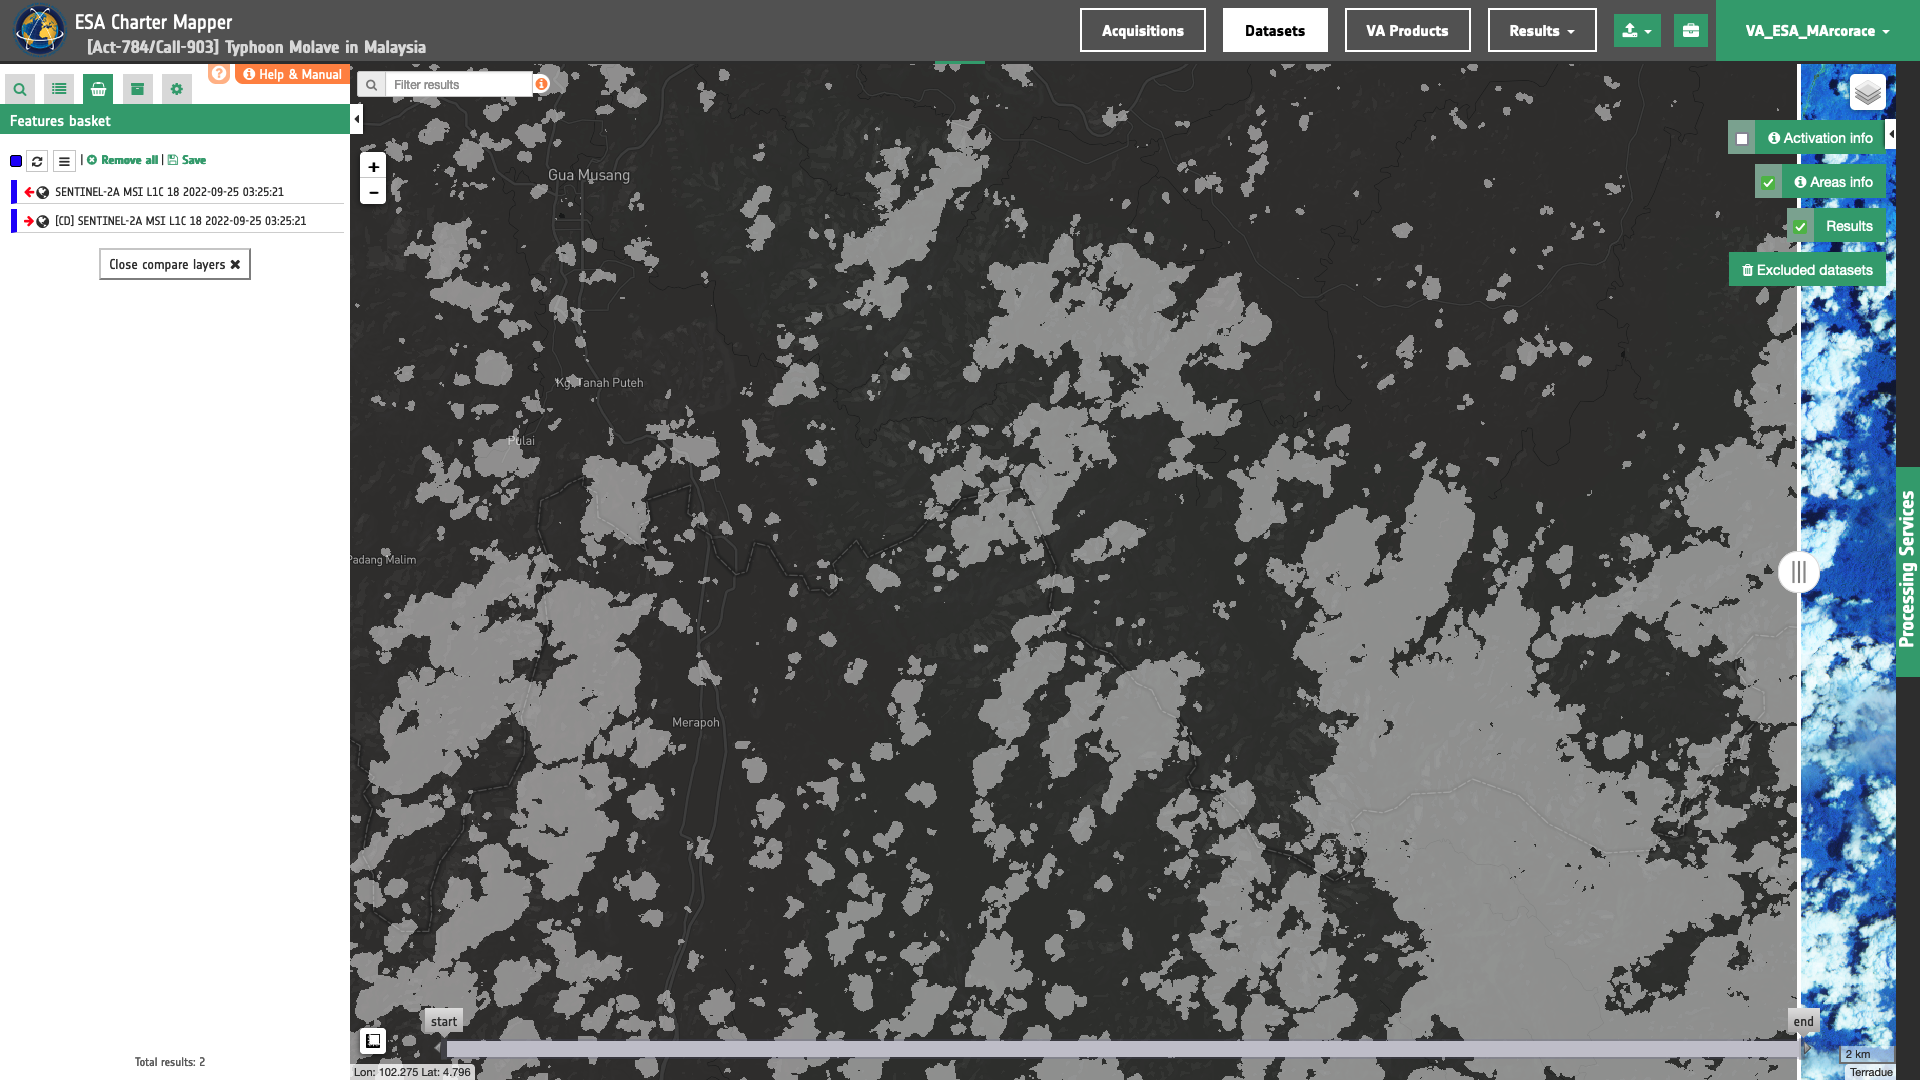
To visually compare the CLP product with the input Calibrated Dataset you can drop both the Result and the Calibrated Dataset in the feature basket, select both the assets and click on Compare Layers.
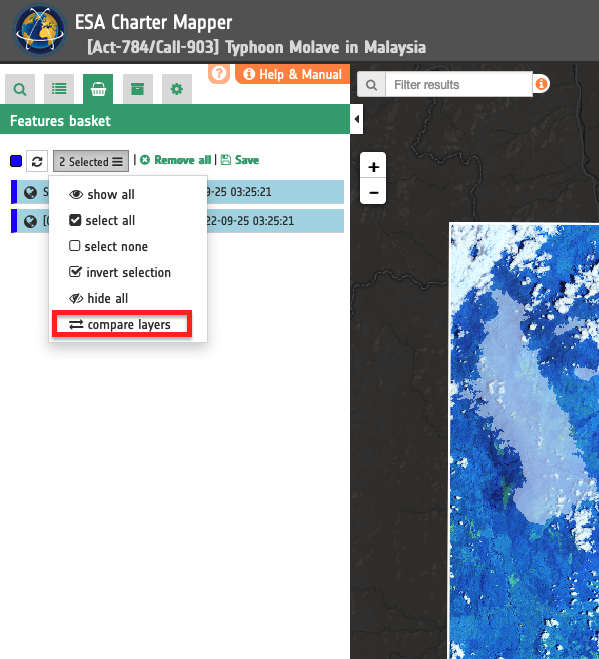
As an example you can compare the s2cloudless_clm asset of the S2-Cloudless result with the overview-atp one from the source Sentinel-2 L1C Calibrated Dataset.
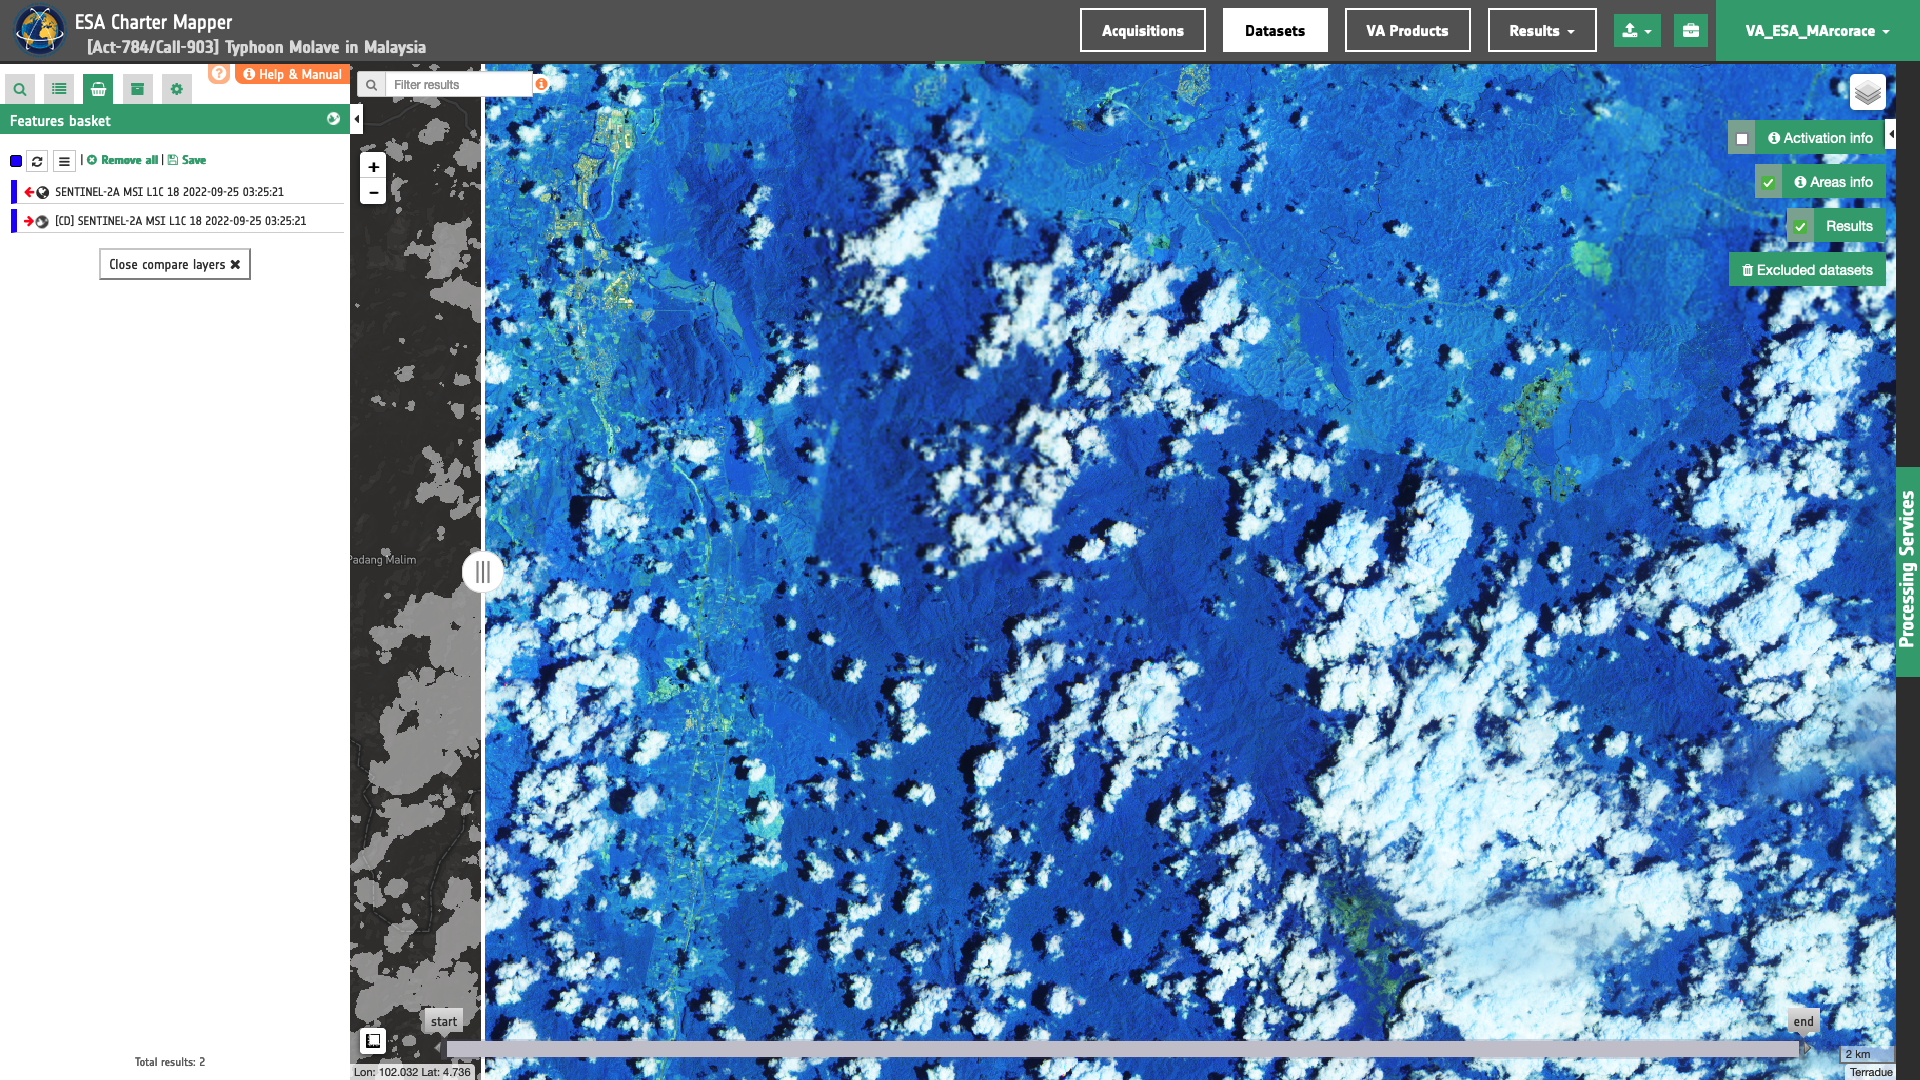
Move the vertical slider to visually compare the cloud mask layer with the Sentinel-2 L1C Atmospheric Penetration false color composite.
Download
In this use case the Sentinel-2 Cloudless (S2-Cloudless) service offers the following products:
- coastal: single-band TOA/BOA reflectance asset
coastalproduct Calibrated Dataset as single band GeoTIFF in COG format, - blue: single-band TOA/BOA reflectance asset
blueproduct Calibrated Dataset as single band GeoTIFF in COG format, - green: single-band TOA/BOA reflectance asset
greenproduct Calibrated Dataset as single band GeoTIFF in COG format, - red: single-band TOA/BOA reflectance asset
redproduct Calibrated Dataset as single band GeoTIFF in COG format, - rededge70: single-band TOA/BOA reflectance asset
rededge70product Calibrated Dataset as single band GeoTIFF in COG format, - rededge74: single-band TOA/BOA reflectance asset
rededge70product Calibrated Dataset as single band GeoTIFF in COG format, - rededge78: single-band TOA/BOA reflectance asset
rededge70product Calibrated Dataset as single band GeoTIFF in COG format, - nir: single-band TOA/BOA reflectance asset
nirproduct Calibrated Dataset as single band GeoTIFF in COG format, - nir08: single-band TOA/BOA reflectance asset
nir08product Calibrated Dataset as single band GeoTIFF in COG format, - nir09: single-band TOA/BOA reflectance asset
nir09product Calibrated Dataset as single band GeoTIFF in COG format, - swir16: single-band TOA/BOA reflectance asset
swir16product Calibrated Dataset as single band GeoTIFF in COG format, - swir22: single-band TOA/BOA reflectance asset
swir22product Calibrated Dataset as single band GeoTIFF in COG format, - cirrus: single-band TOA/BOA reflectance asset
cirrusproduct Calibrated Dataset as single band GeoTIFF in COG format, - s2cloudless_clm: single-band binary mask asset for
CLMas single band GeoTIFF in COG format, - s2cloudless_clp: single-band asset for
CLPas single band GeoTIFF in COG format, - s2cloudless_clm_overview: multi-band visual asset derived from the
CLMasset given as RGBA given as 4-band GeoTIFF in COG format, - s2cloudless_clp_overview: multi-band visual asset derived from the
CLPasset given as RGBA given as 4-band GeoTIFF in COG format.
These products can be downloaded by clicking on the Download button located at the bottom of the Product Details tab in the left panel.